Authentication
The Illumio PCE supports either SAML SSO or LDAP as an external authentication method. Both SAML SSO and LDAP cannot be used simultaneously. When LDAP is turned on, the use of SAML SSO, if already configured, is disabled. Similarly, enabling SAML SSO after LDAP is enabled will disable LDAP authentication.
SAML SSO Authentication
When you use a third-party SAML-based Identity source (IdP) to manage user authentication in your organization, you can configure that IdP to work with the PCE. By configuring a single sign-on (SSO) IdP in the PCE, you can validate usernames and passwords against your own user management system, rather than having to create additional user passwords managed by Illumio Segmentation for Data Centers. It currently supports the following SAML-based IdPs:
Azure AD
Microsoft Active Directory Federation Services (AD FS)
Okta
OneLogin
Ping Identity
Note
You can use other SAML-based IdPs; however, configuring those IdPs is your responsibility as an Illumio customer.
Before configuring SSO in the PCE, you must configure SSO on your chosen IdP and obtain the required SSO information. After obtaining the IdP SSO information, log in to the PCE web console and complete the configuration.
PCE Information Needed to Configure SSO
Before you configure SSO in the PCE, obtain the following information from your IdP:
x.509 certificate
Remote Login URL
Logout Landing URL
The PCE supports the following optional attributes in the SAML response from the IdP:
User.FirstName - First Name
User.LastName - Last Name
User.MemberOf - Member of
Details
The user's email address is the primary attribute used by the PCE to identify users uniquely.
Important
The client browser must have access to both the PCE and the IdP service. The Illumio PCE uses HTTP-redirect binding to transmit SAML messages.
To obtain the SSO information from the PCE:
From the PCE web console menu, choose Access Management > Authentication.
Locate the SAML configuration panel on the Authentication Settings screen and click Configure.
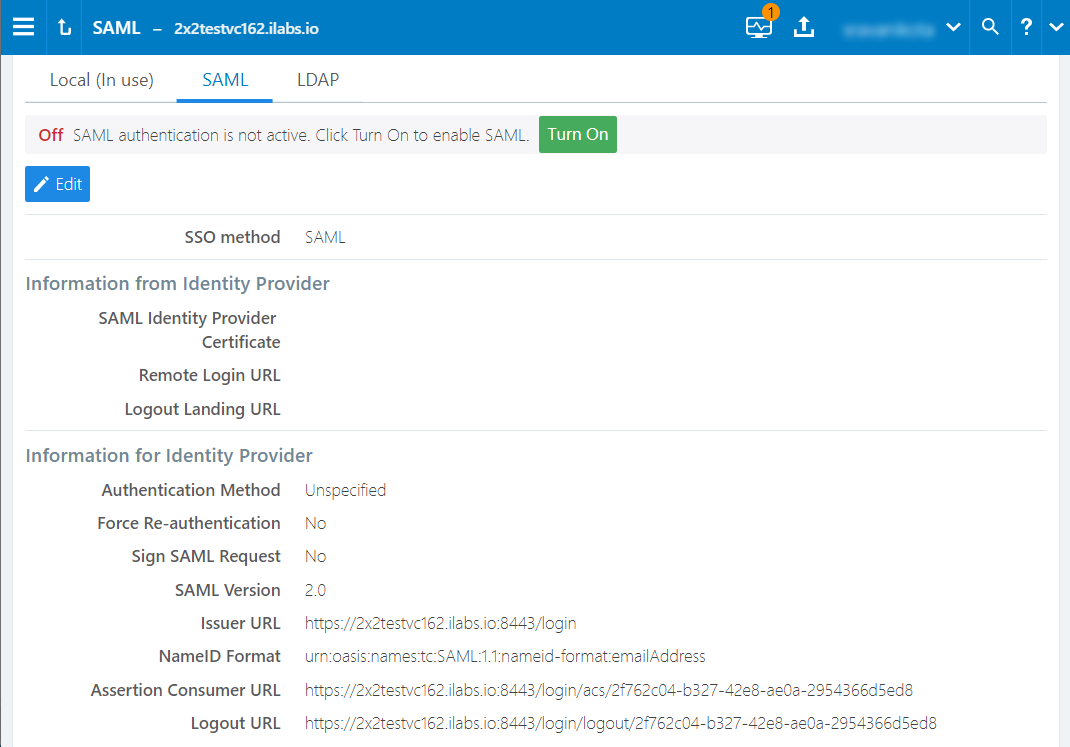
Use the displayed information (as shown in the example below) while configuring your specific IdP.

Note
Even though the SAML NameID format specifies an email address, the PCE can support any unique identifier, such as userPrincipalName (UPN), common name (CN), or samAccountName, as long as the IdP is configured to map to the corresponding unique user identifier.
Signing for SAML Requests
There are four new APIs you can use to sign SAML requests:
GET /authentication_settings/saml_configsGET /authentication_settings/saml_configs/:uuidPUT /authentication_settings/saml_configs/:uuidPOST /authentication_settings/saml_configs/:uuid/pce_signing_cert
These APIs are covered in detail in REST API Developer Guide.
Signing of SAML requests is, however, disabled by default.
To enable SAML request signing:
Using the Web Console, go to Access Management > Authentication.
In the Authentication Setting screen, select Configure button for SAML.
In the SAML screen, click Turn On.

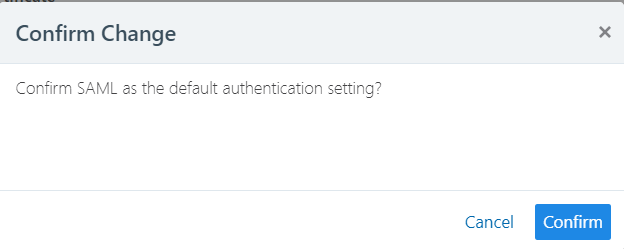
In the pop-up screen, click Confirm.

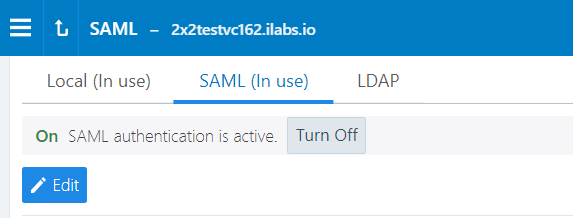
The updated SAML screen shows that SAML authentication is active.

If necessary, you can disable it at any time.
Once configured using these steps, the lifetime of the SAML certificate is ten years.