Configure the Illumio PCE on Illumio Cloud
If you are using Illumio Cloud, perform the configuration steps in Configure the On-Premises PCE .
You need the following two components so that your PCE data can be relayed to the Illumio App for Splunk:
An Amazon S3 bucket, which permits reliably storing events from Illumio Cloud.
The Splunk Add-On for AWS, which permits reading events from an Amazon S3 bucket.
Illumio PCE on Cloud logs all traffic flows, including allowed traffic, blocked traffic, potentially blocked traffic, and auditable events to your Amazon S3 bucket. You may choose to disable specific types of events in Illumio Cloud by filing a support ticket. The Splunk Add-on for AWS reads the data from Amazon S3, enriches the data with the source type, and enables data to be processed by TA-Illumio. You then can see the data in Illumio App for Splunk.
Starting with the Illumio App for Splunk 2.3.0, the consumption of data from S3 is more robust than in earlier versions.
Configure the Amazon S3 Bucket
To implement the Illumio App for Splunk with your Illumio PCE in the Cloud, you must provide an AWS S3 bucket. You can create and configure an using an Illumio-provided CloudFormation template, which is available here: Flow Logs for Illumio Secure Cloud PCE and within this guide: Using the AWS CloudFormation Template .
The CloudFormation template contains the Illumio AWS account ID. "Externalid" is an extra password to ensure that root access to the Illumio production account is not enough to access your S3 bucket, to prevent a poorly functioning third-party service. For more information, see How to Use External ID When Granting Access to Your AWS Resources on the Amazon Blog.
When you contact Illumio, provide the following information:
The AWS S3 bucket name that you have chosen.
Your AWS account ID. This is available under My Account or https://console.aws.amazon.com/billing/home?#/account in the AWS console.
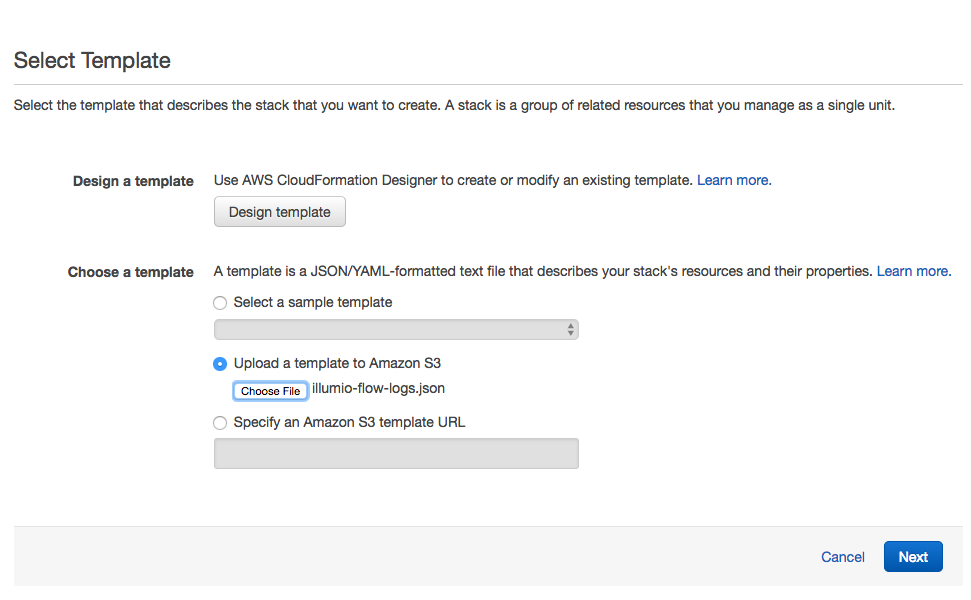
Load the template into CloudFormation as follows:
Select a template.
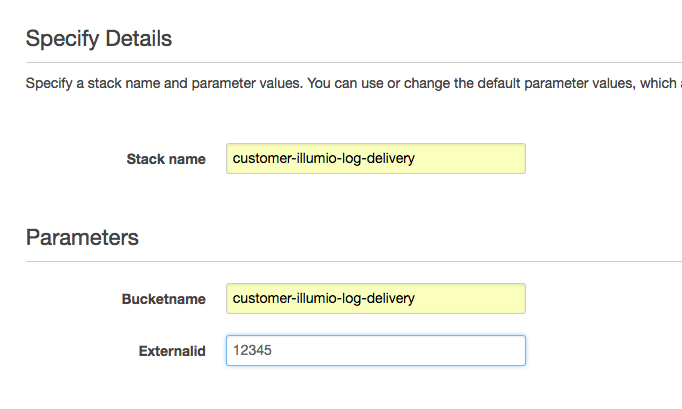
Specify the details. You can use whatever label you want for Stack name, because the name is for convenience only.
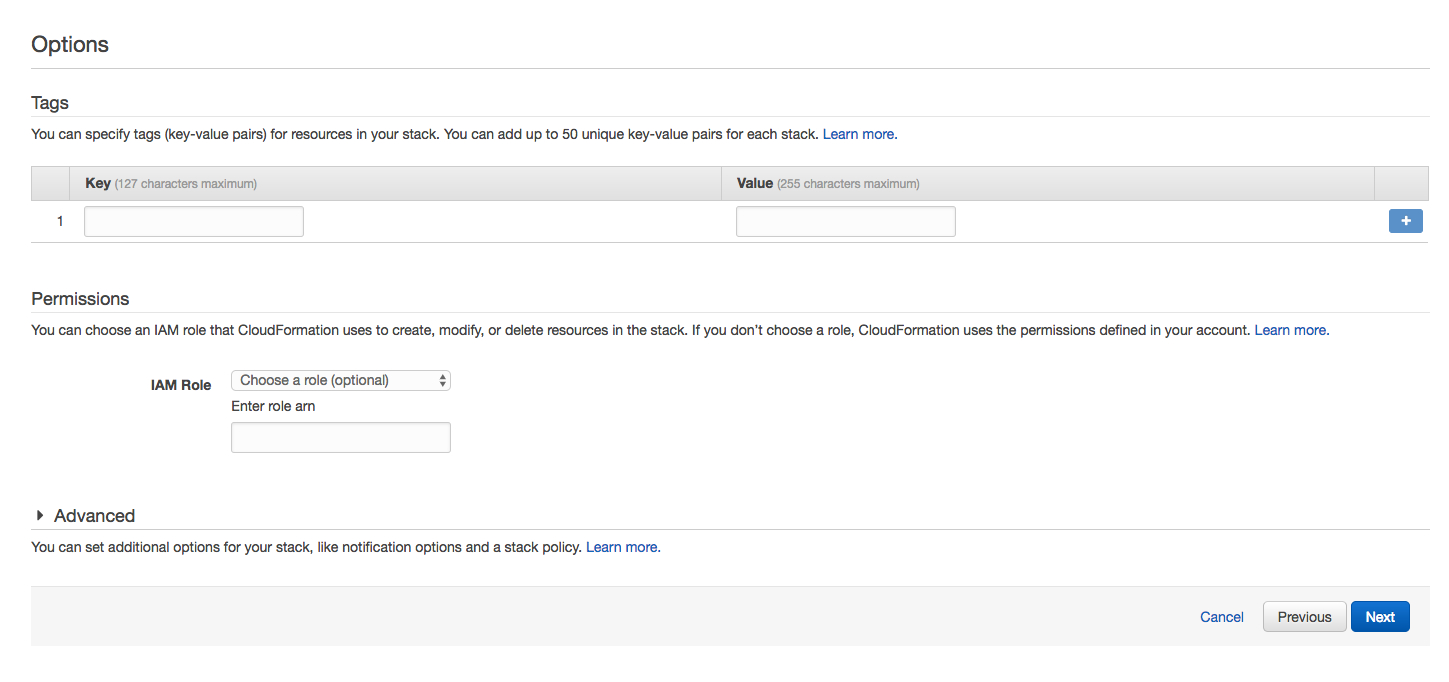
Specify the options.
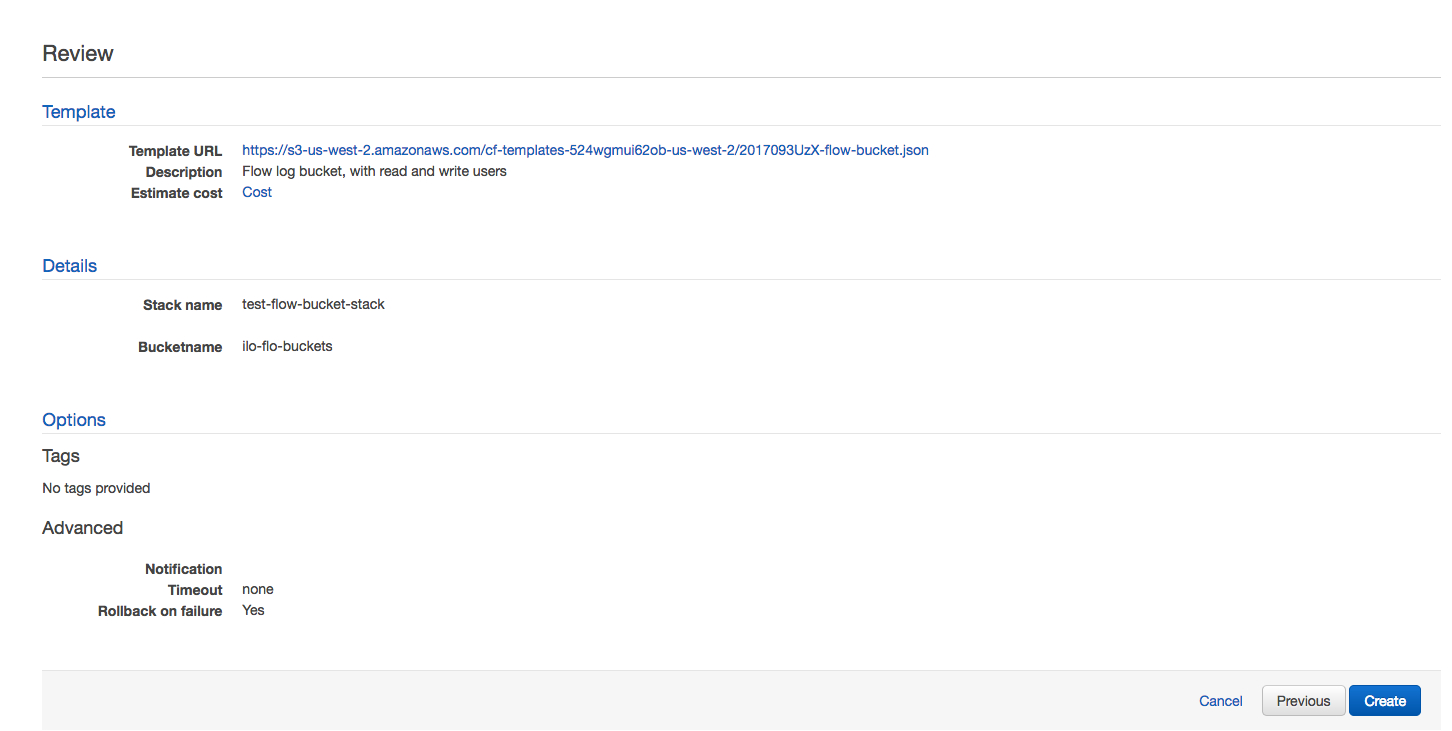
Review the configuration and click Create.
After you have configured the Amazon S3 bucket, you need to perform the following steps so that all of the inputs will display on the dashboards.
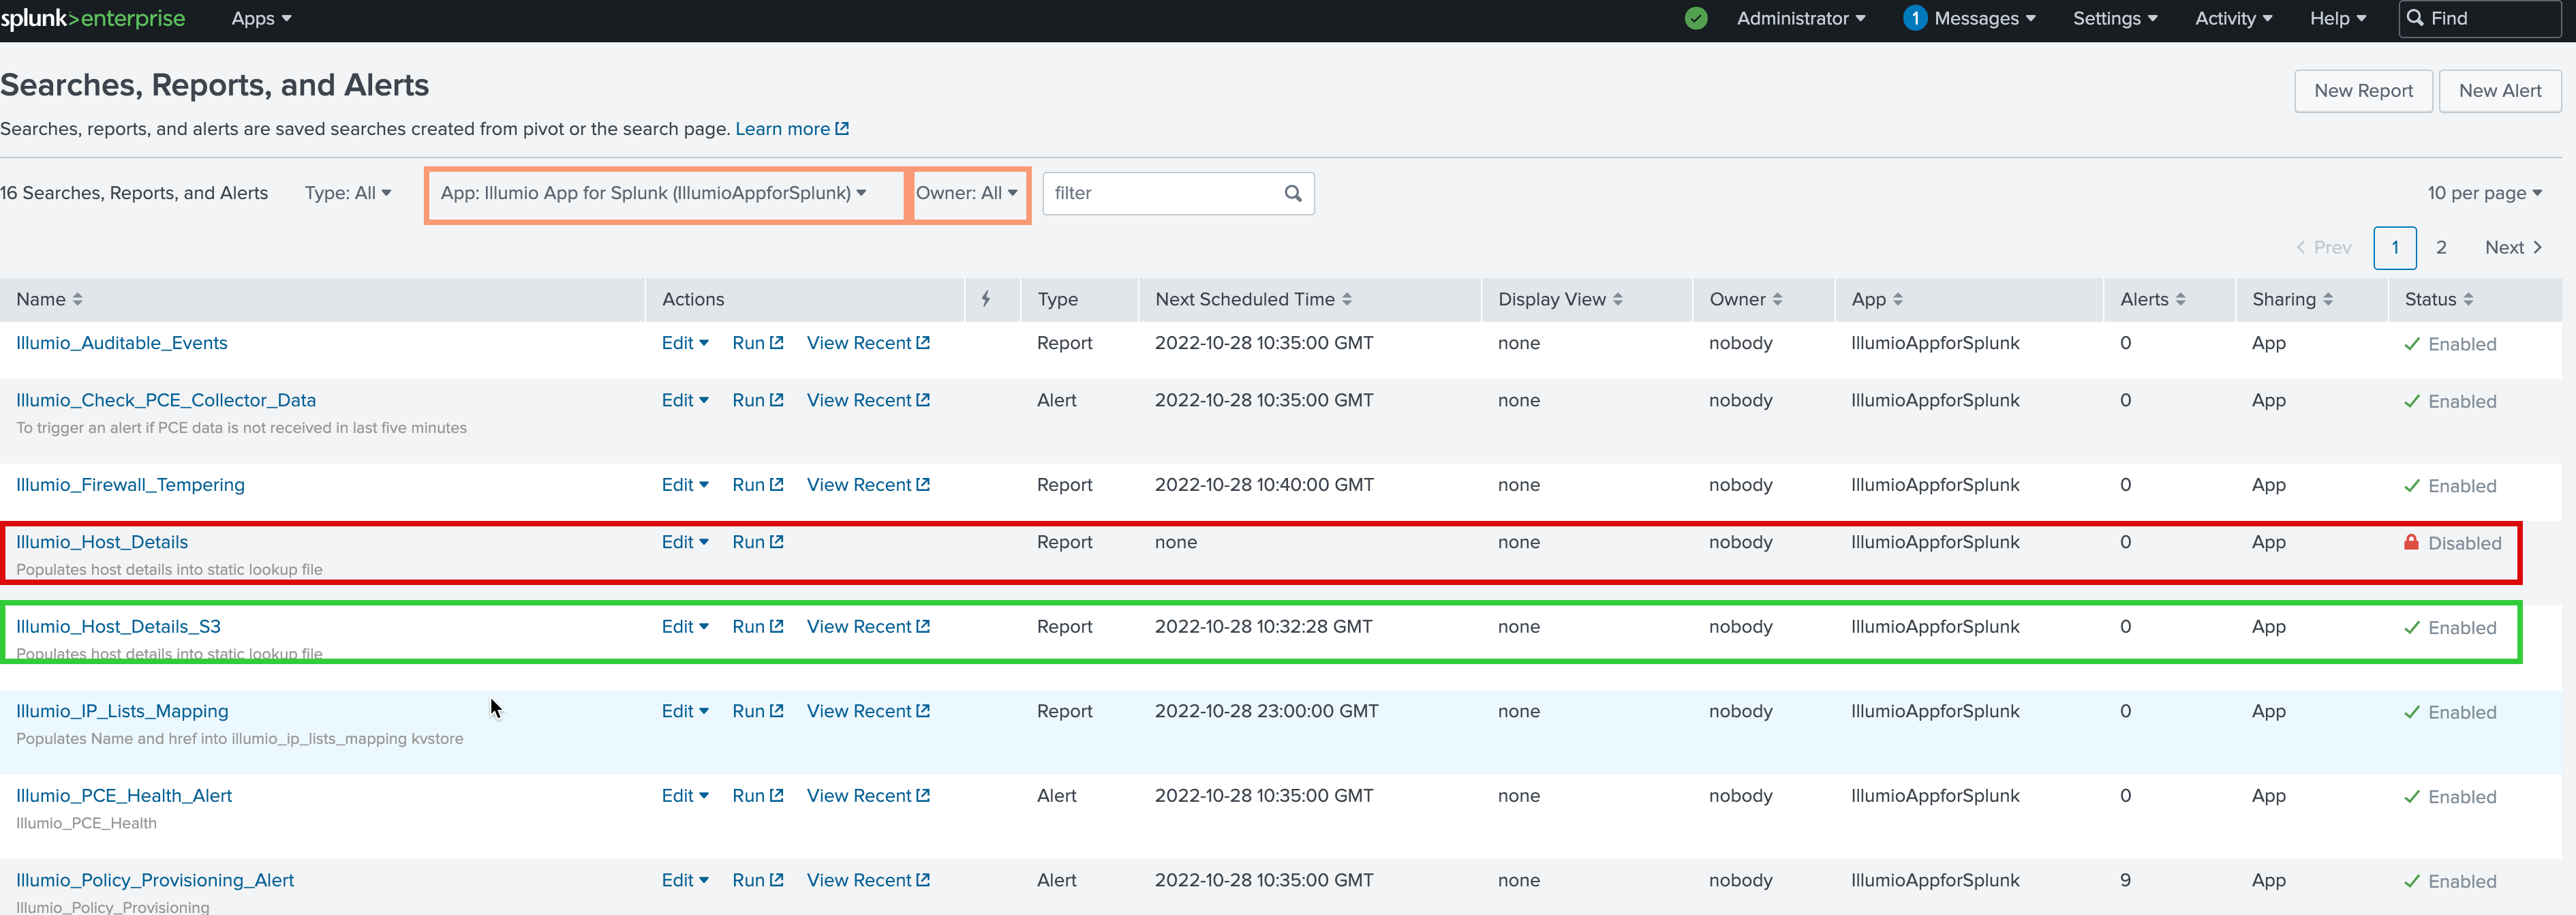
Navigate to Searches, Reports, and Alerts and filter for IllumioAppForSplunk in the App field and All in the Owner field.
In the list, disable Illumio_Host_Details and enable Illumio_Host_Details_S3.
Configure the Splunk Add-On for AWS
Install the Splunk Add-On for AWS.
Note
The Splunk App for AWS is a different app than the Splunk Add-On for AWS.
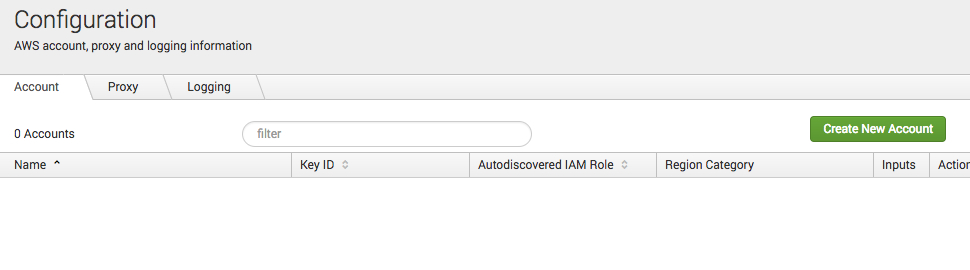
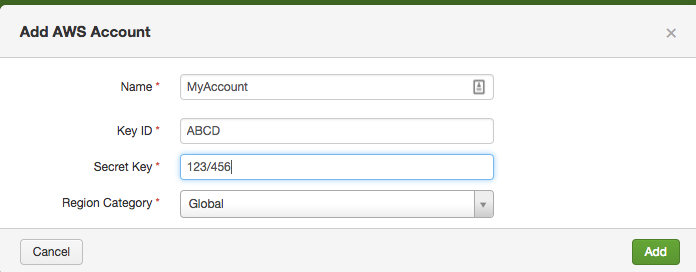
Enter your account into the Splunk Add-On for AWS app:
Enter values into the Name, Key ID, and Secret Key fields, and select Global from the Region Category drop-down:
Be sure to create an IAM S3 bucket policy that allows Splunk to access the S3 bucket. See Configure S3 permissions in the Splunk documentation.
Navigate to Settings > Data inputs:
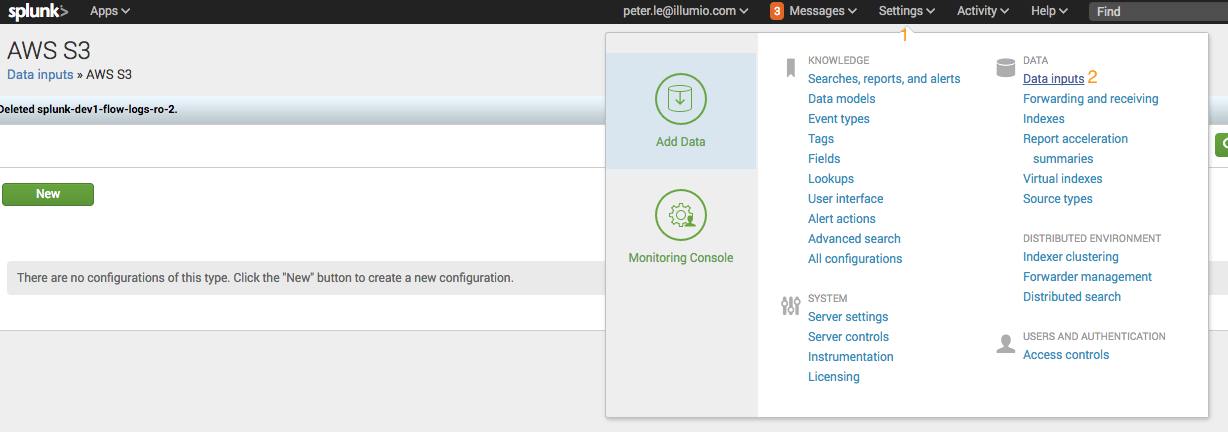
Create two data inputs for AWS S3:
Create one data input for events and set the source type to Illumio:pce.
Create one data input for traffic flow summaries and set the source type to Illumio:pce:collector.
Find AWS S3 and click Add New:

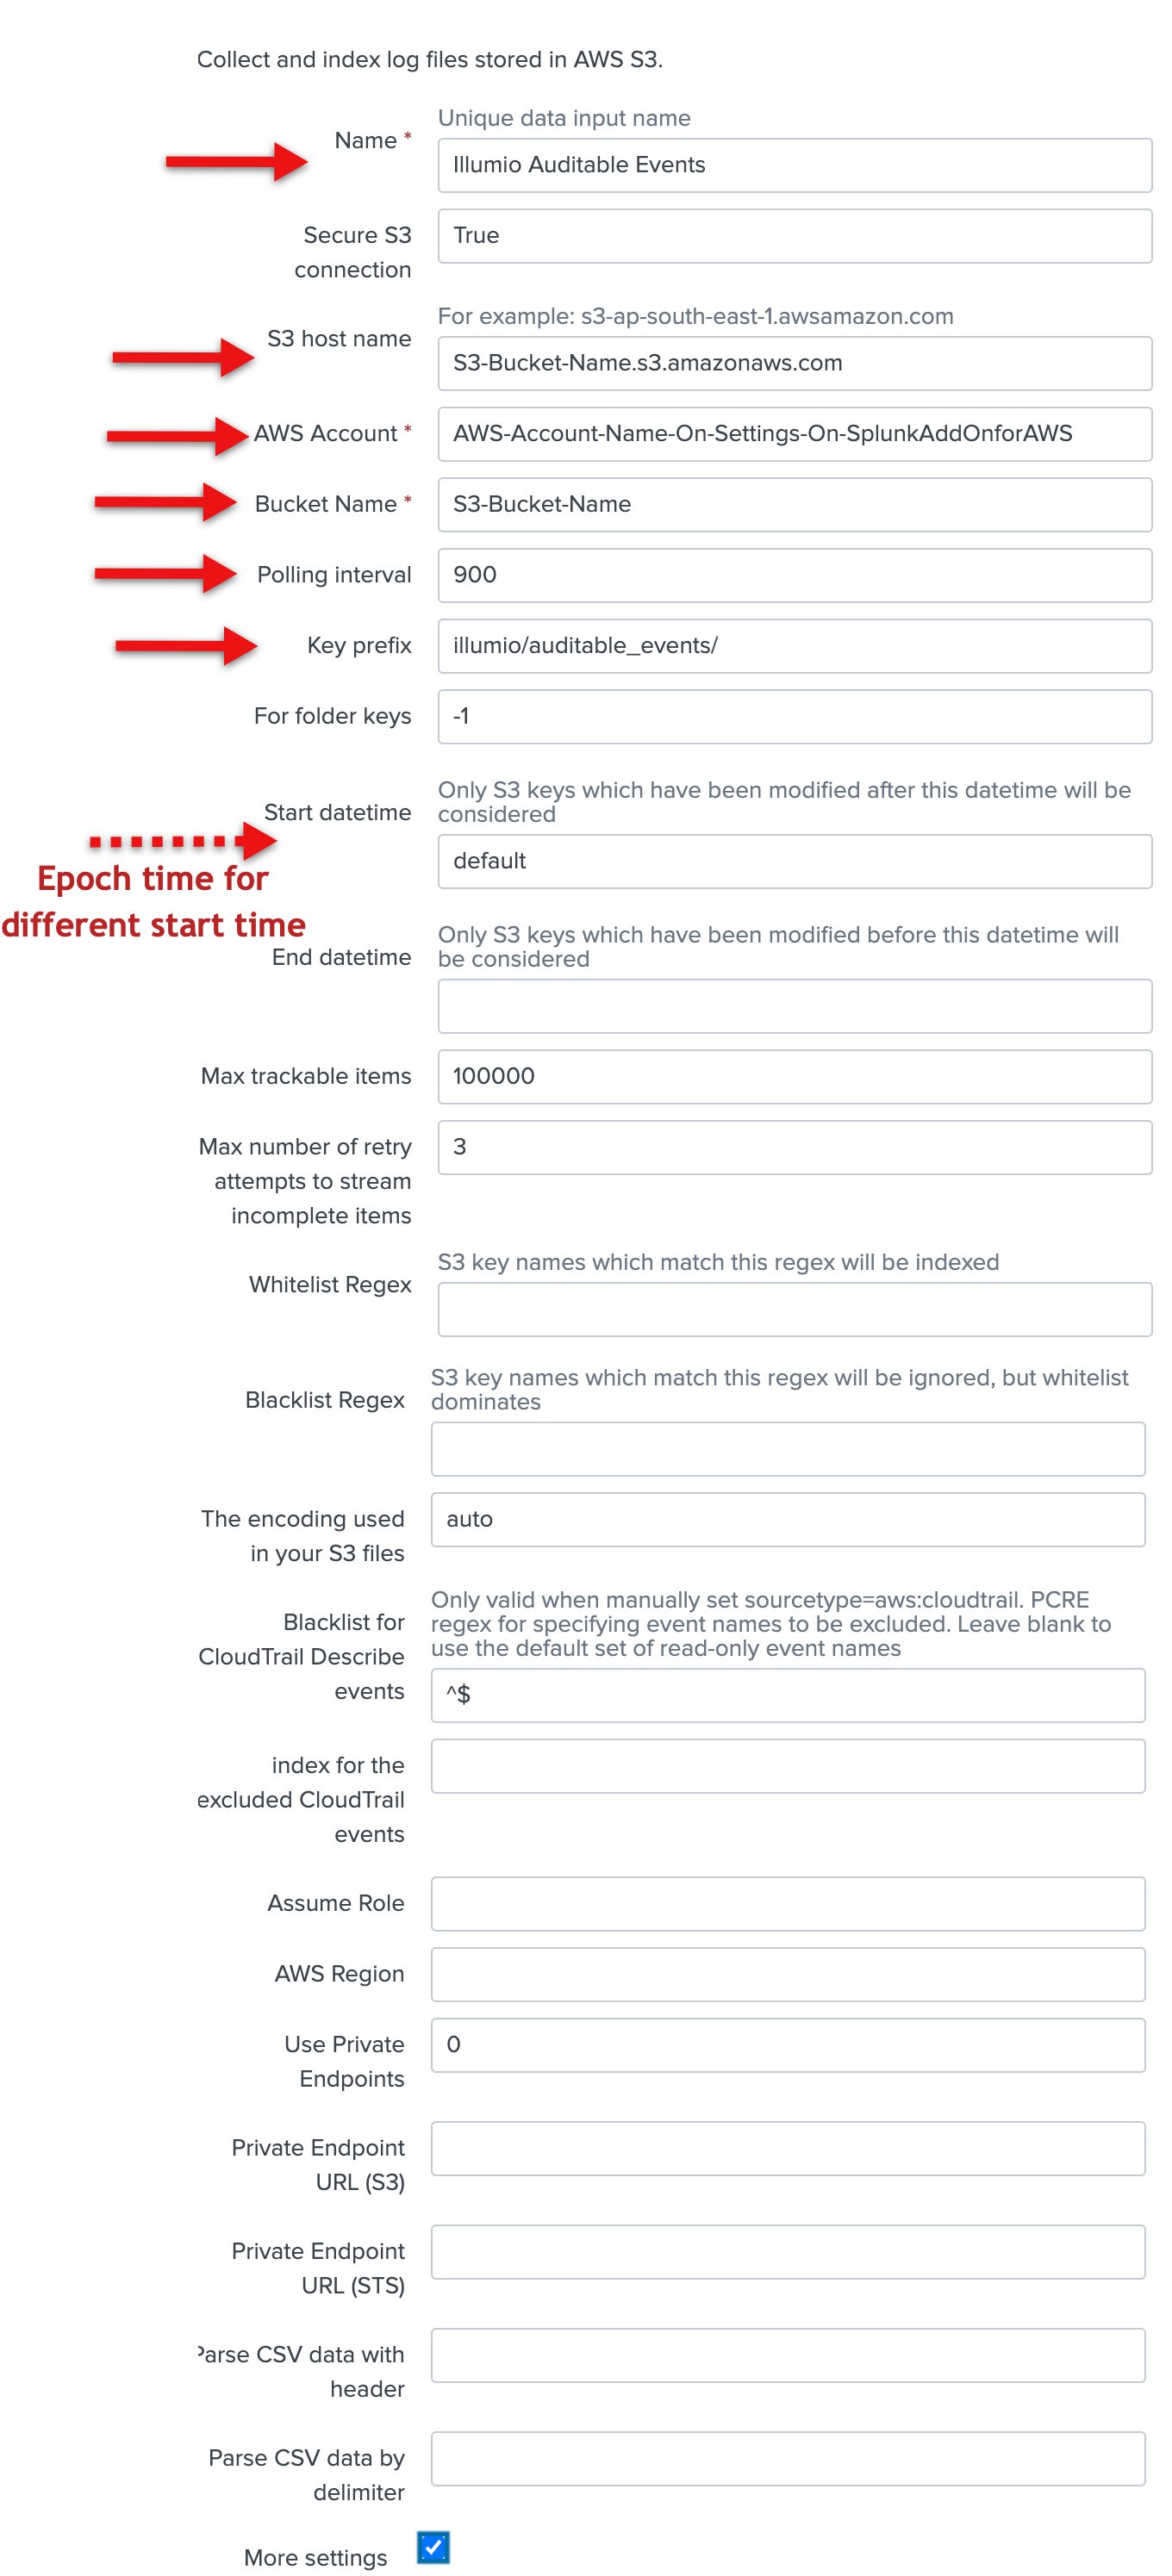
Add the following configuration data for events:
Enter the name in the Name field.
Enter the account in the AWS Account field.
Enter the S3 bucket name in the Bucket Name field.
Enter the polling interval (900 seconds, optional).
Enter Illumio/auditable_events/ in the Key prefix field.
You can accept the default values for everything else on this screen.
Note that you cannot edit the initial time scan parameter of an S3 input after you create it. If you need to adjust the start time of an S3 input, delete it and recreate it.
Check the More settings checkbox, and enter illumio:pce in the Source type field. You can accept the default values for the other fields.
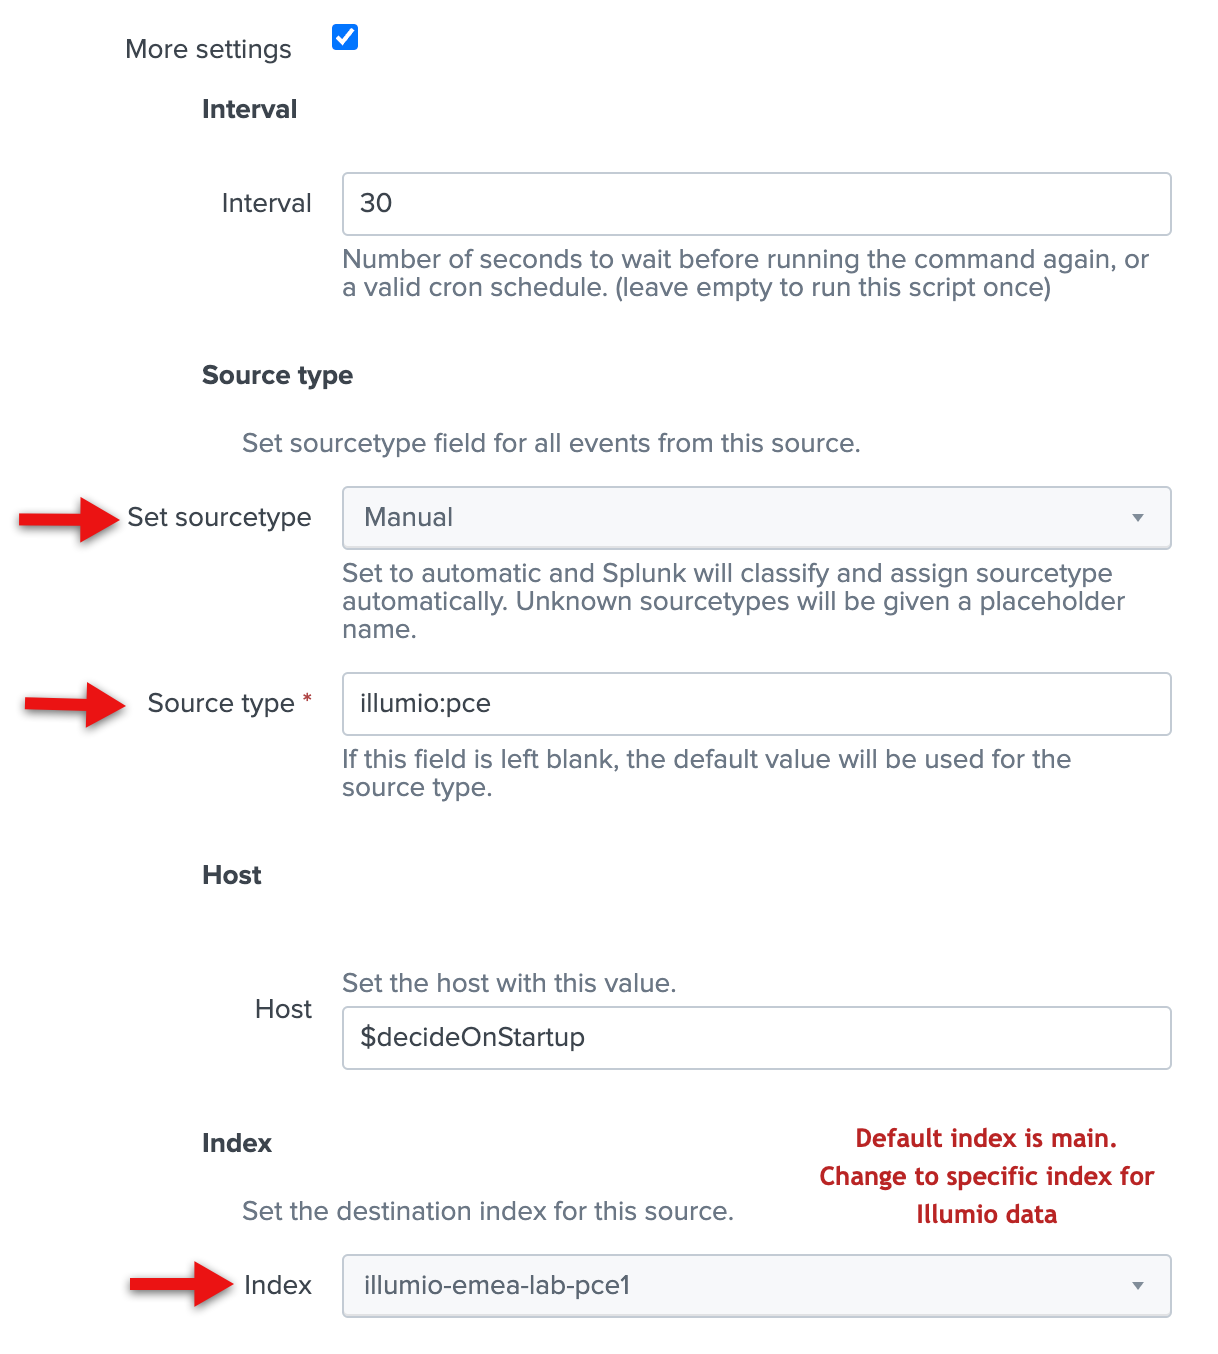
Click Save.
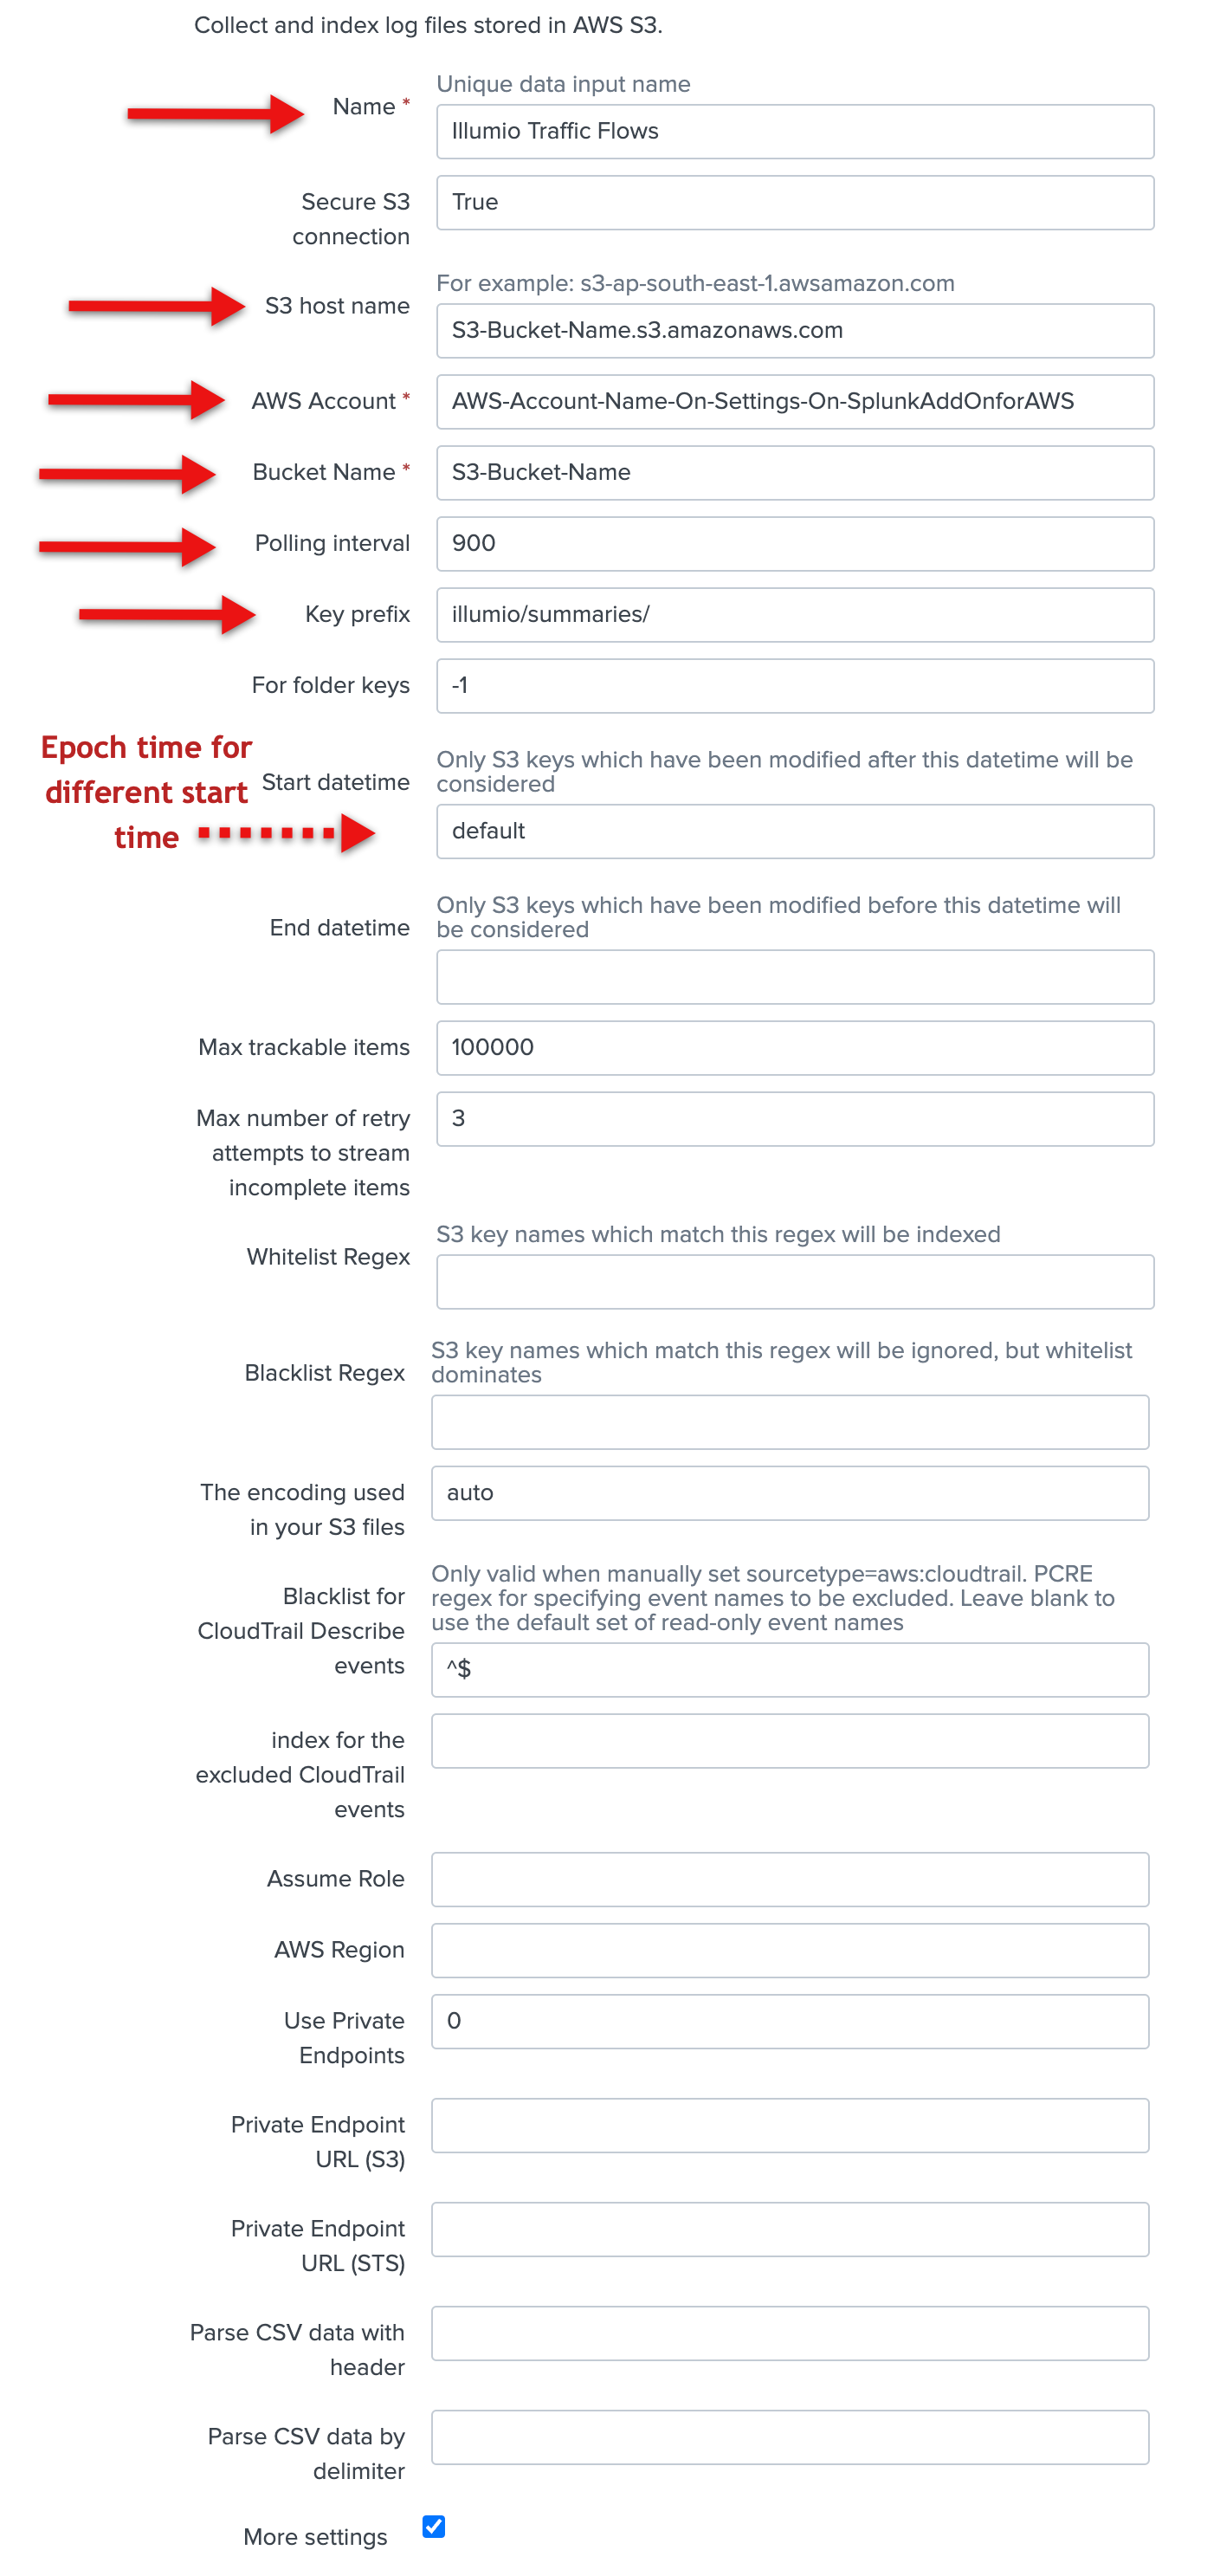
Add the following configuration data for traffic flow summaries:
Enter the name in the Name field.
Enter the account in the AWS Account field.
Enter the S3 bucket name in the Bucket Name field.
Enter the polling interval (900 seconds, optional).
Enter
Illumio/summaries/in the Key prefix field.Check the More settings checkbox, and enter illumio:pce:collector in the Source type field.
You can accept the default values for everything else.
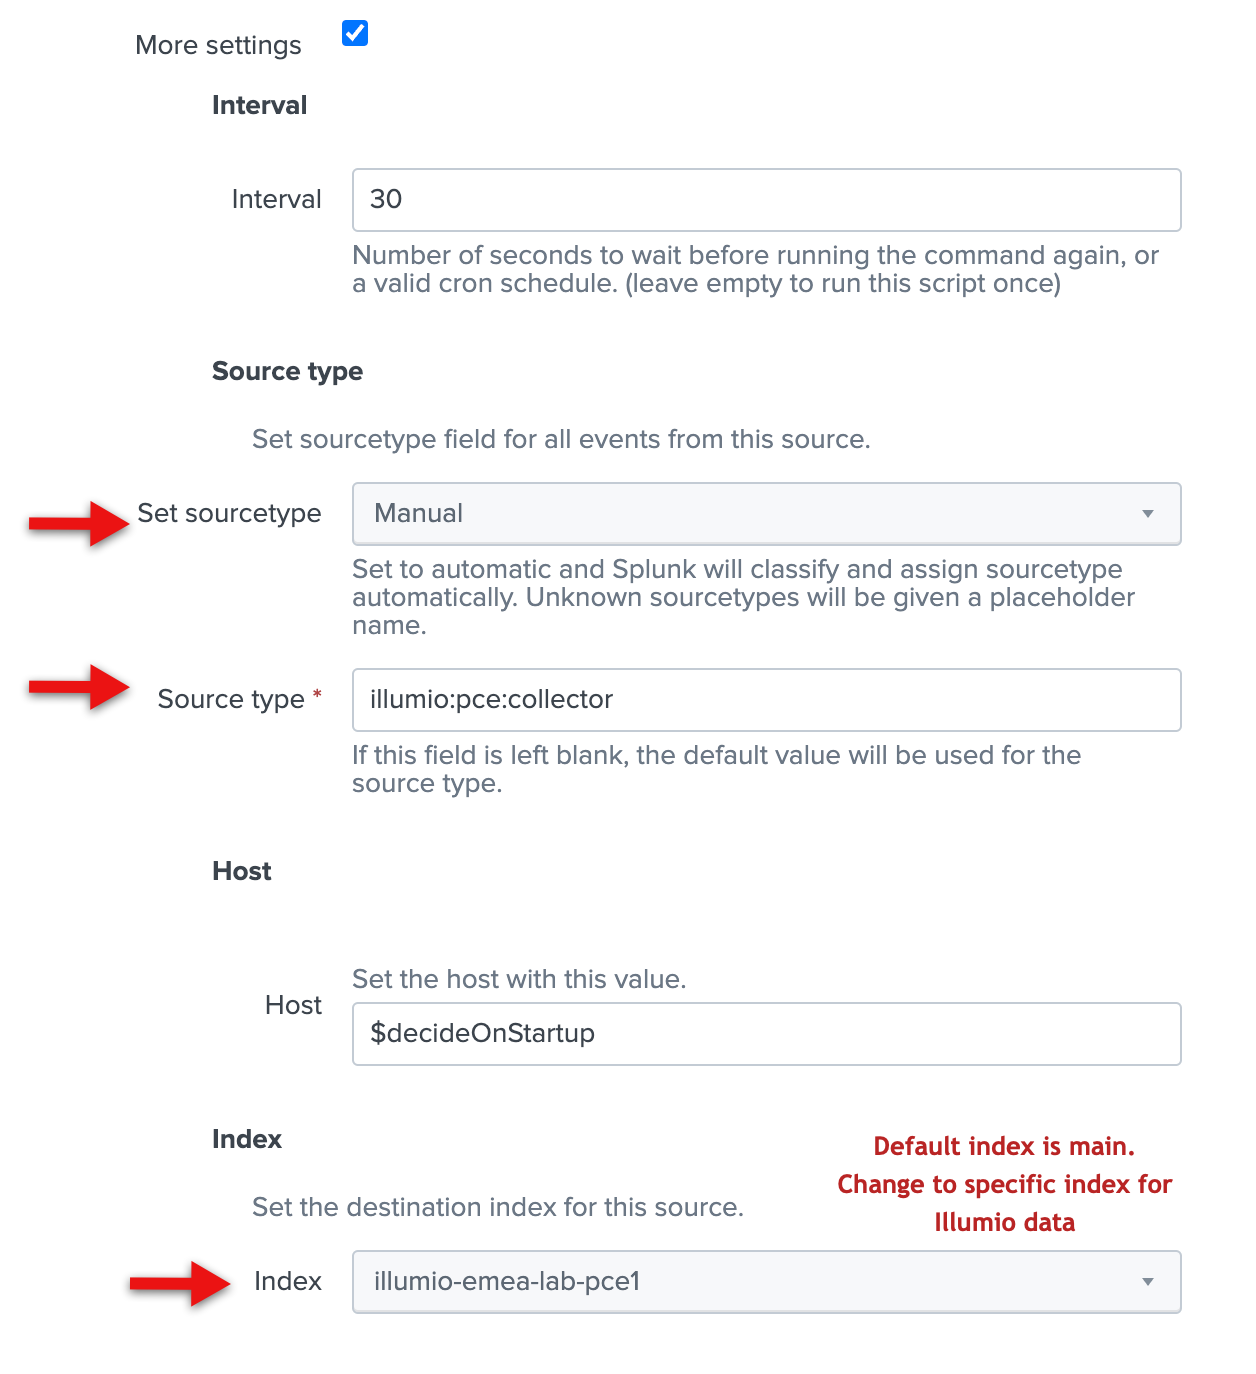
Click Save.
In the Inputs screen, you should see your two new inputs. Click the arrow next to the input name to view details about the input.
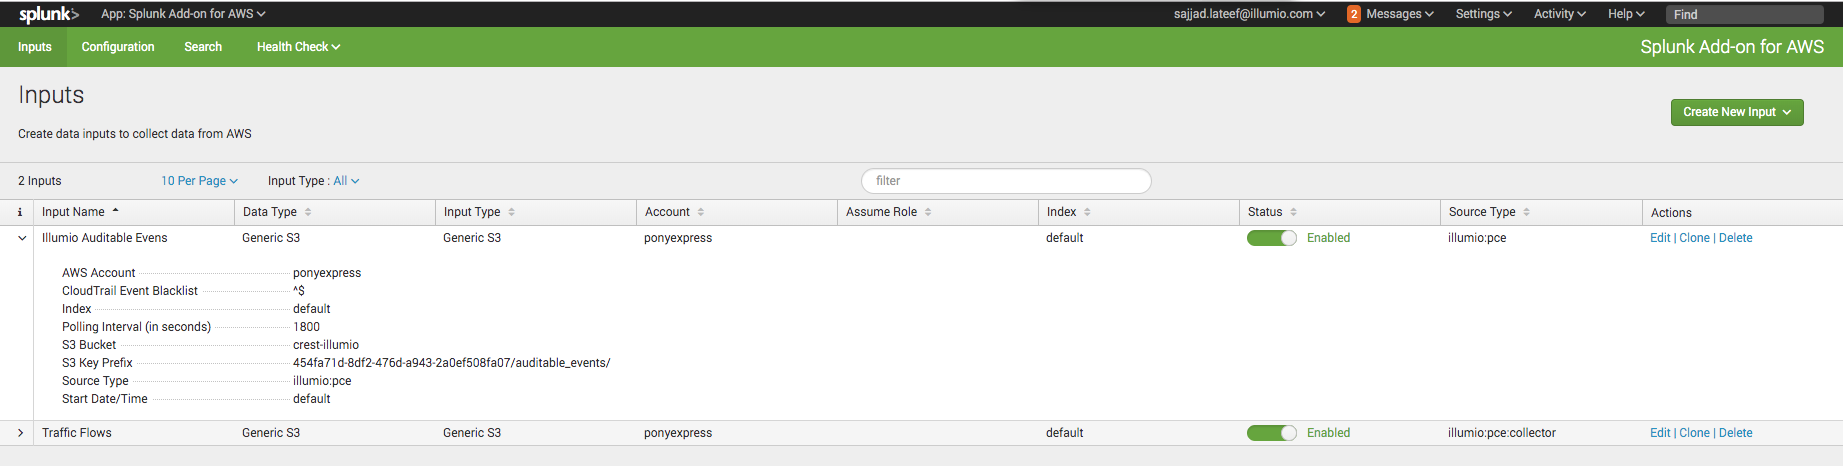
You should also have access to your VEN flow data and auditable event logs. See Example Splunk Queries for examples of how to access the data. Illumio can provide additional Splunk queries if you need them. Contact Illumio Technical Support for assistance.