Onboard an Azure Cloud Tenant - Guided Setup
Learn how to onboard an Azure tenant if you cannot onboard the tenant using the default setup described in Onboard an Azure Cloud tenant - default setup.
Note
If you don't have permissions to run the PowerShell script for Azure tenant onboarding, you will not be able to use the default setup.
Review the prerequisites. See Prerequisites for Onboarding Azure.
Use your Azure console to provide the required permissions. See Permissions for Onboarding Azure for a list of required permissions.
To provide permissions in your Azure console, see Microsoft website.
Onboard your tenant using the guided setup. See Using the Guided Setup.
The method described here lets you manually create an application registration, assign permissions, and apply credentials.
When you onboard an Azure tenant, the service principal allows Illumio Segmentation for the Cloud to retrieve resources. After you create the Azure Entra ID application, set the required reader permissions at the tenant scope, and provide the client ID and client secret credentials, invoke the API using a PowerShell script. The credentials are required to communicate with your Azure tenant.
Using the Guided Setup
Connect to Azure with the Wizard
The steps you take in this first part of the Illumio onboarding wizard are mostly the same as described in Onboard an Azure Cloud tenant - default setup. The exception is that that if you give Illumio Segmentation for the Cloud more than read-only access, you must download the permissions as described in Step 4.
If you are logging in for the first time, click + Azure on the Onboarding page to onboard your first account.
If you've already onboarded other accounts, choose Onboarding from the left navigation. Click +Add Azure at the top of the page.
The Add Azure Cloud Tenant wizard starts and displays the first step: Connect to Azure
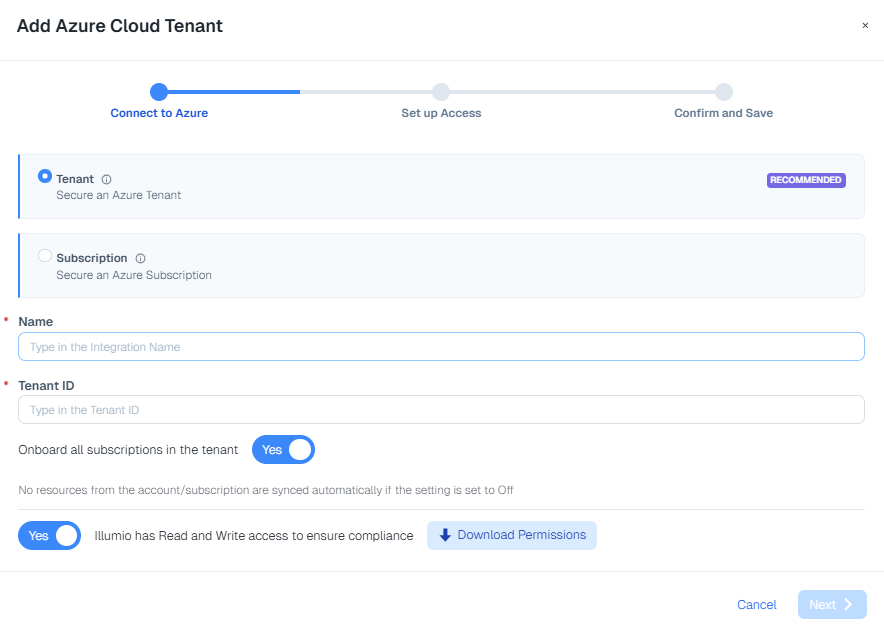
Provide the following information about your Azure account:
Name: Specify a name for the account; this name is what appears in Cloud upon onboarding. Use a descriptive name so that you can easily identify it in Illumio Segmentation for the Cloud.
Tenant ID: Paste the parent management group ID that you copied from Azure.
Onboarding toggle options:
Onboarding Toggle Option
Action
Onboard all subscriptions in the tenant: Yes
To onboard all member subscriptions along with the tenan.
Onboard all subscriptions in the tenant: No
To onboard only some subscriptions in the tenant, choose this option. Select those necessary for Illumio visibility and protection. Then go to the Onboarding page to onboard those subscriptions individually.
Illumio has Read and Write access to ensure compliance: Yes
To grant the Illumio Cross Account Role permission to view your Azure tenant resources and to apply policy to them.
Illumio has Read and Write access to ensure compliance: No
To provide the Illumio Cross Account Role read-only access, choose this option.
Note
To view the permissions you are granting Illumio Segmentation for the Cloud to your Azure tenant, click Download Permissions. This is necessary for you to onboard the tenant if you are unable to run the script, because you must manually provide the listed permissions. Save this list of permissions somewhere readily available.
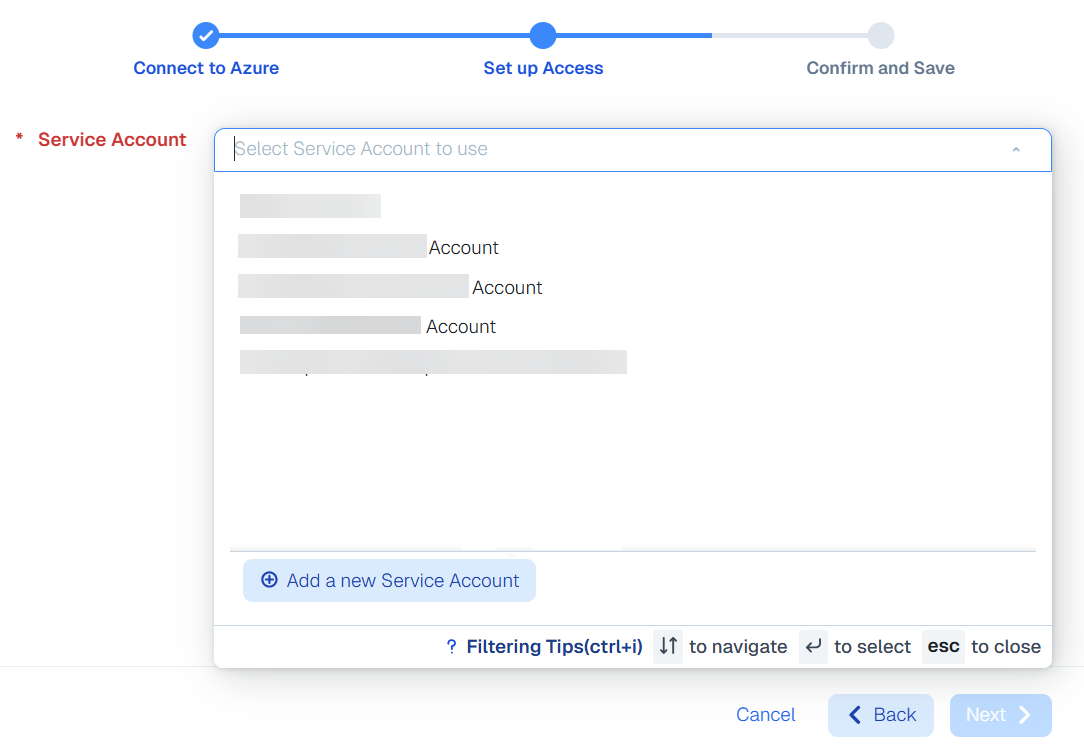
Setup Access using the Wizard without the Script
Select an existing service account or create a new one by clicking Add a new Service Account. You can use spaces, underscores, numbers, or other characters (such as !,@,#, and so on) for the account name. Make it something you can remember.
If you created a new service account, click Download Credentials. They are needed for the callback API to return the Azure Entra ID app credentials back to Illumio Segmentation for the Cloud.
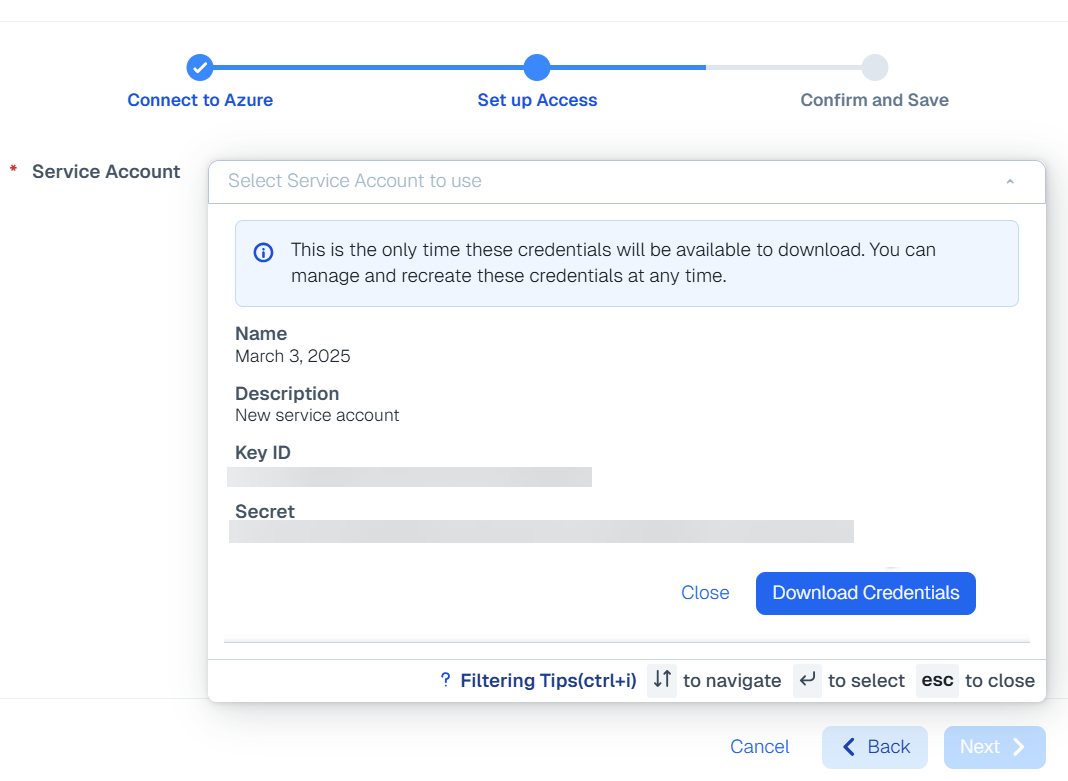
Enter the ServiceAccountToken.
Do not use the PowerShell script offered in the wizard because this onboarding method assumes you lack the permissions to run it. Instead, follow the steps below in Manually Create an Azure Entra ID App and Assign the Reader RBAC Role to create and register your Azure application.
This gives Illumio Segmentation for the Cloud your newly created Azure application registrations, client, client id, and client secret.
Complete the fields.

Review the details and click Save and Confirm.
Manually Create an Azure Entra ID App and Assign the Reader RBAC Role
Use these steps to create an Azure Entra ID App manually.
In a new browser window, open your Azure portal.
Create the Azure Entra ID App registration on the Microsoft website. Skip the redirect Uniform Resource Identifier (URI) in this step.
Once the Entra ID App registration is created, create a new client secret as documented on the Microsoft website.
Once the Entra ID App and secret are created, assign the Reader RBAC role to the App at the tenant scope, as documented on the Microsoft website.
Ensure that the role is assigned at the tenant scope and not at the subscription scope.
After you create the reader RBAC role, assign the API permissions for Illumio Segmentation for the Cloud. You can see the permissions in the .txt file you downloaded from the wizard.
Run the Callback API to Illumio Segmentation for the Cloud
After you connect to Azure and set up access, run the following PowerShell callback to the Illumio Segmentation for the Cloud API in your Azure console to complete the tenant onboarding. If the callback is successful, no output is printed.
Note
The following code is just a reference PowerShell script (Web_request.ps1), so update it according to your environment, but ensure that the subscription ID is empty.
# Set your service account key ID, token, and client secret
$serviceAccountKeyId = "<YourServiceAccountKeyId>"
$serviceAccountToken = "<YourServiceAccountToken>"
$clientSecret = "<YourClientSecret>" # The actual client secret to be encoded

# Combine the key ID and token with a colon and base64 encode for the Authorization header
$authString = "$($serviceAccountKeyId):$($serviceAccountToken)"
$encodedAuthString = [Convert]::ToBase64String([Text.Encoding]::ASCII.GetBytes($authString))

# Base64 encode the client secret separately
$encodedClientSecret = [Convert]::ToBase64String([Text.Encoding]::ASCII.GetBytes($clientSecret))

# Construct the headers with the encoded Authorization header
$headers = @{
  "X-Tenant-Id"  = "<CloudsecureTenantId>"
  "Content-Type"  = "application/json"
  "Authorization" = "Basic $encodedAuthString"
}

# Construct the request body with the encoded client secret
$body = @{
  "type"            = "AzureRole"
  "client_id"       = "<ClientId>"
  "client_secret"   = $encodedClientSecret  # Use the base64 encoded client secret
  "subscription_id" = "<SubscriptionId>" # remove this and use azure_tenant_id if onboarding the entire tenant.
  "azure_tenant_id" = "<AzureTenantId>" # both azure tenant id and subscription_id should be present for subscription onboarding.
} | ConvertTo-Json -Depth 10

# Send the POST request
$response = Invoke-WebRequest -Uri 'https://cloud.illum.io/api/v1/integrations/cloud_credentials' -Method Post -Headers $headers -Body $body

# Output the response
Write-Host $response
Set up and Enable Flow Logs after Onboarding
The Onboarding page opens and displays a new row for that tenant.
Set up and enable flow logs.
To set up flow logs before enabling them, see Set up Flow Logs.
To enable flow logs using the guided setup, see Grant Flow Log Access - Guided Setup.
Grant Flow Log Access - Guided Setup
Run the following script in your Azure console to manually grant flow log access for your tenant. Note that "csTenantId" is the tenant ID and that "subscriptionId" is the subscription ID for Illumio Segmentation for the Cloud.
In summary, the script does the following:
Creates an application registration called "Illumio-CloudSecure-Access"
Creates a custom role called "Illumio Network Security Administrator"
Assigns the application registration the role of "Storage Blob Data Reader"
Gives Illumio Segmentation for the Cloud your newly created application registrations, client, client id, and client secret
#params for running the script
# to run the script use the command
# ./grant_flow.ps1 -serviceAccountKey <key> -serviceAccountToken <token> -csTenantId <cs_tenant_id> -subscriptionId <subscription_id> -storageAccount <storage_account1,storage_account2,...> -url <url>
# default url is https://cloud.illum.io
param(
    $serviceAccountKey = "",
    $serviceAccountToken = "",
    $csTenantId = "",
    $subscriptionId = "",
    [String[]]$storageAccounts,
    $url = "")

#check if the given inputs are valid
if ([string]::IsNullOrEmpty($serviceAccountKey) -or [string]::IsNullOrEmpty($serviceAccountToken)) {
    Write-Host "Service Account Token or Key cannot be empty" -ForegroundColor Red
    exit
}

if ([string]::IsNullOrEmpty($csTenantId)) {
    Write-Host "csTenantId cannot be empty" -ForegroundColor Red
    exit
}

if ([string]::IsNullOrEmpty($subscriptionId)) {
    Write-Host "subscriptionId cannot be empty" -ForegroundColor Red
    exit
}


if ($storageAccounts.Count -eq 0) {
    Write-Host "storage accounts list cannot be empty" -ForegroundColor Red
    exit
}

# Combine the key ID and token with a colon and base64 encode for the Authorization header
$authString = "$($serviceAccountKey):$($serviceAccountToken)"
$encodedAuthString = [Convert]::ToBase64String([Text.Encoding]::ASCII.GetBytes($authString))


# Construct the headers with the encoded Authorization header
$headers = @{
    "X-Tenant-Id"   = $csTenantId;
    "Content-Type"  = "application/json";
    "Authorization" = "Basic $encodedAuthString";
}

# Construct the request body with the storage accounts
# list of storage accounts which has flow logs and for which access has been granted.
# the storage account names must be the entire namespace as shown in cloudsecure flow logs page.
# Eg: /subscriptions/<subscription_id>/resourceGroups/<resource_group_name>/providers/Microsoft.Storage/storageAccounts/<storage_account_name>

$body = @{
    "type"            = "AzureFlow";
    "subscription_id" = $subscriptionId; # subscription in which the storage accounts are present
    "destinations"     = $storageAccounts;
} | ConvertTo-Json -Depth 10

# Send the POST request
$endPoint = "/api/v1/integrations/cloud_credentials"

if ([string]::IsNullOrEmpty($url) ) {
    Write-Host "url is empty hence using default url https://cloud.illum.io" -ForegroundColor Yellow
    $url = "https://cloud.illum.io"
}

$url = $url + $endPoint

Write-Host "making API call to $($url)"

$response = Invoke-WebRequest -Uri $url -Method Post -Headers $headers -Body $body

# Output the response
if ($($response.StatusCode -eq 200)) {
    Write-Host "API call to cloudsecure successful"
} else {
    Write-Host "Error making API call to cloudsecure. Status code: $(response.StatusCode)"
}
What's next after you onboard your tenant?
The Onboarding page opens and displays a new row for that tenant.
If you originally set the permissions to read only, and wish to change them to read and write, see Change Azure permissions from read to read and write.
Updating your tenant
After tenant onboarding is complete, it shows a list of subscriptions. If a subscription belonging to a tenant is onboarded before the tenant onboarding, it does not show in the tenant's list of subscriptions. To see a subscription that you onboarded prior to the tenant onboarding, you must delete the onboarded subscription. Upon tenant onboarding, it automatically syncs and onboards the subscription.
You may someday need to update your service account principals due to expiry or other issues. If you must update your service account principals after onboarding, see Update Service Principals for Onboarded Azure Subscriptions and Tenants.