What's New and Changed in Release 23.2.0
The following new features were added in Illumio Core 23.2.0
New UI
Illumio is excited to announce a new user interface for Illumio Core Cloud customers. Our New PCE user interface (UI) is designed to maximize user productivity and enable intuitive platform administration.
We think you'll love this cleaner, more flexible design – but while we always strive to keep Illumio core easy-to-use, change is hard, so we’ve assembled this short guide to help you introduce you to this new Illumio Core experience.
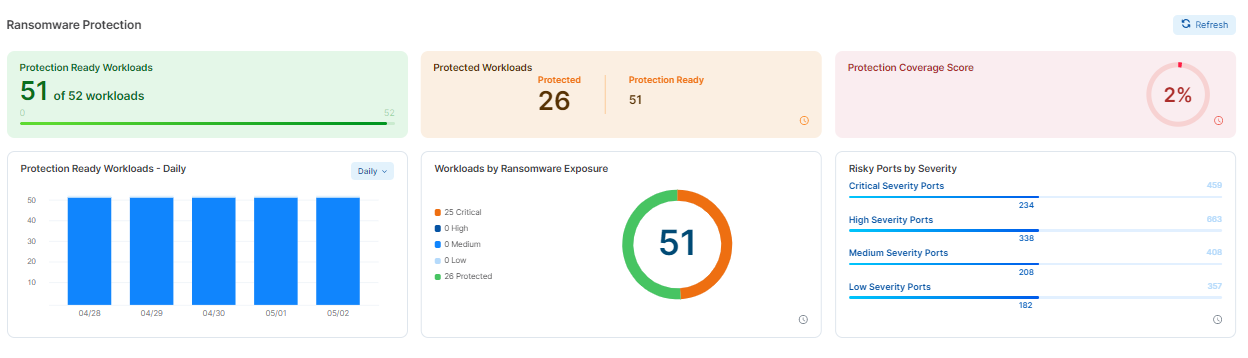
Ransomware Protection Dashboard
The Ransomware Protection tab provides detailed protection information for the workloads regarding each of the ransomware-risky services.
Information about the ransomware risk is then aggregated into the Ransomware Protection Dashboard for the system-side ransomware risk analysis.
You can access the Dashboard by clicking on the Dashboard button in the left menu.

The new Ransomware Protection Dashboard is located above the VEN Dashboard in a single screen. To see the VEN Dashboard, scroll down until the heading VEN Statistics appears.
In this release, only the following global user roles are allowed to use the Ransomware Protection Dashboard:
Global Org Owner
Global Administrator
Global Viewer
Only managed server workloads are included in the Dashboard statistics. Endpoints and container workloads are not included.
Write a Ringfencing Rule
Using the Illumination Plus Map view (in the Classic UI) or the Explore > Map (in the New UI), you can quickly create a ringfencing rule by adding that rule to a new ruleset within the scope of the selected group.
Ringfencing shrinks the security perimeter from a subnet or VLAN to a single application. It provides the largest impact with the least amount of work, requiring only one line of security policy per application to close off 90 percent of the potential attack surface for east-west traffic movement.
Enhancements to the Explore Features
In Illumio Core 23.2.0, Illumio has enhanced the Explore features in the following ways.
Default Graph
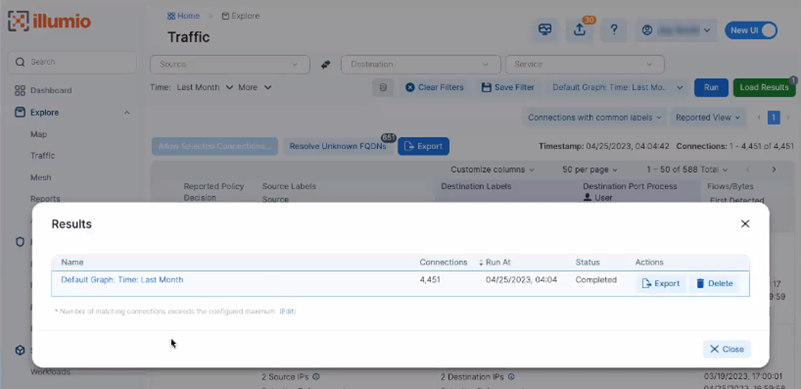
In Core 22.5.x, the PCE cached the Illumination Plus queries (for the Map and Table views) that you ran and were saved for a 24-hour period. Caching your query results allowed the PCE to display Illumination Plus pages quickly. To view and access your cached queries, you clicked Load Results at the top-right corner of the Map page. The Results page appeared.
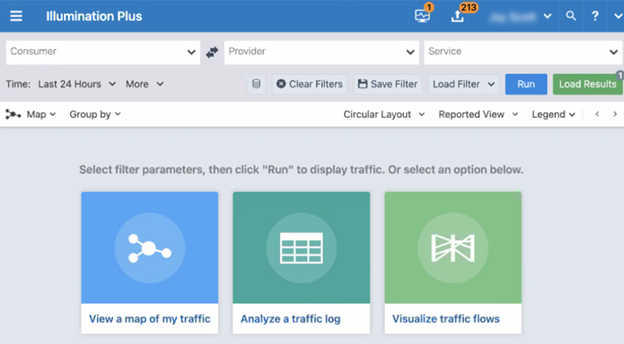
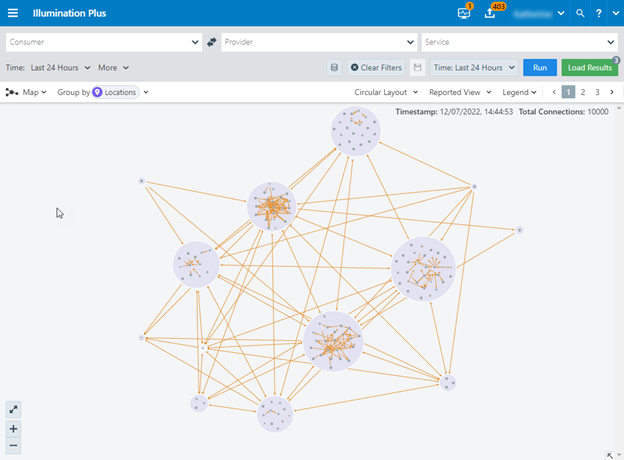
In 23.2.0, if you don’t have a default graph in the PCE, the page below is your start page for the Map and Traffic pages.
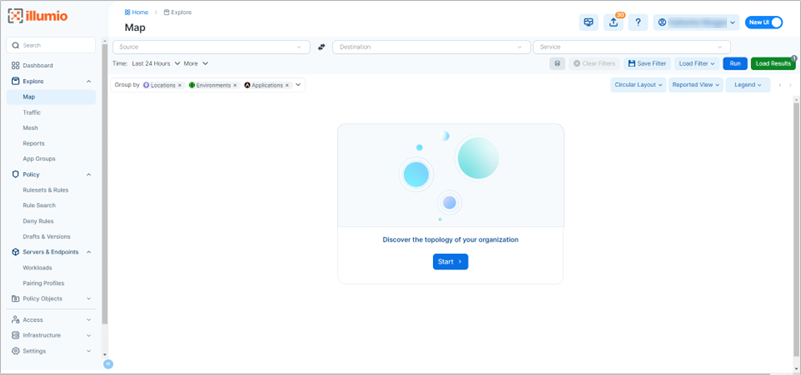
The new page above has replaced this Start page that you saw in Core 22.5.x:
When you click Start, the PCE creates a map or traffic table based on the values you have in the filters at the top of the page. The PCE saves this query with those filters as the default graph The graph expires in 24 hours; however, the PCE saves the default graph as a scheduled report that runs every 24 hours (between 12:00 midnight and 8:00 AM).
Then, when you return to the Map or Traffic page, the PCE loads that saved default graph, unless you already have another graph (different filters) displayed. You won’t see this Start page again, unless you delete the default graph.
This page now appears when you click Load Results in the Map page to display the entry for the Default Graph:
When you open the Reports feature from the left navigation and select the Schedules tab, you see the scheduled report for the Default Graph.
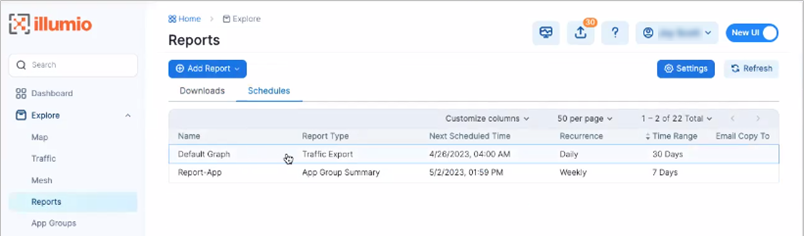
Important
Not all Illumio users can access the Default Graph scheduled report. You must have the correct Access permissions.
Tips for Using the Default Graph
To change the query that the PCE runs for the Map and Traffic page:
Go to the Reports page and select a different saved query.
Delete the default graph by clicking Load Results in the Map or Traffic page and clicking Delete in the Load Results dialog box. Then, navigate to the Map or Traffic page so that the Start page appears. Click Start to create a default graph.
Click the Schedule Time field and select a new time to change when the default graph report runs each 24 hours. However, you must have the correct permission to edit the Default Graph (RBAC roles and permissions).
Auto Grouping Feature Removed
In Illumio Core 22.5.x, you could select the Auto Grouping option to have the PCE calculate the best grouping for your managed environment.
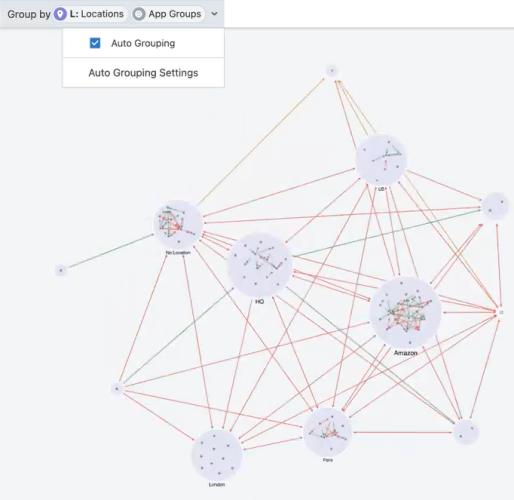
In Illumio Core 23.2.0, this feature is removed, and the map grouping was simplified.
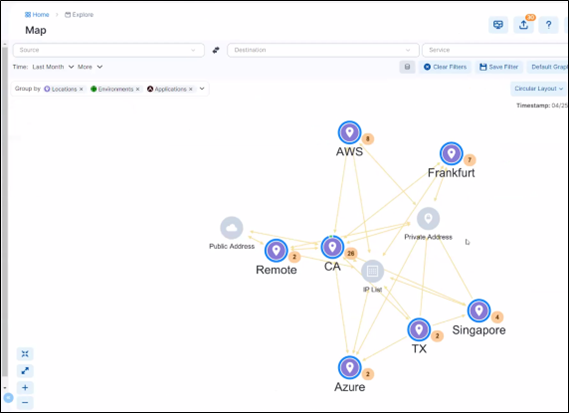
In this release, you now specifically choose which labels that you want to group your map by:
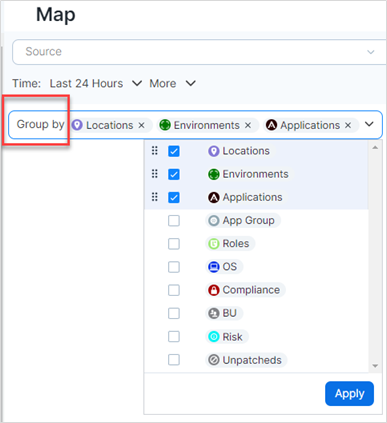
In 23.2.0, whatever labels you select from the Group by drop-down list, is the grouping that your Map uses. By default, the Map uses the labels Locations, Environments, and Applications. However, you can change the grouping to whatever labels you want.
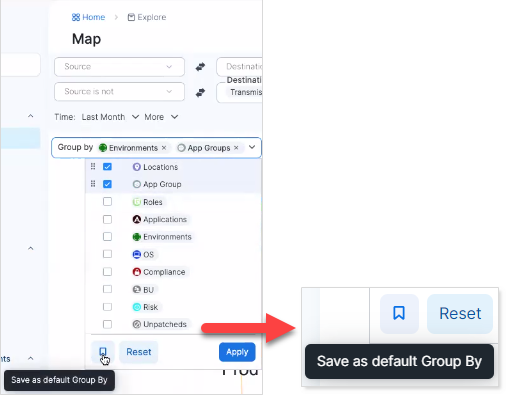
To save your grouping selections, select the bookmark icon. When bookmarked, the grouping becomes your default setting. If you change the grouping for a specific view of your data, click Reset to go back to your default grouping.
Opening Right Panel
In Core 22.5.x, clicking a group in the map opened the right panel with the details about the group.
In core 23.2.0, you must click two times to open the right panel with group details.
Prior to clicking:
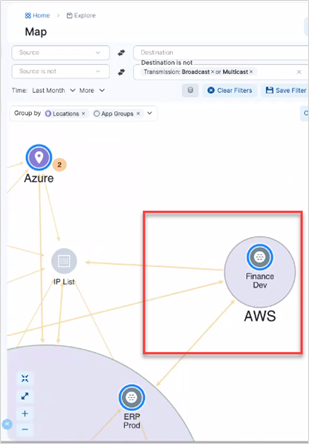
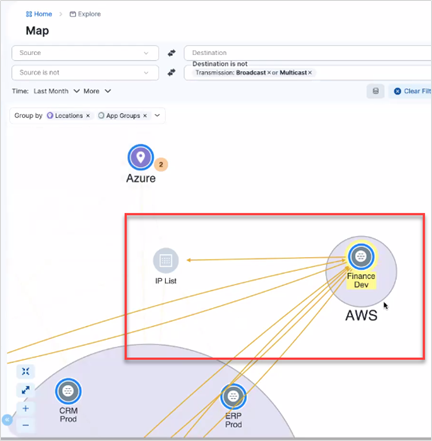
The first click selects and highlights the group and all connections associated with the group.
The second click opens the right panel:
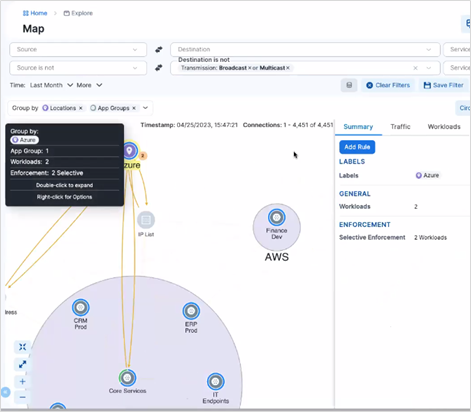
Clicking a link opens the right panel immediately; or, if the panel is open, clicking a group once refreshes the details in the panel with the new group.
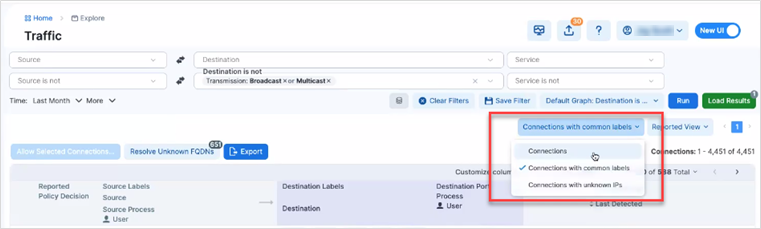
Unmanaged IP Addresses
In Illumio Core 22.5.x, unmanaged IP addresses were accessible as a node in the Illumination Plus map.
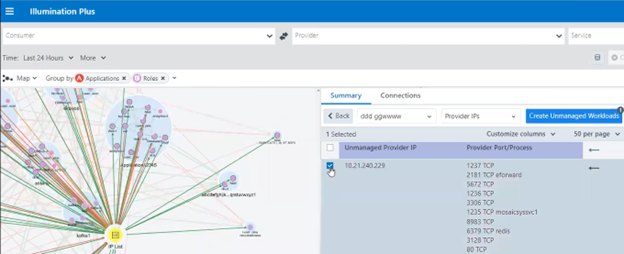
In Illumio Core 23.2.0, unmanaged IP addresses are accessible from the following map drop-down list:
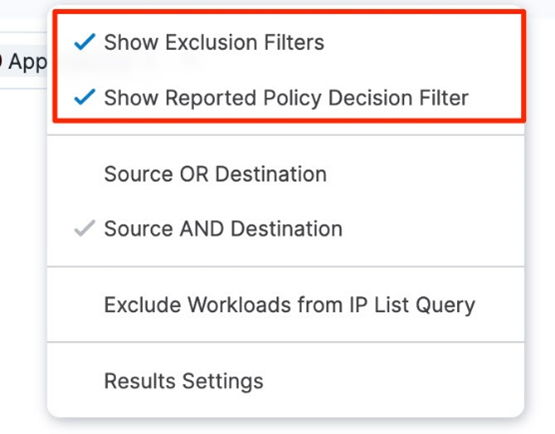
Enhancement in Map Filter
The Exclusions filter and Reported Policy Decision filters enabled by default:
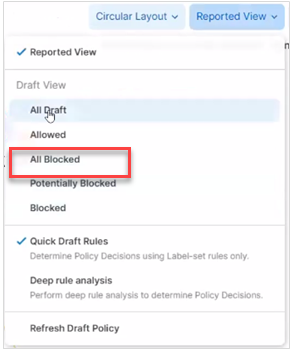
View Drop-Down Menu
The View drop-down list includes a new option to show all blocked traffic.
Grouping in the Map Collapsed
In Core 22.5.x, all the top groups in the Map were expanded so that you could see their contents:
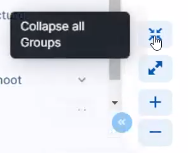
In Core 23.2.0, these top groups are collapsed by default
In addition, you have a new control to collapse all expanded groups:
Set VEN Type in the Pairing Profile
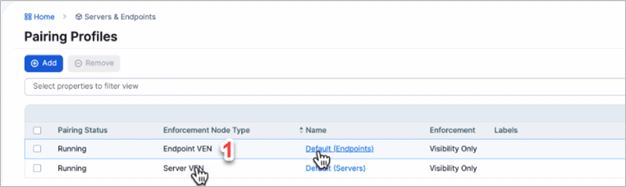
In Illumio Core 23.2.0, each Pairing Profile now includes information about Enforcement Node. This column lets you know the type of device you can run the pairing script on, namely servers versus endpoints.
Or, you can choose not to set the type in the Pairing Profile and let the PCE determine the correct type when the VEN activates with the PCE.
Enforcement Node Type column and values
Set VEN Upgrade Expiration Time
When upgrading VENs, you can specify how much time the VENs have to successfully upgrade by entering a value and units of time in the new VEN Upgrade Expiration field of the VEN Upgrade dialog. The VEN upgrade timeout value can be specified in minutes, hours, or days. The timeout must be between 15 minutes and 180 days. For server VENs, the recommended upgrade timeout is 1 day. For endpoint VENs, the recommended timeout is 7 days. After the expiration time passes, the PCE will no longer instruct the VEN to upgrade, and the VEN will be in a warning state.
Configure Second FQDN for Southbound Traffic
You can specify a second fully-qualified domain name (FQDN) for VENs to use to send communications to the PCE with the new optional Public Experimental runtime parameter agent_pce_fqdn.This is in addition to the existing required parameter pce_fqdn.
RHEL 5 Support
Red Hat Enterprise Linux (RHEL) 5 is supported for VENs, with some limitations.
The following are not supported:
FQDN-based rules
Machine authentication
IPv6
Byte counting
When a curl command is used to run the VEN pairing script, additional configuration steps are required:
Downgrade the minimum TLS version. Set
min_tls_versiontotls1_0.Update the CA certificate file on the RHEL 5 machine. Download the latest
cacert.pemand append it to theca-bundle.crtfile.
RHEL 9 Support
Red Hat Enterprise Linux (RHEL) 9 is supported for VENs.