Pairing Workloads Lesson
In this lesson, you will learn how to install the Illumio agent on compute assets in your data center or private or public cloud so that you can apply micro-segmentation policies.
Lesson Prerequisites
This lesson requires you to have the following data, access, and systems.
Understand essential concepts: To complete this lesson, you must understand what the Illumio VEN is and how pairing workloads works.
5 to 20 hosts: Bare-metal servers or VMs in your data center or a public cloud. They can be running Windows or Linux.
Installed packages: The hosts must have the required packages installed.
Supported operating systems and required packages: For information, see OS Support and Package Dependencies on the Illumio Support portal.
Development or test applications: The hosts need to have running applications that are generating traffic data. A distributed application is recommended.
Root or Admin access: You must have Root or Admin access on the hosts to install the VEN. Windows hosts must have PowerShell installed.
Internet HTTPS access over TCP port 443: The hosts must be able to connect outbound over TCP port 443.
Instructions
Log into your Illumio Core.
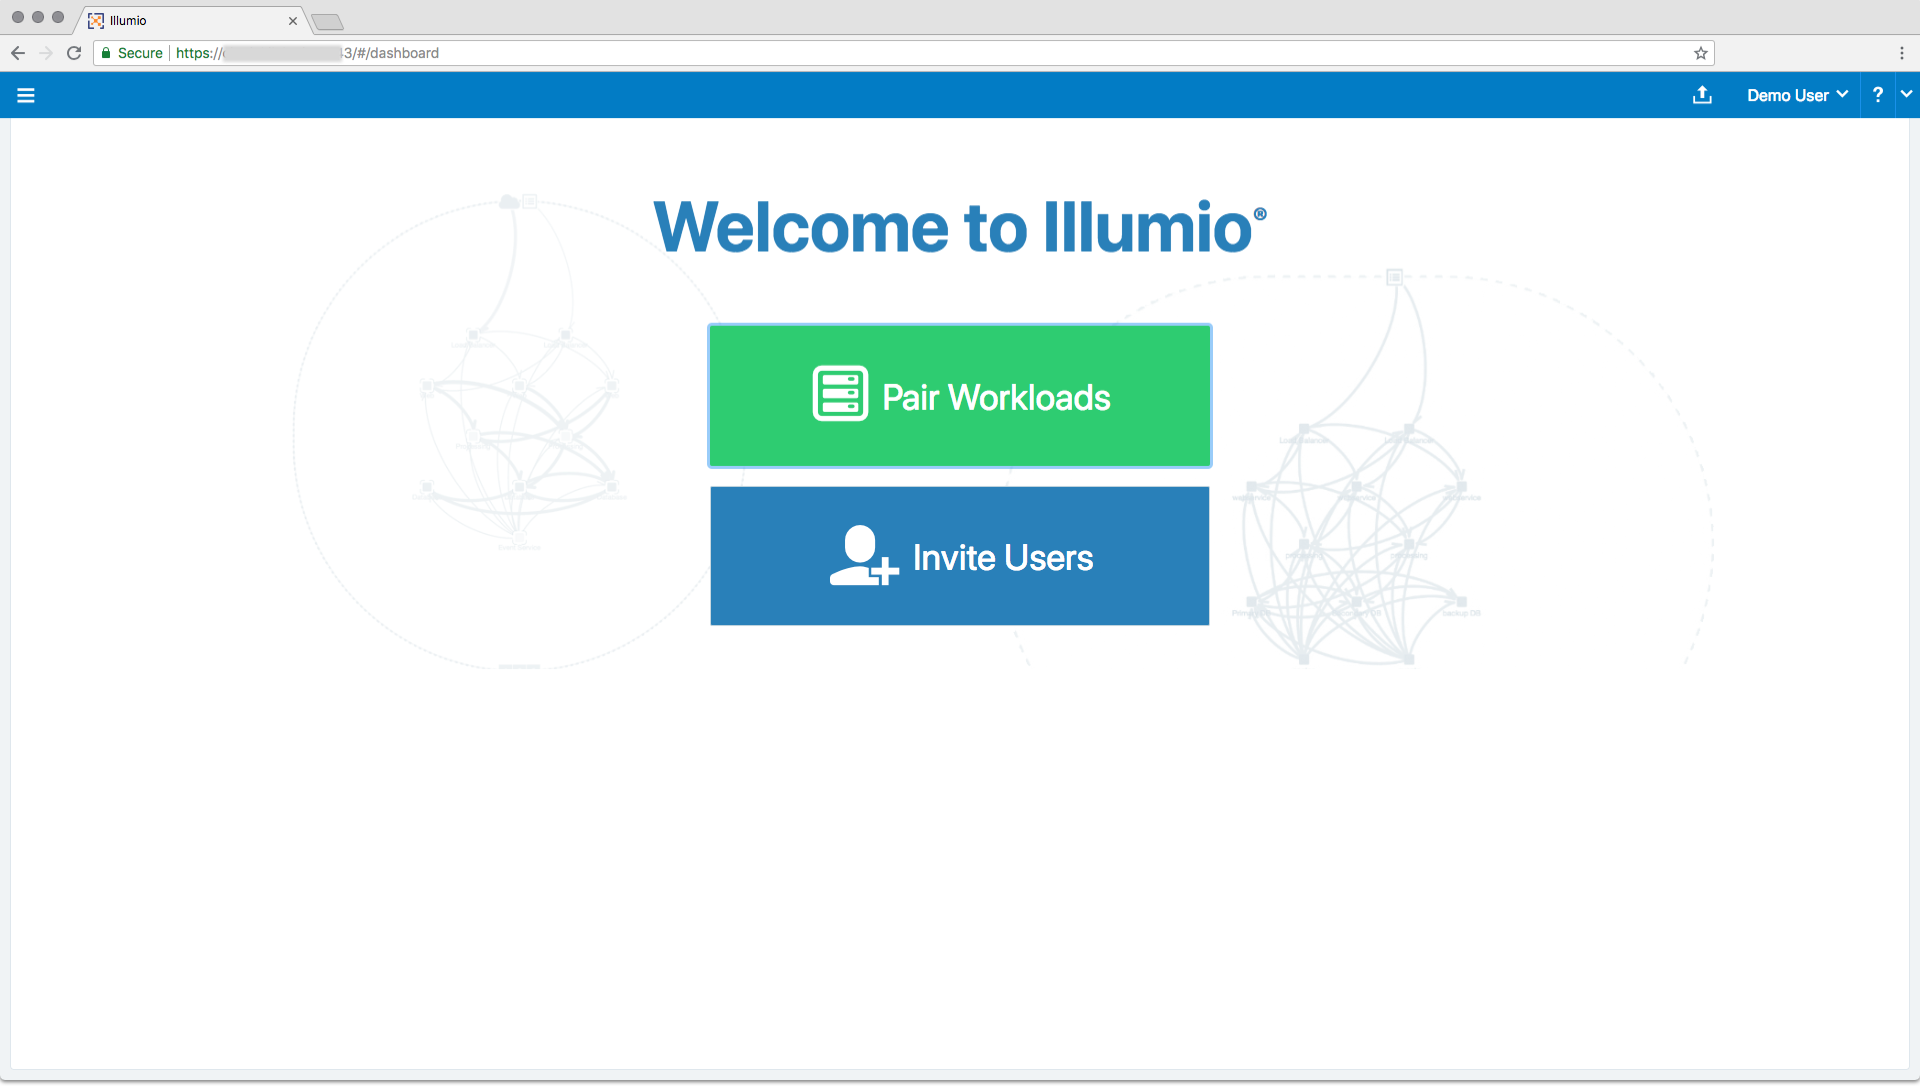
When you log into the Illumio web console the first time, you see the Welcome page, which directs you to pair workloads or add Illumio users.
The next time you log into the web console, the Illumination map appears.
Generate a pairing key and script.
The PCE web console provides a default pairing profile containing a pairing key and pairing script so that you can begin pairing workloads. You have the option to create a new pairing profile if you want to configure your own workload pairing settings. This lesson directs you to use the default pairing profile.
You can configure a pairing profile so that it assigns labels to the workloads you pair. The default pairing profile does not contain any labels. You will learn how to apply labels to workloads in a later lesson during this tutorial. The policy state is set to Build mode in the default pairing profile. You will learn about policy states in a later lesson.
The default pairing profile provides unlimited pairing for an unlimited time. You can change this behavior by editing the pairing limit and time. In this lesson, you will use the default settings.
If this is your first time logging in, click Pair Workloads in the Welcome page. Otherwise, from the left navigation menu, select Workloads. The Workloads page appears.
Select Add → Pair Workload with Pairing Profile.
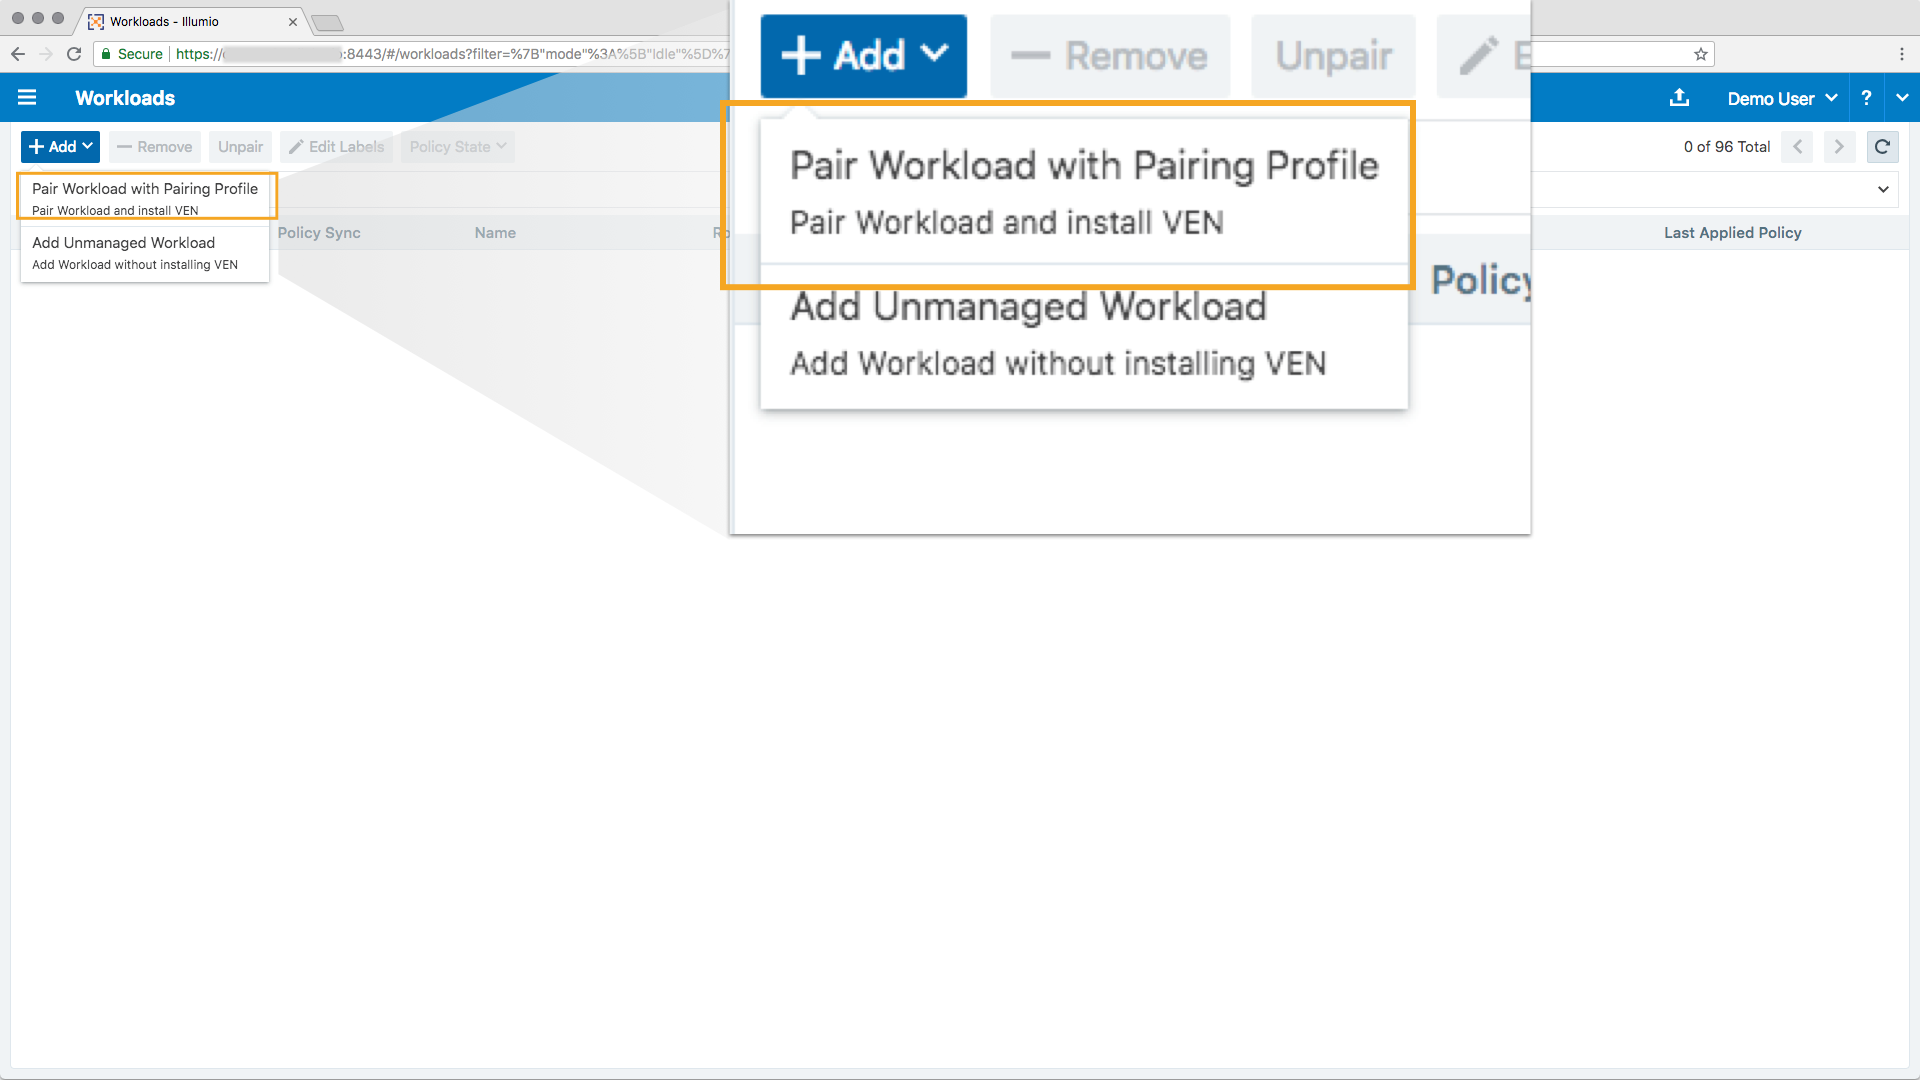
The Pairing Profile page appears with a generated pairing key and scripts for Windows and Linux workloads.
Pair a Linux workload.
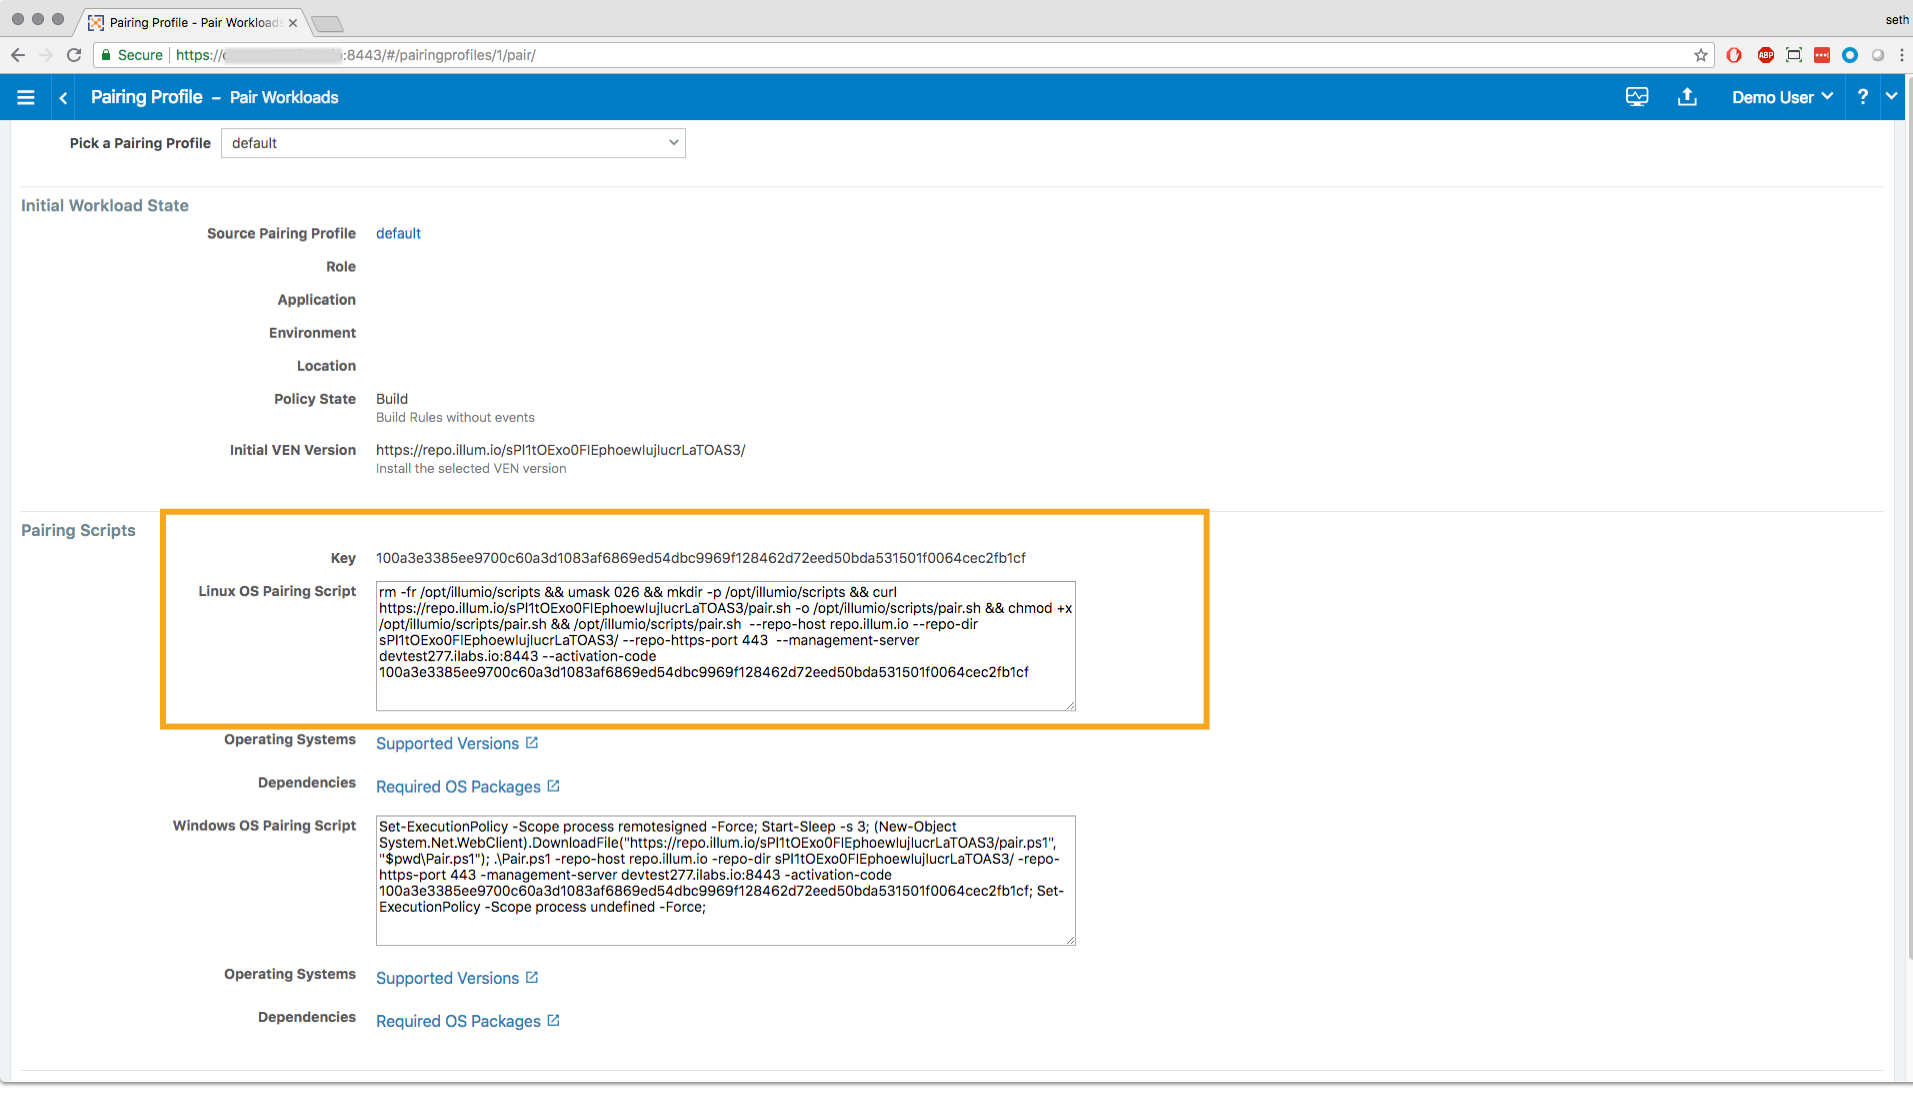
On the Pairing Profile page, you see only one pairing profile named “default” if this is your first time pairing.
In the Pairing Script section, copy the Linux pairing script.
SSH into the Linux workload you want to pair. Root access on the workload is required for installation of the Linux VEN.
In the shell window on the Linux workload, paste the script you copied from the pairing profile and run it.
The workload starts the pairing process. As the pairing script runs, you will see success messages appear.
Wait until you see the message “Workload has been SUCCESSFULLY paired with Illumio,” which means your VEN pairing is complete.
Pair a Windows workload.
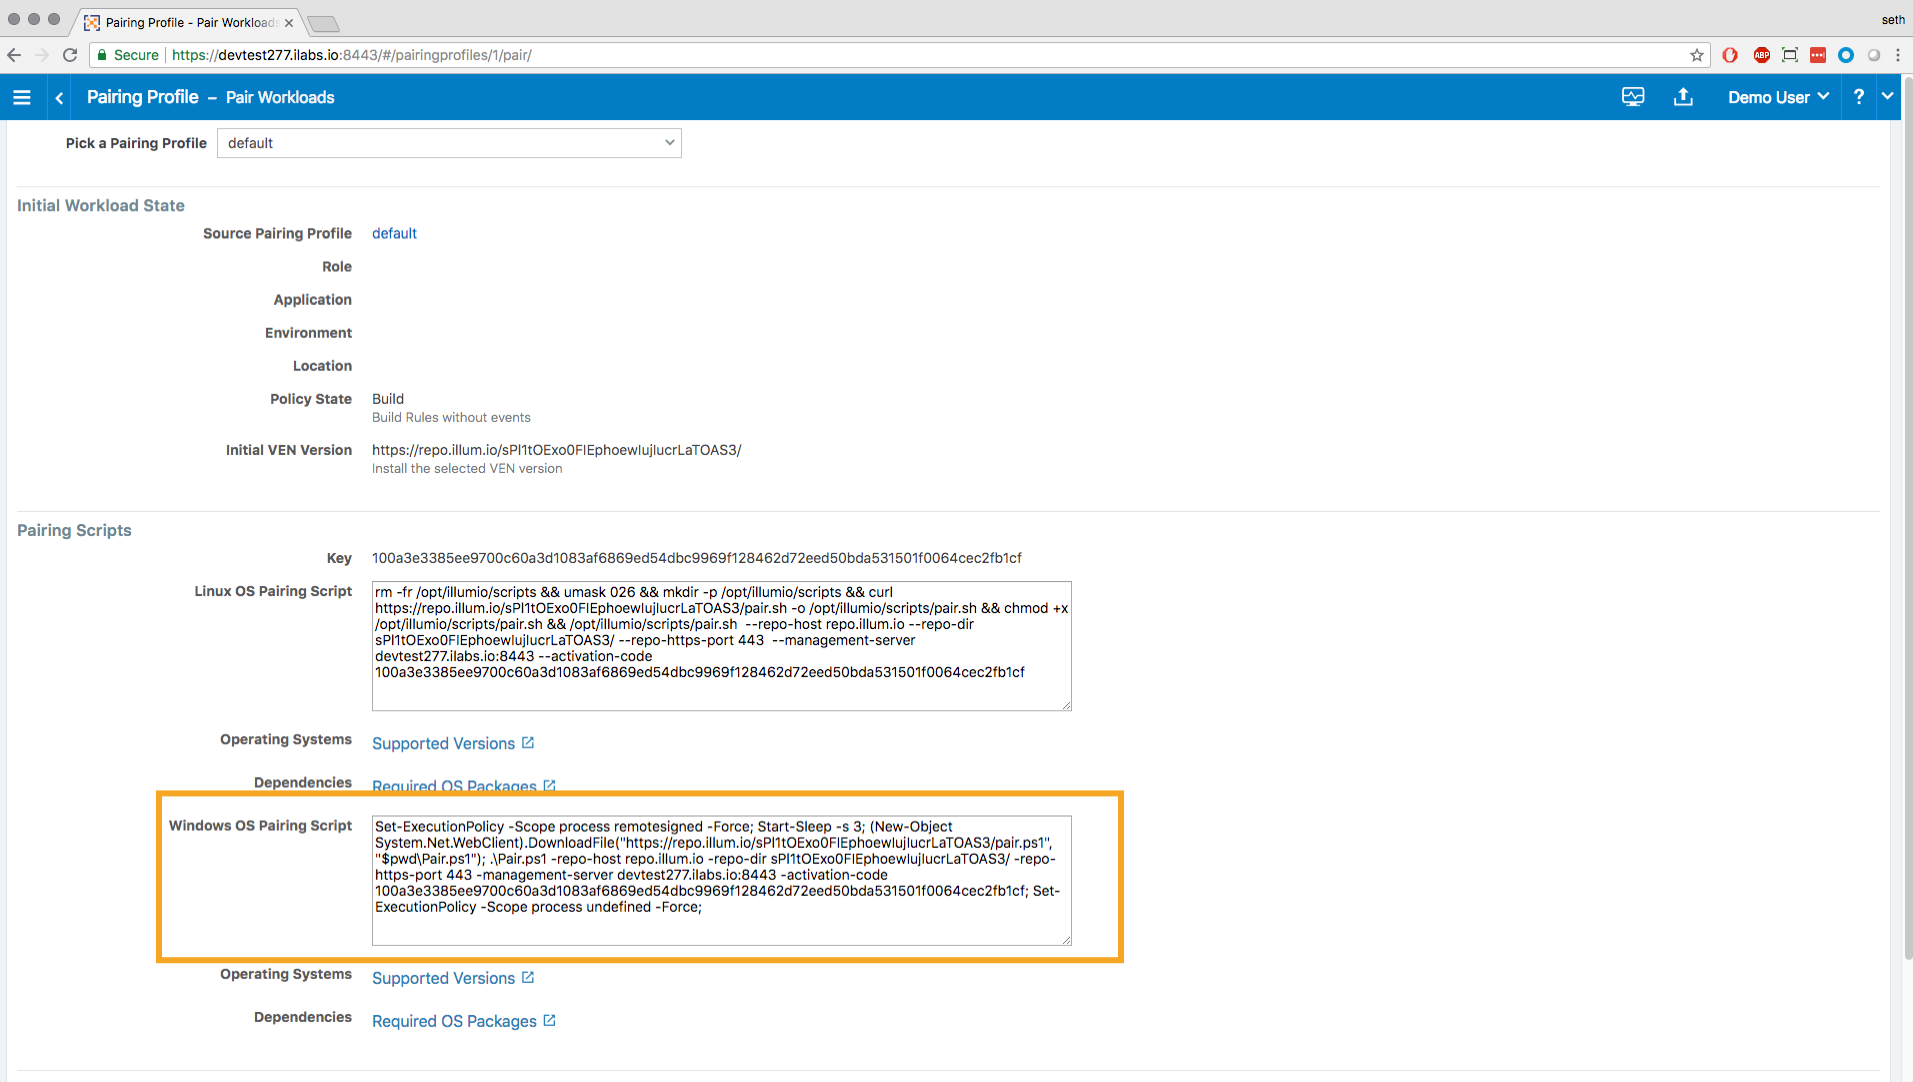
On the Pairing Profile page, you see only one pairing profile named “default” if this is your first time pairing.
In the Pairing Script section, copy the Windows pairing script.
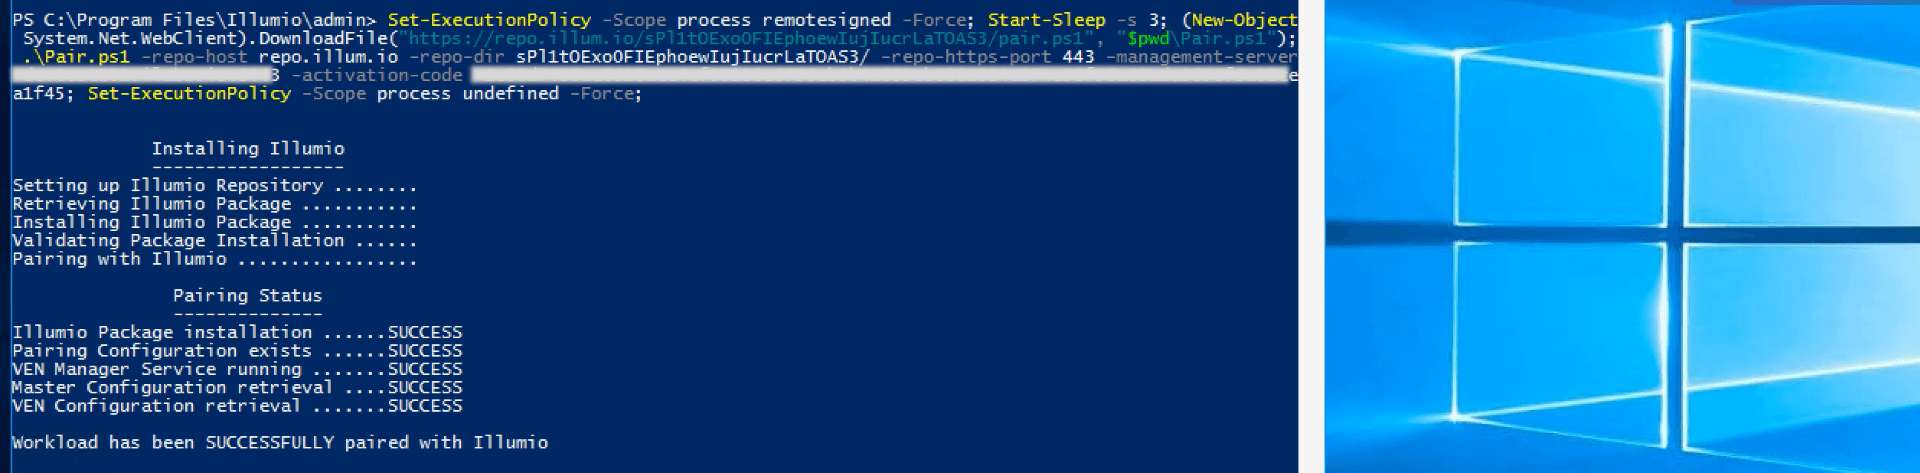
On the Windows workload you want to pair, open the Windows PowerShell as an Administrator user.
Paste the pairing script you copied into the PowerShell command prompt and run it.
The workload starts the pairing process. As the pairing script runs, you will see success messages appear.
Wait until you see the message “Workload has been SUCCESSFULLY paired with Illumio,” which means your VEN pairing is complete.
Note
When the Illumio VEN is being installed on a Windows workload, all internet group management protocol IGMP traffic will be blocked. Windows servers typically use IGMP for things like Windows internet naming service (WINS), Windows Deployment Services (WDS), IGMP Router Proxy Mode, or network load balancing (NLB) in multicast mode.
Repeat pairing procedure.
You can pair as many workloads as you have in your application. The default pairing profile provides unlimited pairing for an unlimited time. You can change this behavior by editing the pairing limit and time.
Validate workload pairing.
After the workload is paired, you can validate that the workload is managed by Illumio.
From the left navigation menu, select Workloads.
If necessary, click the refresh icon to load the workload you just paired.
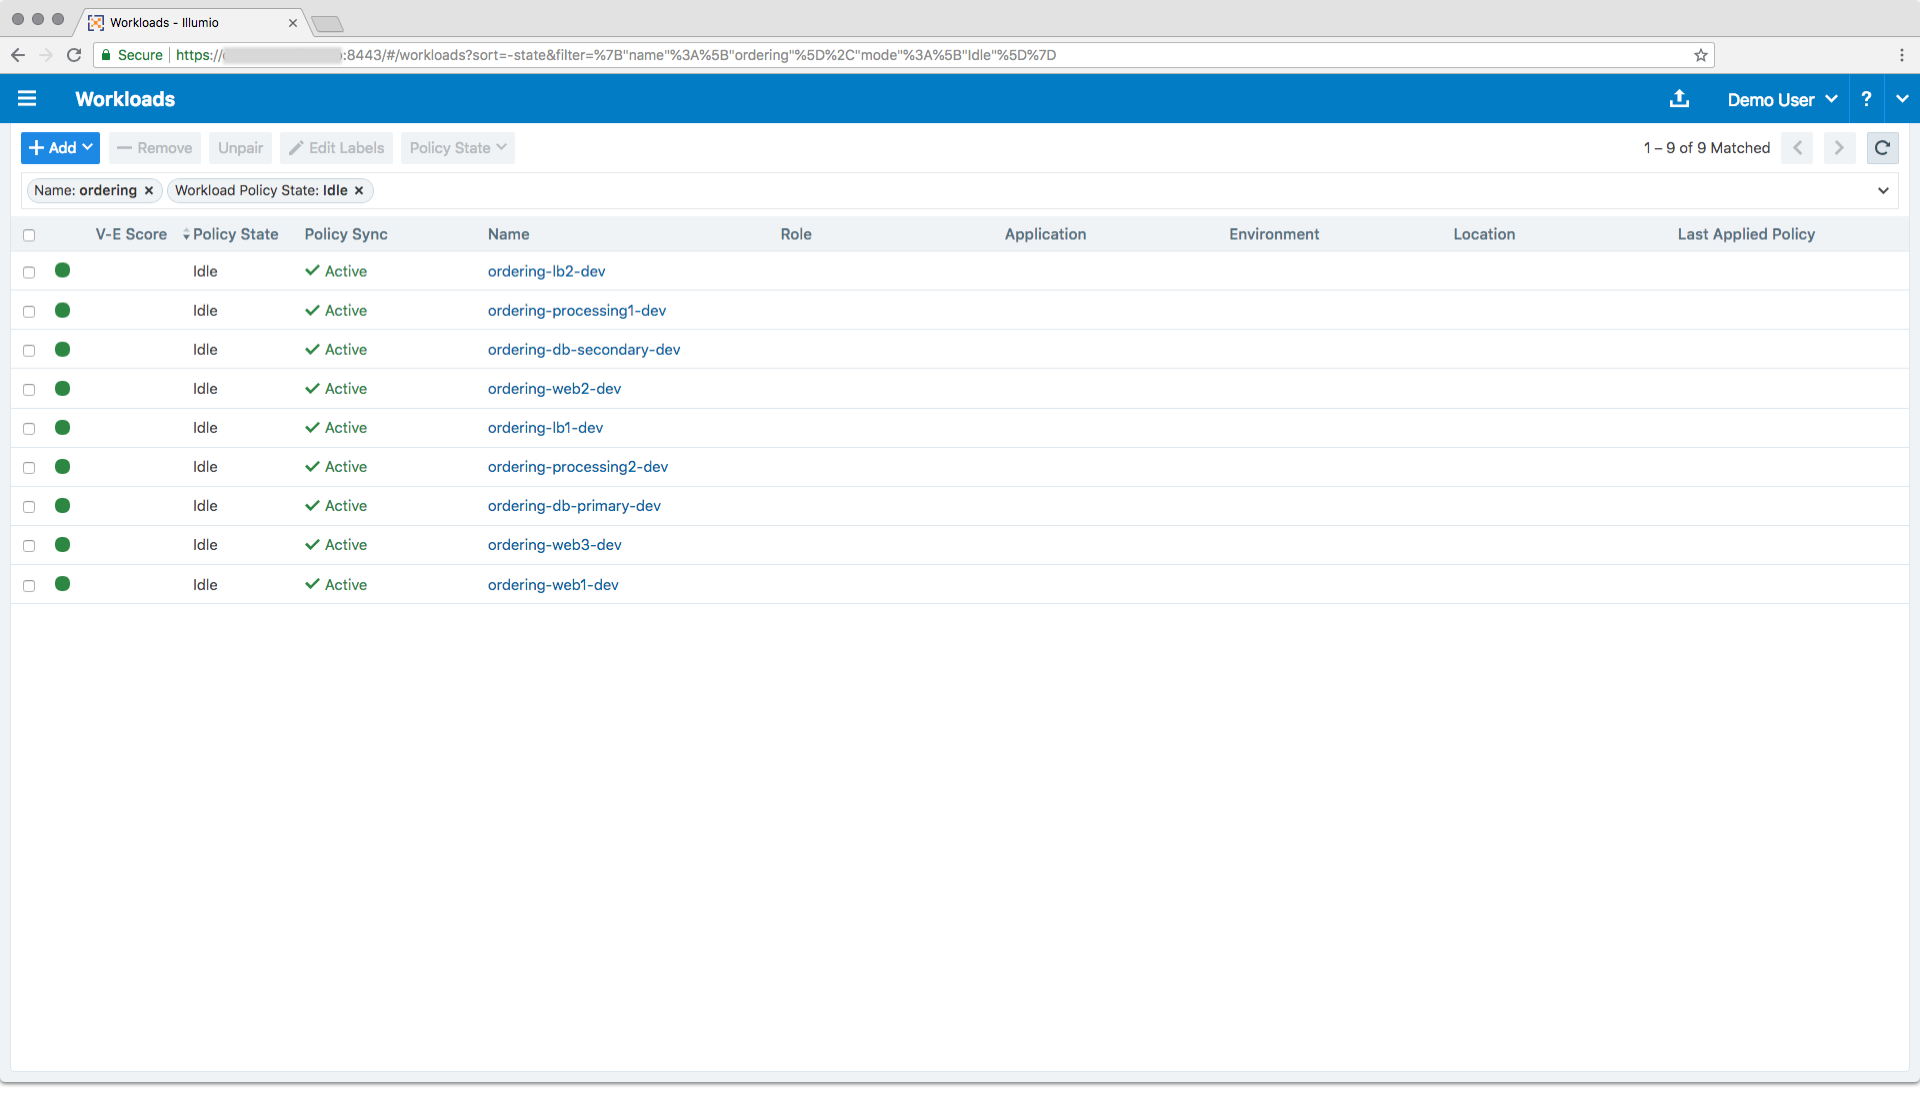
Note
When using the default pairing profile in the pairing process, the Label columns are blank as shown above.
Additionally, you can view the workloads in the Illumination map. Select Illumination from the left navigation menu.
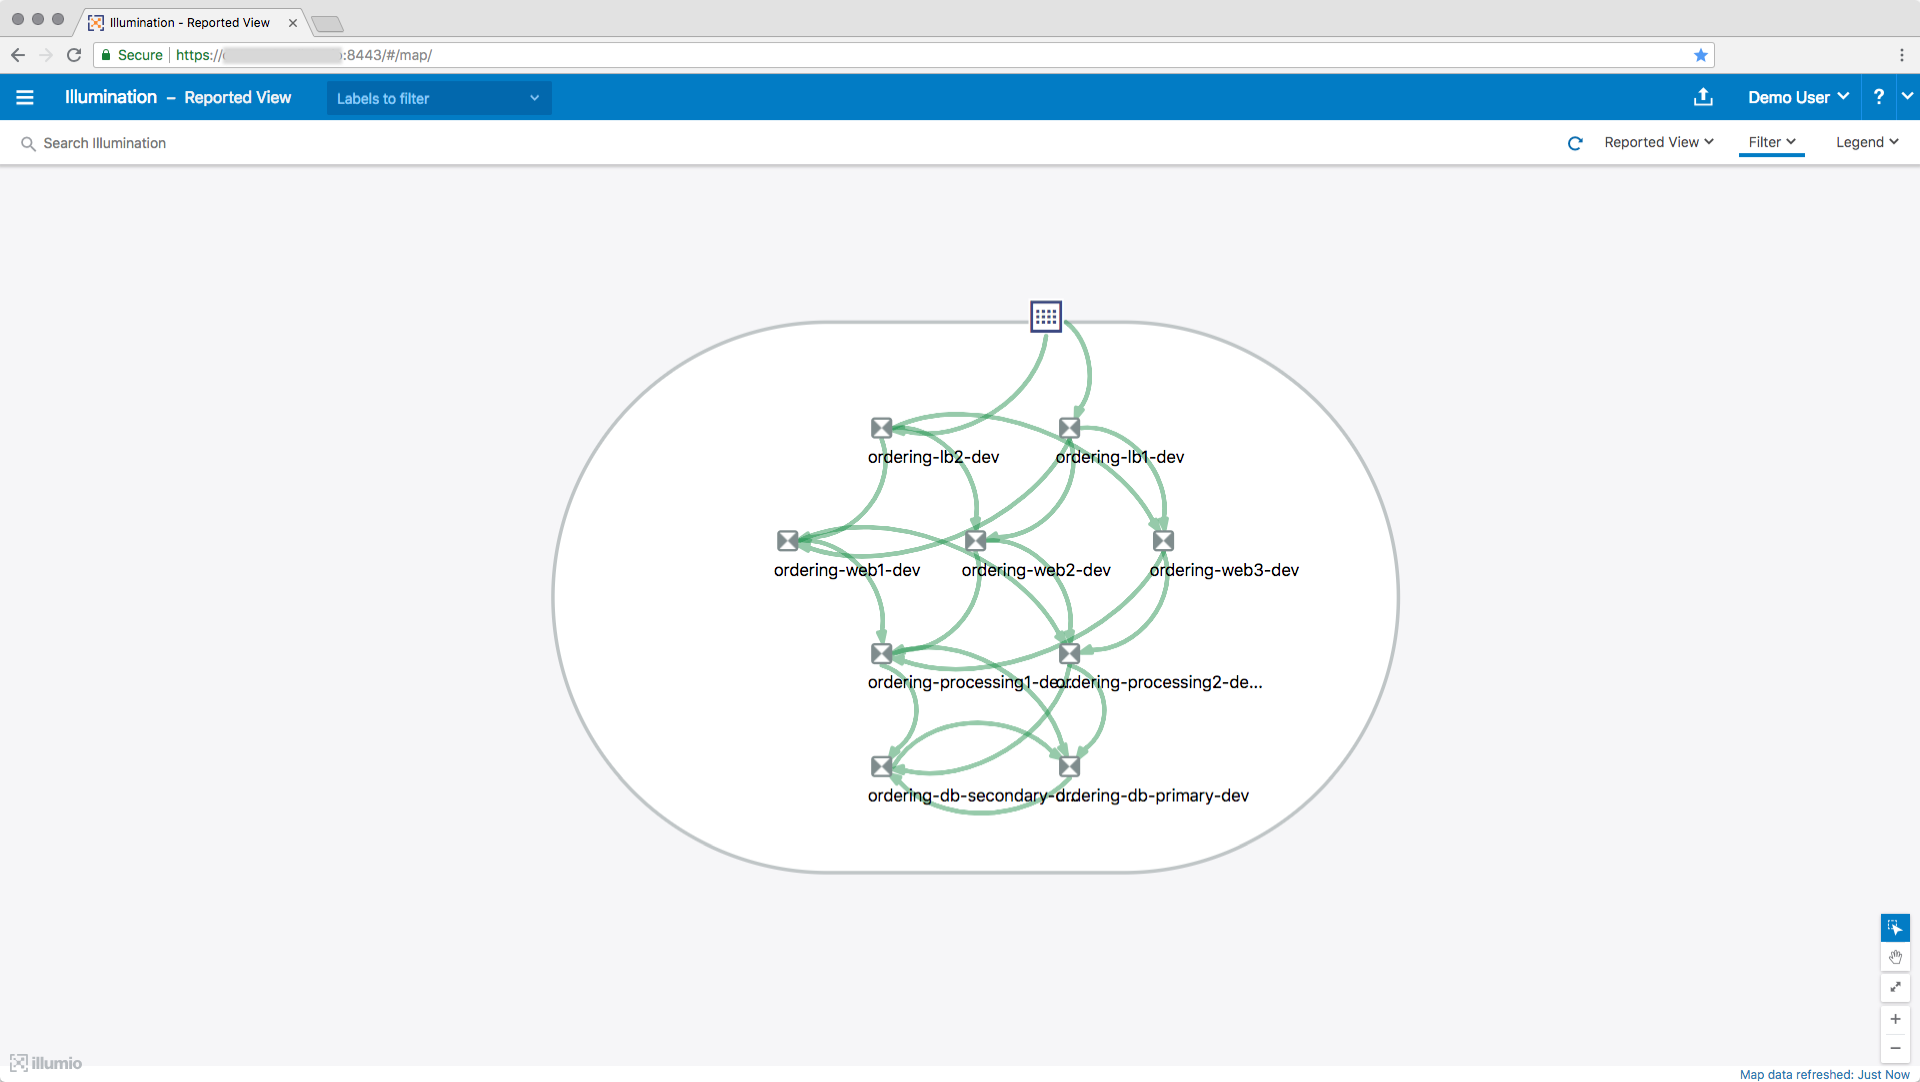
That’s it! Pair as many workloads as you like.
You will learn all about working with the Illumination map in one of the next lessons.