Manage OpenShift Namespaces
After activating the VENs on the OpenShift cluster nodes and Kubelink is in sync with the PCE, you can start managing the OpenShift projects (or namespaces). By default, all namespaces are unmanaged, which means Illumio Core does not apply any inbound or outbound controls to the pods within those namespaces. Any pods or services within unmanaged namespaces do not show up in the PCE inventory and Illumination.
After an Illumio Core PCE administrator changes an OpenShift namespace from unmanaged to managed, the pods and services will show up in Illumination and inherit the labels of each OpenShift namespace. The pods are represented in Illumio Core as Container Workloads. If there are frontend services, then Illumio Core represents each one as a Virtual Service.
The following section describes how to change a namespace from unmanaged to managed.
Using Annotations
For Deployment Configurations (Pods)
Open the OpenShift Web Console.
Navigate to the desired deployment/daemon set and click Edit YAML.
Inside the configuration YAML navigate to
spec: > template: > metadata: > annotations:. Ifannotations:does not exist, then create anannotations:section underneathmetadata:.The following Illumio label key fields which can go under the the
annotations:section.com.illumio.role:com.illumio.app:com.illumio.env:com.illumio.loc:
Fill in the appropriate labels.
Save the file and exit.
For Service Configurations (Services)
Open the OpenShift Web Console.
Navigate to the desired service and click Edit YAML.
Inside the configuration YAML navigate to
metadata: > annotations:. Ifannotations:does not exist, then create anannotations:section underneathmetadata:.The following Illumio label key fields which can go under the the
annotations:section.com.illumio.role:com.illumio.app:com.illumio.env:com.illumio.loc:
Fill in the appropriate labels.
Save the file and exit.
When using the annotations method, you may need to restart the pods or service after saving the changes to the YAML for the labels to get assigned.
Below are examples of pods and namespaces which use label assignments via either Container Workload Profiles or a mix of Container Workload Profiles plus annotation insertion.
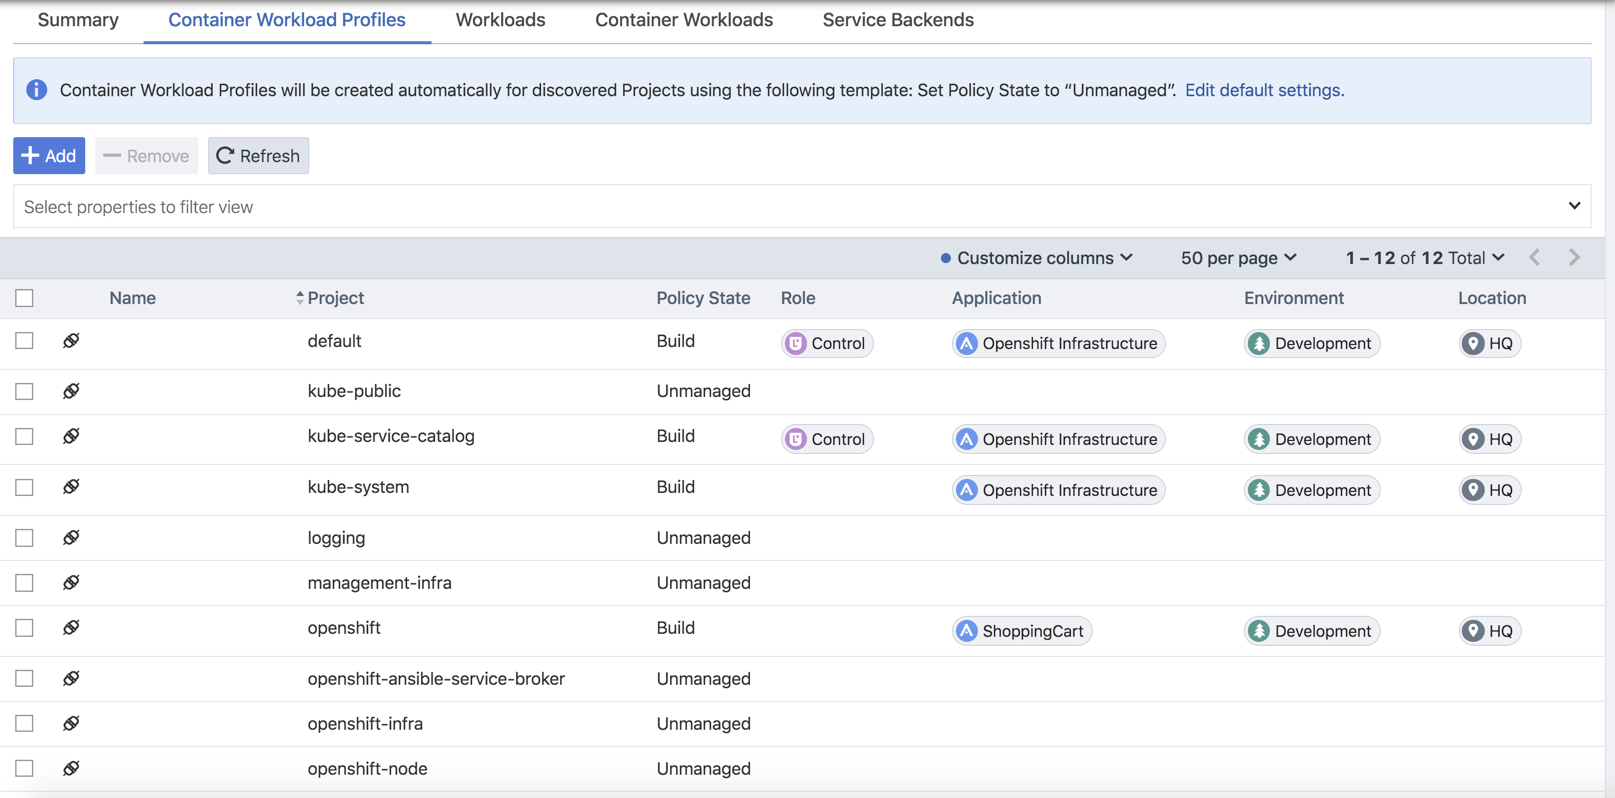
This example changes unmanaged namespaces of Openshift infrastructure services (such as apiserver, registry-console, etc.) into managed namespaces.
Things to notice about the example shown below:
There are Openshift infrastructure services, or control plane pods, that exist within namespaces like
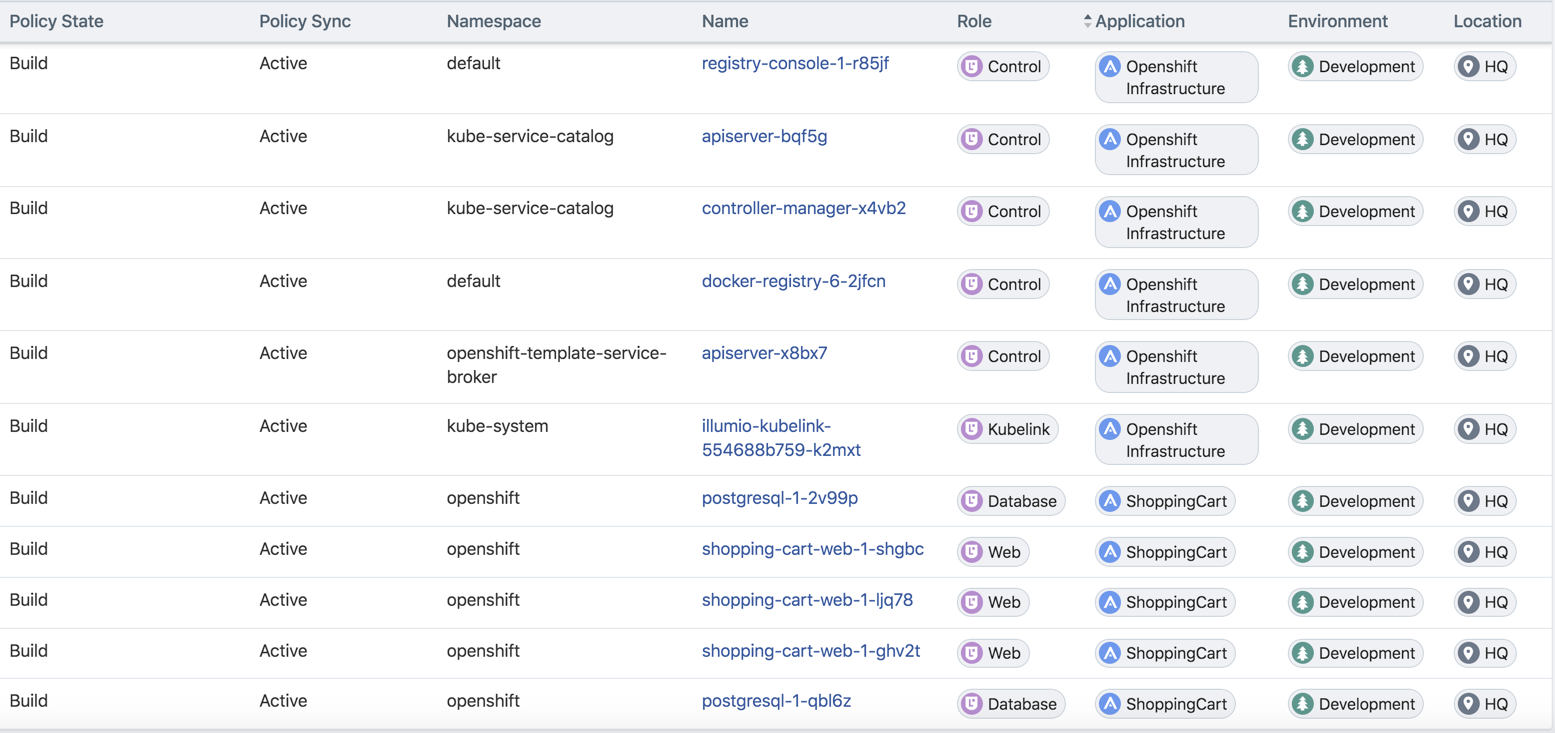
default,kube-service-catalog, etc. They will inherit all four R-A-E-L labels, including a Role label called "Control", from what has been configured in the Container Workload Profile(s). The Application, Environment, and Location labels are the same as the Openshift cluster nodes. This will minimize the complexity of writing policy which is mentioned later in this guide.The Kubelink pod exists in the kube-system. This pod will get the same application, environment, and location labels as the Openshift cluster nodes. The role label is left blank and will be specified later using the annotations. These labels are assigned to the Kubelink pod through the Container Workload Profile associated to the kube-system namespace.
There is a namespace called
openshiftwhich contains two different deployments or a two-tier shopping cart application (Web and Database). To achieve tier-to-tier segmentation across the application they would need different Role labels; therefore, a Role label will be inserted into the annotations of each deployment configuration.
Snippet of illumio-kubelink deployment configuration file shown here. Role label of "Kubelink" inserted under spec: > template: > metadata: > annotations: section.
illumio-kubelink-openshift.yml
apiVersion: apps/v2
kind: Deployment
metadata:
  name: illumio-kubelink
  namespace: kube-system
spec:
  replicas: 1
  selector:
    matchLabels:
      app: illumio-kubelink
  template:
    metadata:
      labels:
        app: illumio-kubelink
      annotations:
        com.illumio.role: Kubelink
Snippet of the Shopping-Cart Web deployment configuration file shown here. Role label of "Web" inserted under spec: > template: > metadata: > annotations: section.
shopping-cart-web.yml
spec:
  replicas: 3
  revisionHistoryLimit: 10
  selector:
    name: shopping-cart-web
  strategy:
    activeDeadlineSeconds: 21600
    resources: {}
    rollingParams:
      intervalSeconds: 1
      maxSurge: 25%
      maxUnavailable: 25%
      timeoutSeconds: 600
      updatePeriodSeconds: 1
    type: Rolling
  template:
    metadata:
      annotations:
        com.illumio.role: Web
        openshift.io/generated-by: OpenShiftNewApp
      creationTimestamp: null
      labels:
Snippet of the Shopping-Cart Database deployment configuration file shown here. Role label of "Database" inserted under spec: > template: > metadata: > annotations: section.
shopping-cart-db.yml
spec:
  replicas: 2
  revisionHistoryLimit: 10
  selector:
    name: postgresql
  strategy:
    activeDeadlineSeconds: 21600
    recreateParams:
      timeoutSeconds: 600
    resources: {}
    type: Recreate
  template:
    metadata:
      annotations:
        com.illumio.role: Database
        openshift.io/generated-by: OpenShiftNewApp
      creationTimestamp: null
      labels:
Below is the final outcome of the label assignment from the example.
Daemonsets and Replicasets
The steps above apply only to services in OpenShift which are bound to deployment or deploymentconfig. This is due to the Kubelink's dependency on pod hash templates which daemonset and replicaset configurations do not have. If you discover pods derived from daemonset or replicaset configurations and also discover services bound to those pods, then Kubelink will not automatically bind the virtual service and service backends for the PCE. The absence of this binding will create limitations with Illumio policies written against the virtual service. To get around this limitation for daemonsets and replicasets follow the steps below.
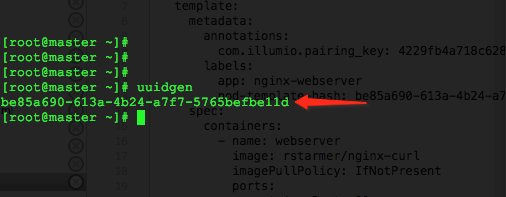
Log into the CLI of any OpenShift node and generate a random uuid using the
uuidgencommand.Copy the output of the
uuidgencommand.In the OpenShift web console, navigate to the configuration of the daemonset or replicaset and edit the YAML file.
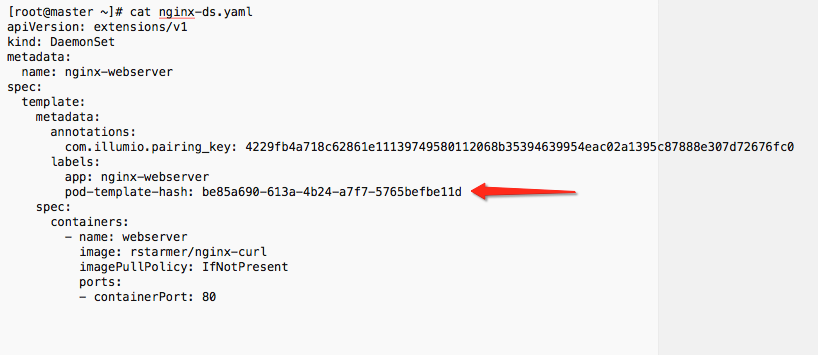
Find the
spec: > template: > metadata: > labels:field in the YAML and create field calledpod-template-hash:under thelabels:section.Paste the new uuid to the value of the
pod-template-hash:field.Save the changes.
Repeat steps 1 through 6 for each daemonset or replicaset configuration.
See screenshots below for DaemonSet or ReplicaSet reference.