Onboard the Check Point Connector with the Log Exporter
To ingest Check Point firewall logs, you must first onboard the Check Point Connector using the Log Exporter.
Important
Do not add the API Connector until after you have successfully onboarded the Check Point integration using the Log Exporter.
Navigate to the Connectors page and click + Add on the Check Point Connector tile.
On the Check Point Connector page, click + Add Log Exporter.
On the Add Log Exporter page, under Upload Certificate Signing Request (CSR), upload your CSR file.
Important
You must have uploaded your CSR file to the Check Point Management Server to allow the mTLS connection. See Prerequisites for the Illumio and Check Point Integration and Utilizing Mutual TLS Authentication with Log Exporter.
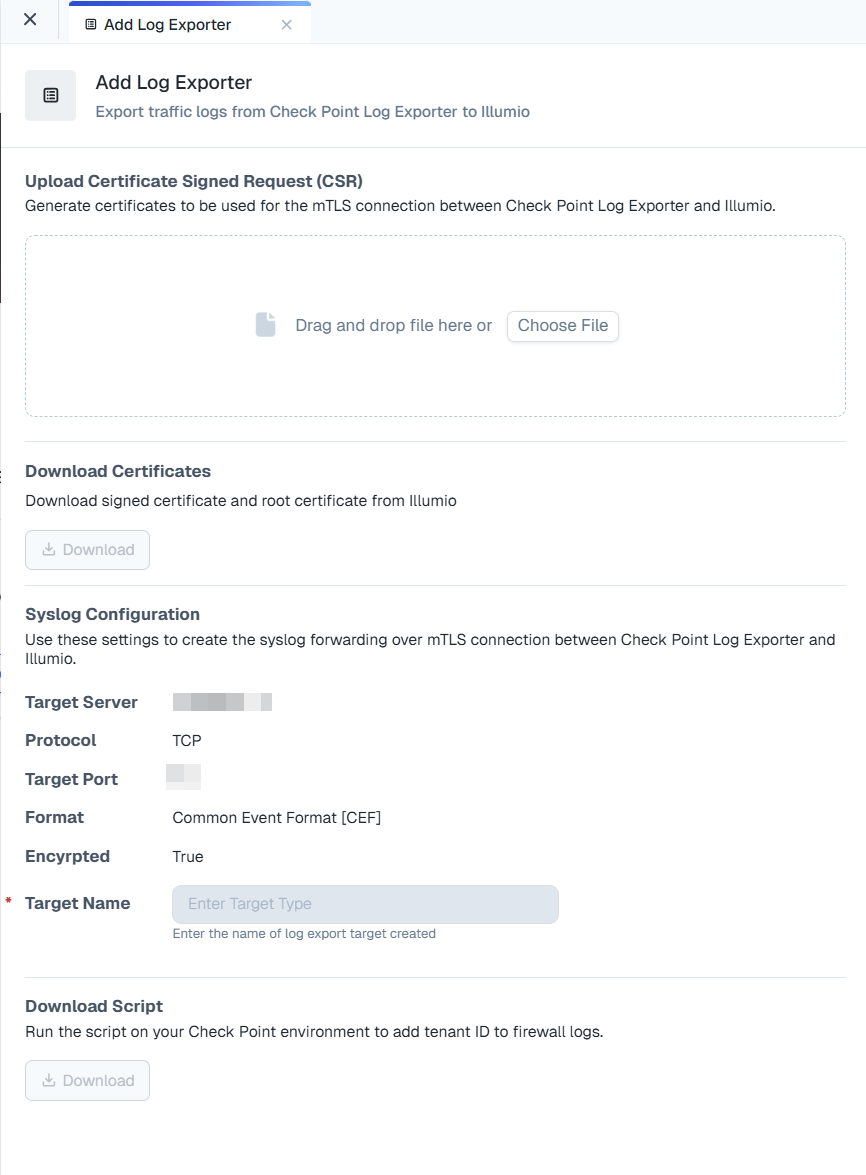
After the CSR has been successfully uploaded, click Download to download the signed client certificate and the CA root certificate.
Under Syslog Configuration, enter the target name in the Target Name field.
Under Download Script, click Download and run the script in your Check Point environment. This script adds the tenant ID to your firewall logs.
Click Save.
The Log Exporter Added status message displays and the Log Exporter appears as Active in the Log Exporter table.
Add Multiple Log Exporters
You can add multiple log exporters. This can be useful when you have multiple firewalls that are managed in different domains, because it allows each firewall to establish a connection to Illumio Insights.
Edit the Log Exporter
To edit Log Exporter information, on the Log Exporter page, click the edit icon at the end of the row for the Log Exporter whose information you want to edit.
You can upload a different CSR if you need to. If you upload a new CSR, you'll get a new certificate to download.