Setting Up and Using Illumio Core
This section includes the procedures for setting up and using the Illumio Illumio Core.
For a recommended workflow of tasks, see Typical Workflow.
Add a Managed Tenant
Note
You must be a Global Organization Owner to add a customer tenant.
When you add a tenant:
An Illumio organization is created automatically for your customer.
An audit event is generated automatically. You can view these events from your Illumio organization in Troubleshooting > Events. The user ID of the logged-in MSSP user appears on the Events page in the Generated By field.
Log in to your Illumio Core organization.
Click Add, and then select the type of tenant you want to add:
Core Tenant
Express Tenant
Edge Tenant
Enter details:
Name: Enter a descriptive name for the new tenant.
Customer Domain: Enter a globally unique name in the form of a domain (example.com).
Company URL: Enter the customer's company website URL.
Country
Address lines 1 & 2
City
State/Province/Territory
Zip Code/Postal Code
Click Save.
Remove a Managed Tenant
Note
You must be a Global Organization Owner to add a customer tenant.
When you remove a tenant:
The tenant is deleted and can't be restored. (The ability to restore a deleted tenant is planned for a future release.)
The active VEN count for the tenant is reduced to zero.
An audit event is generated automatically. You can view these events from your Illumio organization in Troubleshooting > Events. The user ID of the logged-in MS/MSSP user appears on the Events page in the Generated By field.
To remove a tenant:
Log in to your Illumio Core organization.
Select the tenant you want to remove.
Click Remove.
Access Your Managed Tenants
Note
You must be a Global Organization Owner to add a customer tenant.
Log in to your Illumio Core organization.
The Illumio Core Home screen lists up to 500 of the tenants you're currently managing.
In the list, find the tenant that you want to access, and then click Manage Tenant for that tenant.
You're redirected to the customer's tenant in the Illumio product where it resides (Core, Xpress, Edge).
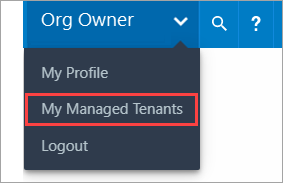
To return to your Illumio Core organization, click the upper right-hand corner of the console, click your username, and then select My Managed Tenants from the drop-down menu.
For Illumio product details, see the links in the following table:
Customize the Managed Tenants List
You can change the appearance of the managed tenants list in several ways:
Refresh the list
Click to update the number of VENs in the list.
Re-order the list
To reorder the Managed Tenants list according to the contents of a given column, click the appropriate column heading. For example, if you want to order the list by Illumio product, click the Product column heading.
Add or remove columns and reset to default sorting
By default, all columns appear in the list, sorted by tenant name.
To add or remove columns from the Managed Tenants list, click Customize Columns and select the columns you want to appear.
To reset the entire list page to the default order by Name, click Reset.
View user activity
You can view a list of user activity through the Access Management menu.
Log in to your Illumio Core organization.
Click the Global menu in the upper left corner .
Select Access Management and then select User Activity. Session details for each user appear.
Click a user to view the role assigned to that user. The User Activity page also displays users who were removed and are offline.