Configuring Okta as an IdP
Follow these steps to configure Okta as an external identity provider (IdP) via OIDC in your llumio Console instance. Okta can be used as an IdP for both local users and external groups in Illumio Console.
Log into your Okta account.
From the left navigation pane, click Applications > Applications.
At the Applications page, click Create App Integration.
In the Create a new app integration popup:
For Sign-in method, choose OIDC - OpenID Connection.
For Application type, choose Single-Page Application.
Click Next.
Under the Login section, click Add URI, and enter the Sign-in redirect URI as
https://console.illum.io/*, making sure to append the asterisk wildcard.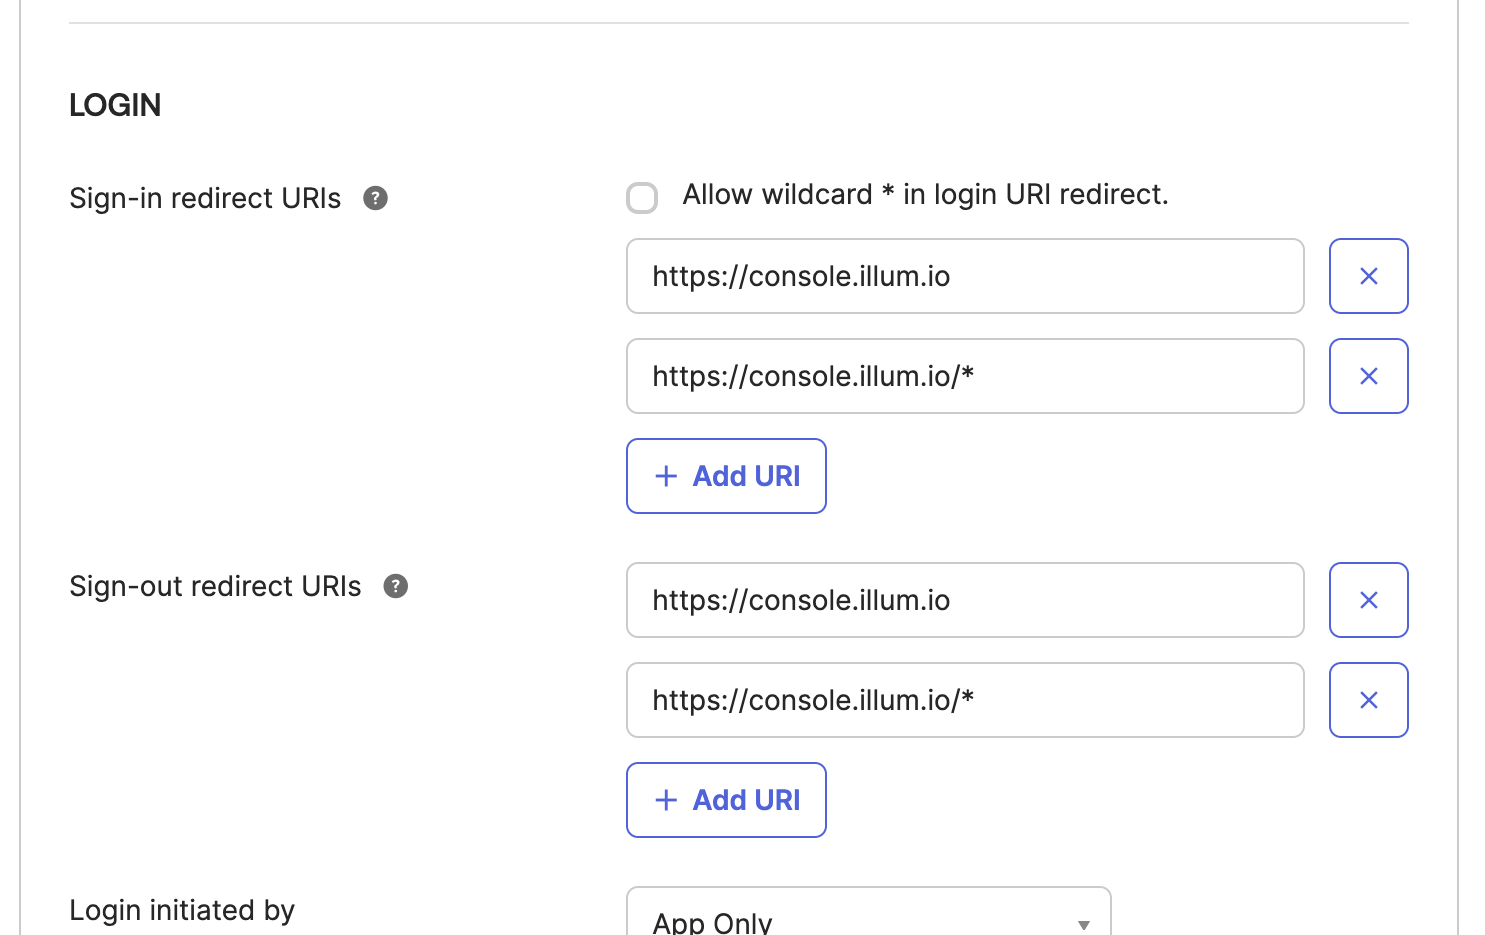
This value is used by Okta to allow a browser redirect from the Illumio application to Okta.
Select your Granted Access.
Click Save.
Scroll to the bottom of the page, and under the Assignments section, disable Federation Broker Mode by clearing the checkbox.
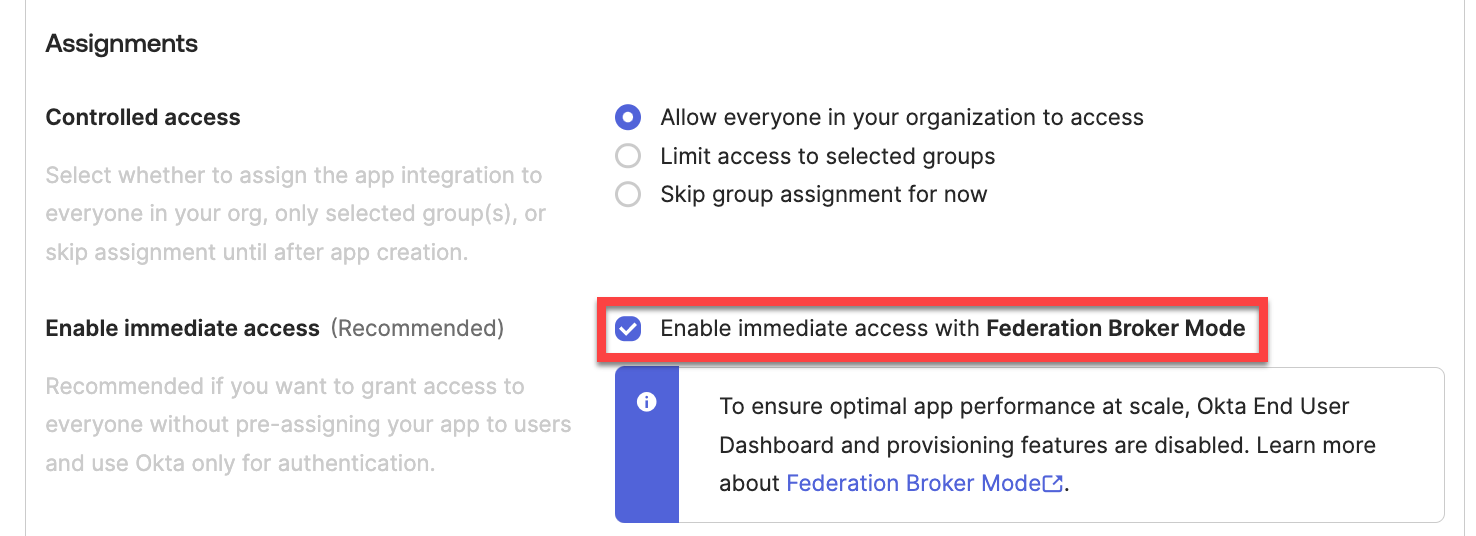
Click Continue at the Disable Federation Broker Mode? confirmation popup.
Click Save at the bottom of the page to save your authorization application.
On the details page for your new application, the General tab now shows the Client ID and Issuer ID values for the application. The Issuer URI consists of the Issuer ID with "
https://" added in front of it. In the example shown below, the Issuer URI is https://trial-8581813.okta.com.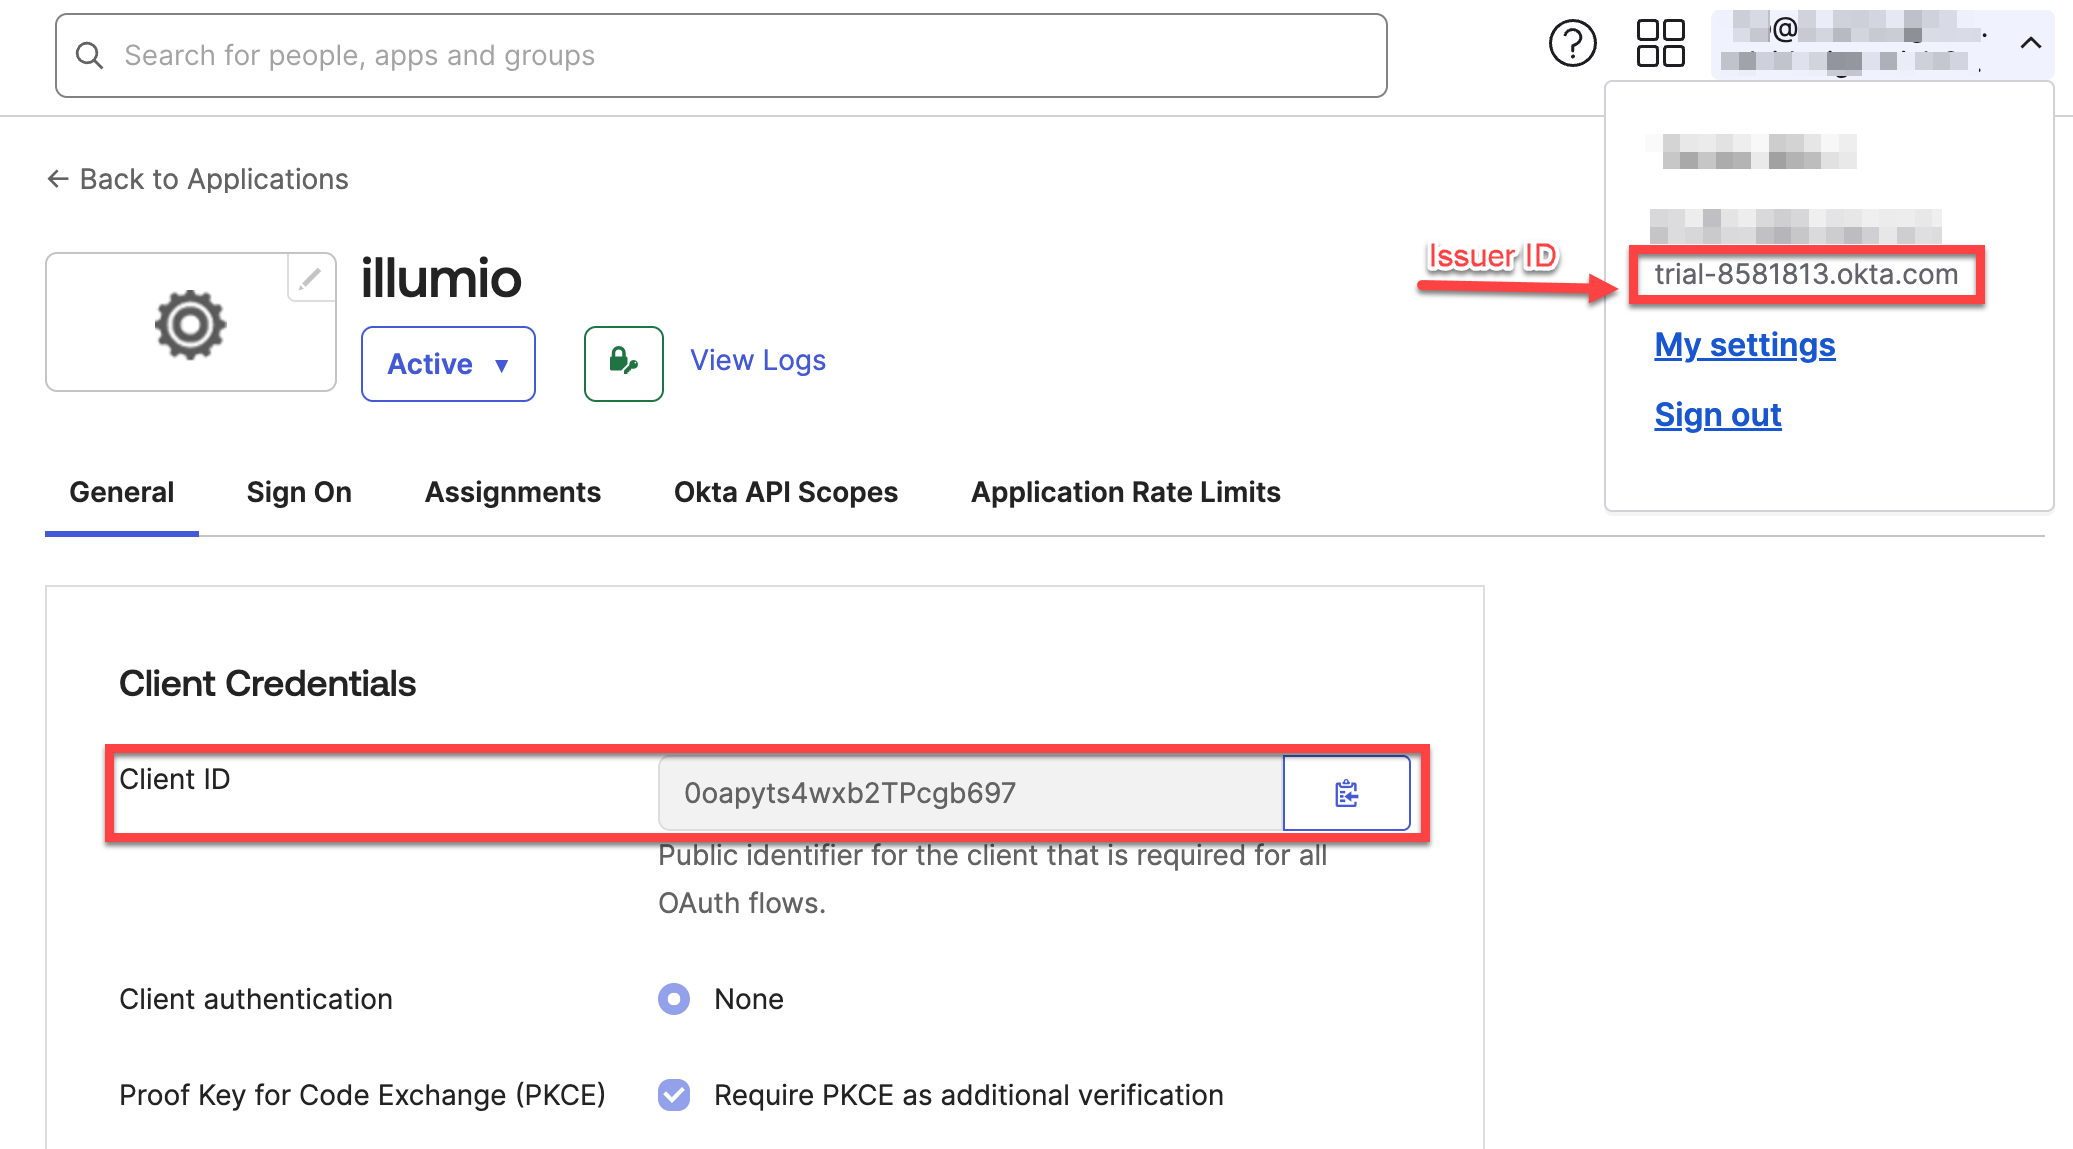
Copy the Client ID and Issuer URI values because you must enter them when you finish configuring the authentication at the Illumio Console OIDC page (Access > Authentication). See Authenticating Users with OIDC. You will also use the Client ID when you update the Authorization Server for this application, later in this procedure.
Additional information about your OIDC Application (or assigning users to your Okta IdP App for Illumio Console)
After creating and configuring an Okta App to serve as an IdP for your Illumio Console instance, you can assign People and Groups to the app. These appear in Illumio Console as external users and external groups, respectively.
At your Okta application details page (Applications > Applications), click Assignments.
List people to add. Either click People under the Filters heading , or click the Search field, Choose People from pull-down menu and enter a specific name in Search.
Assign the Everyone group to your Okta app.
You must assign the Everyone group, to ensure the People type of Individual can properly access the application, and therefore access the Illumio Console it is configured to.
Update Authorization Server
In left navigation pane, go to Security > API.
Click Claims tab, to add the following claims to the ID token:
Add groupNames claim, with value type Groups.
Add firstName claim, with value type Expression, and value user.firstName.
Add lastName claim, with value type Expression, and value user.lastName.
Add a Trusted Origin
In left navigation pane, go to Security > API.
Click Trusted Origins tab.
Under Filters, choose Redirect.
At the Add Origin popup, complete the following entries:
Origin Name -- of your Okta app
Origin URL -- https//www.illium.io
Cross-Origin Resource Sharing (CORS) -- Enable
Redirect -- Enable
Click Save.