Using Okta to Add External Groups
Prerequisites: Create an account on Okta, and create an authorization application there for your Illumio Console instance. For details, see Configuring Okta as an IdP.
Note
When you create your Okta authorization application for your Illumio Console instance, make sure to copy and save the Client ID and Issuer URL values that are generated for your Okta application.
When you add an authorization server to your Okta application, make sure to add the following claims to its ID token (at Security > API > Add Authorization Server under the Claims tab):
groupNames (with value type
Filterand value groups)firstName (with value type
Expression, and valueuser.firstName)lastName (with value type
Expression, and valueuser.lastName)
If you want to send groups from Active Directory (AD) or both Okta and AD groups in the groupNames claim, see the Okta documentation about using customized tokens with a groups claim. In this case, change the groupNames claim to the Expression type. Use the following expression as an example and adjust it to your organization's needs:
Arrays.isEmpty(Groups.startsWith("active_directory","",50)) ? Groups.startsWith("OKTA","",50) : Arrays.isEmpty(Groups.startsWith("OKTA","",50)) ? Groups.startsWith("active_directory","",50) : Arrays.flatten(Groups.startsWith("active_directory","",50),Groups.startsWith("OKTA","",50))Follow this workflow to configure Okta as the IdP for your external groups:
Create a Group in Okta
Log into your Okta application
Go to Directory > Groups.
Click Add Group.
Enter a Name and an optional Description.
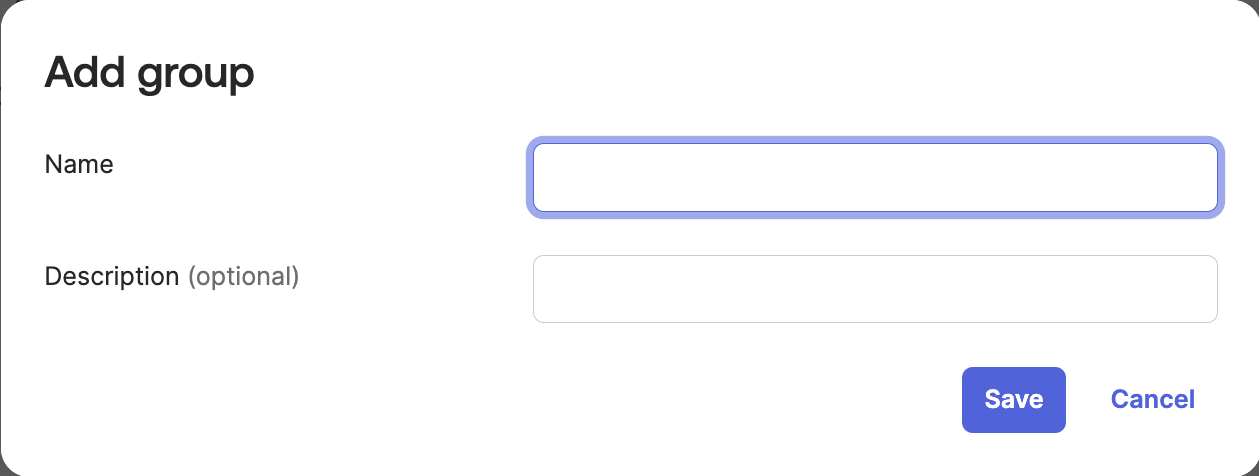
Use this Okta application group Name when you add this external group to your Illumio Console.
Click Save.
Add a User and Assign the User to an Okta Group
Log into your Okta application and add users into your Okta group.
Go to Directory > People.
Click Add Person.
At the Add Person popup, enter the user details, and click Save.
You can continue to add users by clicking Save and Add Another.
Click Directory > Groups.
Click the new group you just created in Create a Group in Okta.
Click the People tab, and assign people.
Use Search to find the new user or users you created and click Assign people to assign them to this group.
Assign the Application to an Okta group
Important
Prerequisite: Make sure you have already created an enterprise application in Okta for your Illumio Console instance.
Click Directory > Groups.
Click the group that you created in Create a Group in Okta.
Click the Applications tab.
Click Assign Applications.
Use Search to find your application and click Assign applications.
Click Done.
Configure OIDC in the Illumio Console Authentication Settings
The first action at Illumio Console is to configure the Console for Okta as an OIDC-compliant IdP.
Log into Illumio Console.
Click Access > Authentication.
Click OIDC Authentication.
In Identity source, choose Okta.
Under Information for Identity Providers, enter details for this Okta configuration:
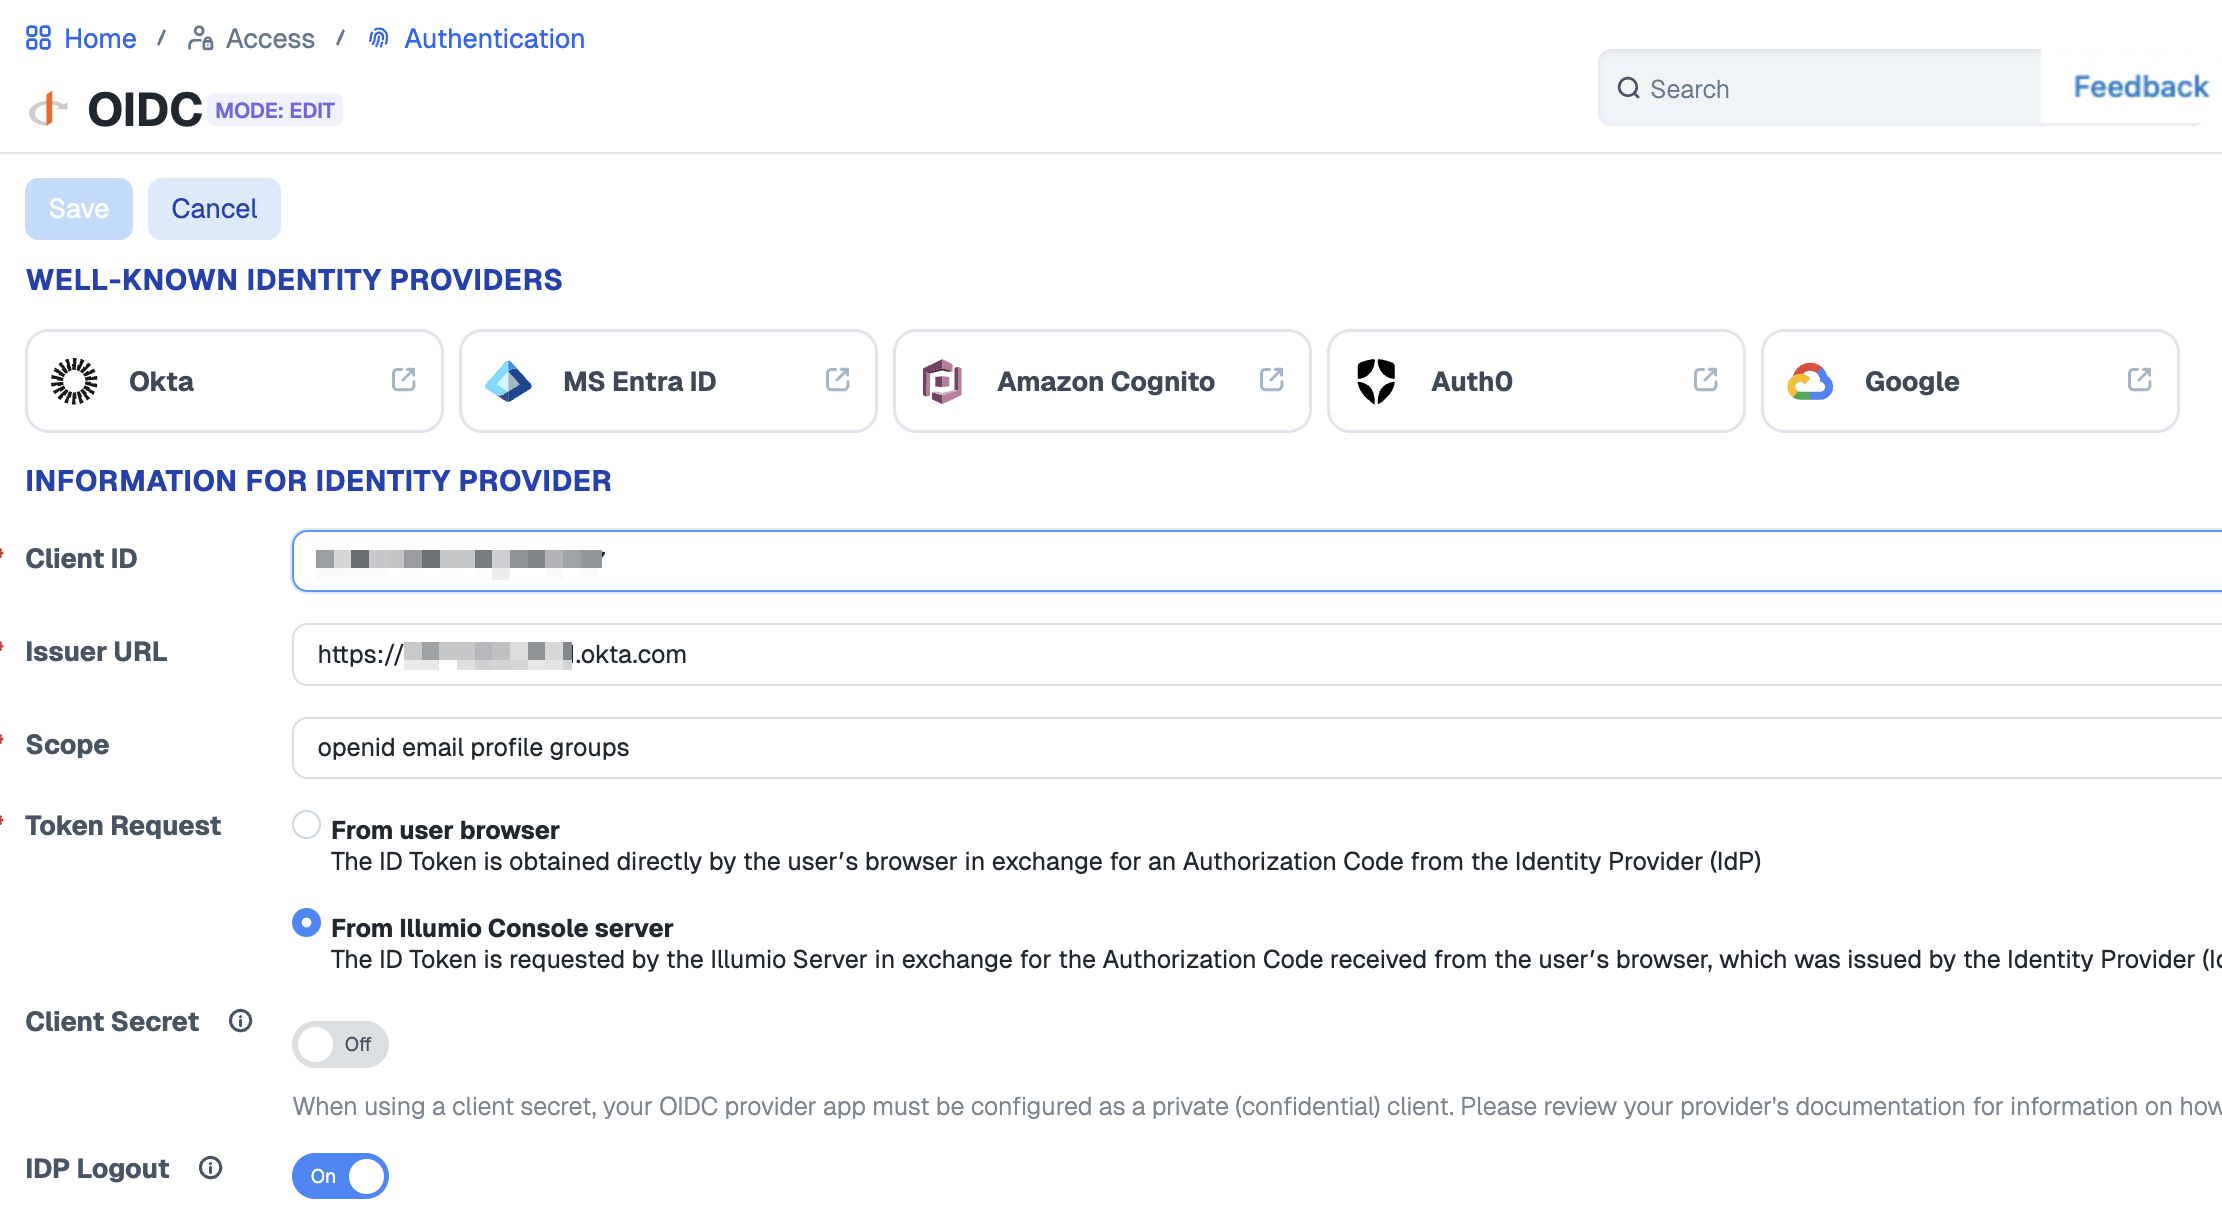
Client ID - Enter the Client ID generated by Okta when you created your Okta Application for Illumio Console.
Issuer URL Enter the Issuer ID generated by Okta when you created your Okta Application for Illumio Console.
Scope - You must enter openid email profile groups.
Token request - Choose From Illumio Console server.
Client secret
IdP Logout
Click Save.
Add an External Group to Illumio Console and Specify Claims
Next, add the specific Okta group as a Console external group.
Log into Illumio Console.
Click Access > External Groups.
Click Add.
Enter the external user group details.
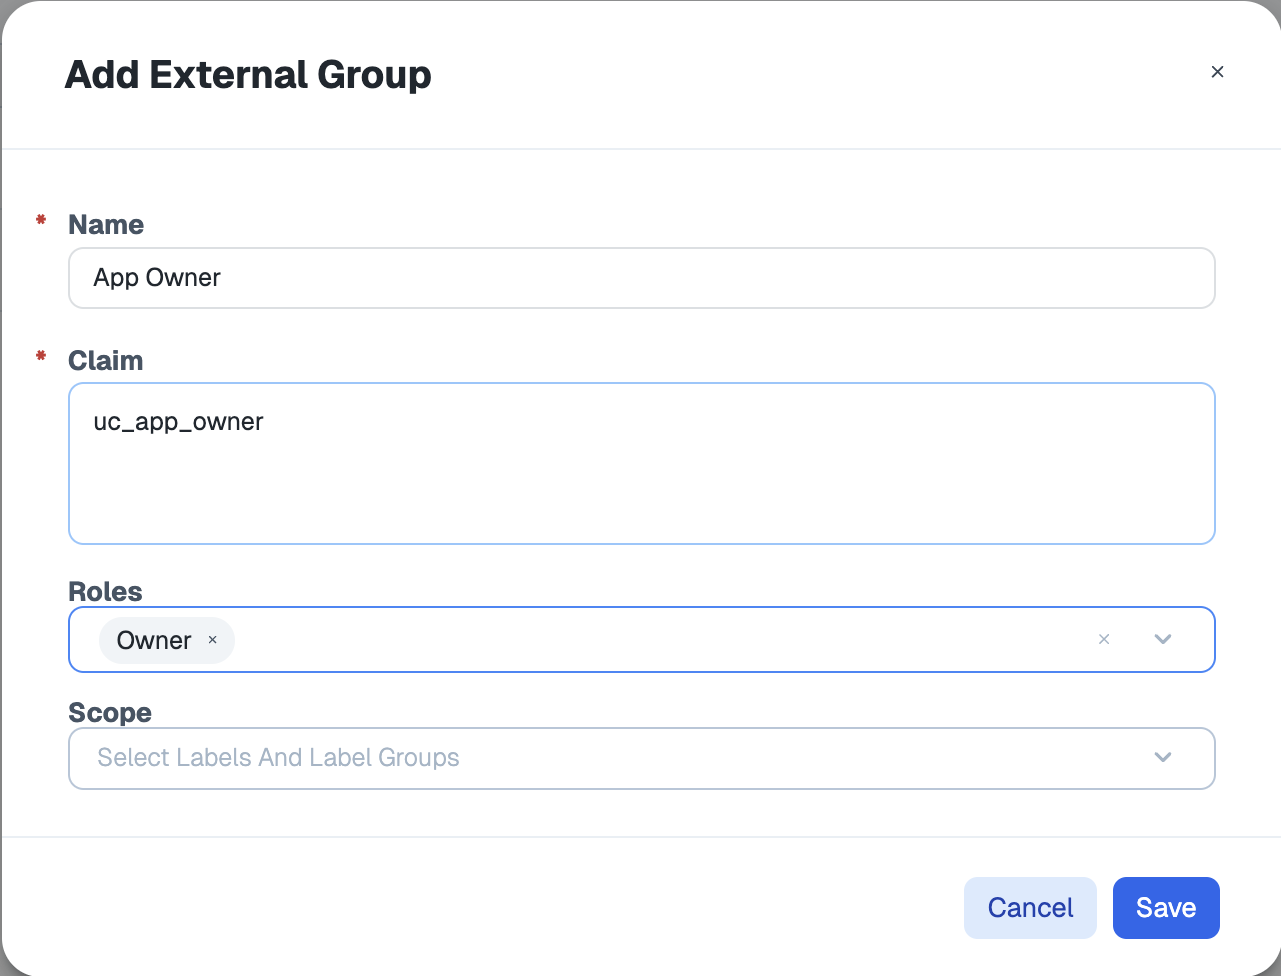
Name - Enter a name for this external group as it will appear in your Illumio Console. This is not the name you gave the group in Okta.
Claim - Enter the group Name you entered when adding the group to your Okta application.
Roles (optional)
Scope (optional)
Click Save.