Onboarding Illumio Insights from the AWS Marketplace

Onboarding Illumio Insights from AWS Marketplace

Here's a summary of your onboarding journey from start to finish. 

Onboarding Illumio Insights

Step 1: Subscribe on AWS Marketplace

Details

AWS_Step1.png
  1. Within Amazon Console, navigate to AWS Marketplace, click Discover products, and search for Illumio Insights.

  2. On the Illumio Insights page, select View purchase options.

  3. Select the appropriate options from Contract configuration and Pricing details.

  4. On the Subscribe to... page, click the vendor's website link under Offer details.

Step 2: Configure Your Account

Details

AWS_Step2.png
  1. In the AWS marketplace sign up pane, enter your information and click Continue.

    Illumio creates your tenant and validates your Insights subscription with AWS. Do not close the browser window during this process.

  2. Click Continue in the Account Configured Successfully pane.

  3. Click Create a Passkey in the Create a Passkey pane.

    You can now log into Illumio Insights!

Step 3: Add an AWS Cloud Organization

Details

AWS_Step3.png
  1. Launch the onboarding wizard in either of the following ways:

    • Click + AWS in the Onboarding page to onboard your first organization when you sign in for the first time

    • From the left navigation, choose Onboarding and click + AWS at the top of the page.

  2. Provide the following information about your AWS account:

    • Name for the root account

      This name is what will appear in Illumio. The name should be descriptive so that you can easily identify it in Illumio.

    • The AWS ID of the root account you are onboarding into Illumio

    When done completing these settings, click Next.

    The wizard advances to step two: Set up Access.

  3. Select or create a service account.

    If you haven't onboarded any accounts yet, click Add a new Service Account in the Service Account drop-down list and specify a name and description (optional) and click Create.

    A pop-up dialog box appears displaying information about the credentials created for the service account.

    You cannot copy information from the dialog box. Click Download Credentials to save this information locally, then click Close.

    Important

    • Make a note of the Cloud Tenant Id. It is needed for running the template in AWS Console.

    • Open the downloaded credentials file (Service-Account-<name>.txt) for the service account and copy the value in the serviceAccountKeyId and serviceAccountToken fields. You will need these values when creating the CloudFormation stack or stackset in AWS. Cloud provides these credentials for download only during this step of the onboarding wizard.

  4. In step two (Set up Access) of the onboarding wizard, select Download Cloud Formation Stack and click Download.

    Cloud downloads an AWS Integration YAML file to your local system.

  5. Click Next. The final step of the wizard appears.

  6. Review the account information and if everything looks correct, click Save and Confirm. If you see issues you need to correct, click Back and return to that wizard step.

For helpful notes about permissions and service accounts, see Onboard an AWS Cloud organization.

Step 4: Set up and Enable Flow Logs

Details

AWS_Step4.png
Set up AWS flow logs using the console

To configure flow logs for a VPC in the AWS console:

  1. Go to the VPC console at https://console.aws.amazon.com/vpc/ and select the region to which the VPC belongs.

  2. Select the VPC for which flow logs are to be enabled.

  3. Under the VPC details page, select the Flow logs page and click the Create flow log button.

  4. Provide the following details in the flow log configuration page:

    • Name for the flow log config

    • Type of traffic to be filtered. For more insights, select All.

    • The time interval can be set to 10 minutes

  5. Select Send to an Amazon S3 bucket and paste the ARN of the S3 bucket. It also provides the option to create a new S3 bucket from there.

  6. For log record format, select any value. For more details, select Custom format and select all attributes. Use defaults for all other values.

  7. After entering the required information click Create flow log.

To set up AWS flow logs using the command line or CloudFormation template instead, see Set up flow logs in your CSP environment.

Grant AWS flow log access

Review the prerequisites for your CSP. See Prerequisites for granting flow log access to your CSPs.

  1. Click Flow Log Access on the Onboarding page to open the Flow Log Access page.

  2. Find the account name you want.

  3. Grant access by first selecting individual or grouped accounts.

    1. Confirm that the flow log destinations you want are selected. If you wish to grant access to flow log destinations within this account or incoming from external accounts:

    2. Click Grant Access and use the above prerequisites information in the Grant Access... dialog box, as explained in the in-application help.

To grant access to external flow log destinations, see Grant flow log access to your CSPs.

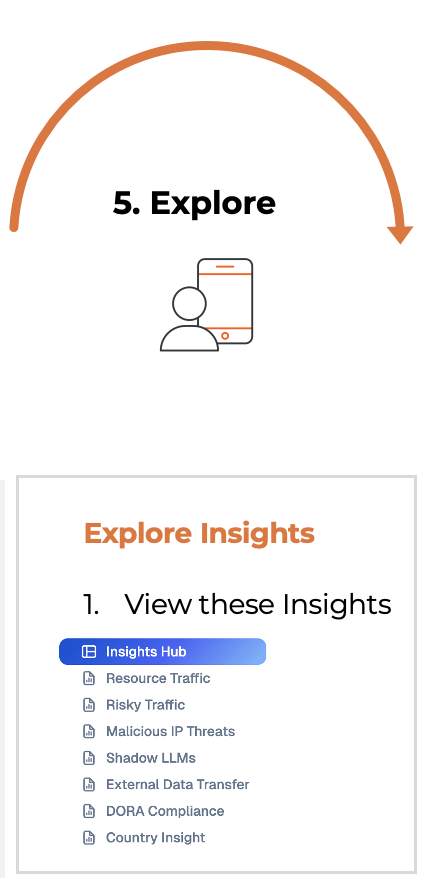
Step 5: Explore Insights

Details

Step_Five.png
  1. Log into Illumio Console with the passkey you created to explore Illumio Insights.

  2. After you have logged in to Illumio Console, click Onboarding to view the subscriptions or tenants you have onboarded.

Invite Users

After you log into Illumio Console, add your administrator so that they can onboard Illumio Insights.

  1. To invite your admin or other users to use Illumio Insights, navigate to Users and click Add.

  2. Enter the user's details.

    The user will automatically receive an email from Illumio to onboard to Illumio Insights.