Configure the Illumio App for Splunk, the PCE, and Alerts
This section describes how to configure the following after you install the Illumio App for Splunk:
Configure the Splunk app itself
Configure the on-premises or Cloud PCE
Configure Alerts
Configure the Illumio App for Splunk
After you have installed the Illumio Technology Add-On for Splunk, use the following procedure to configure Splunk to receive the data from the Illumio PCE syslog and to get workload and label information indexed into the Splunk App using the Illumio ASP REST API.
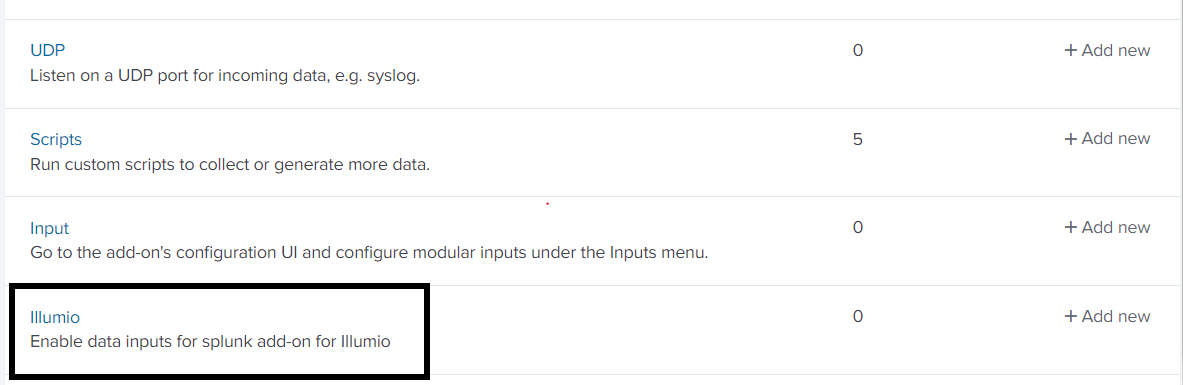
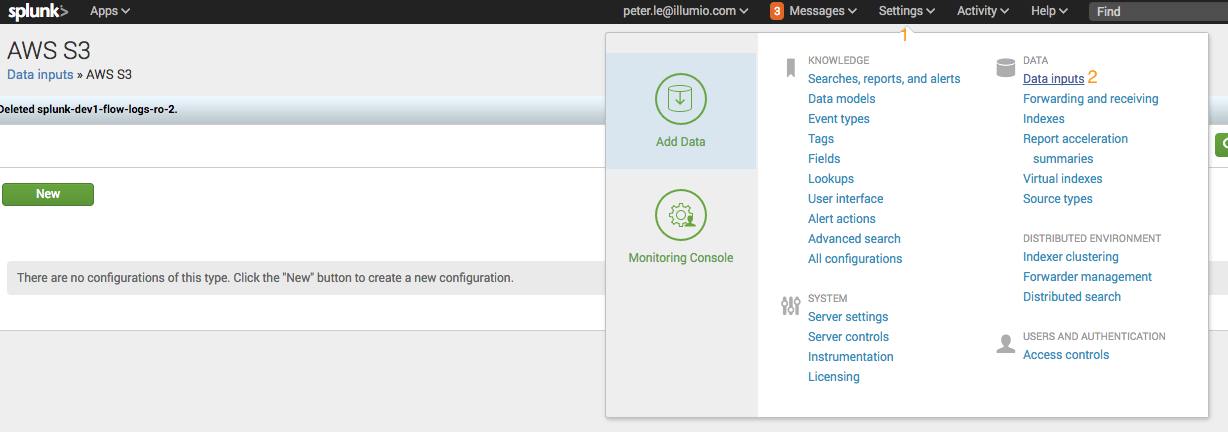
Log in to the Splunk web app and navigate to Settings > Data inputs.
Locate Illumio and click it.
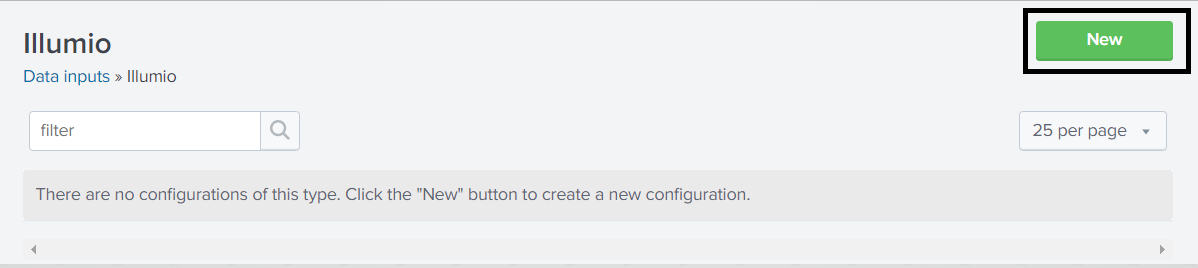
Click New to create the Data Input (Modular Input) for ingesting data from the Illumio PCE to the Illumio App for Splunk.
Note
If you have multiple PCEs sending data to a single Splunk instance, then you need to have a different Data Input with a different TCP port for each PCE.
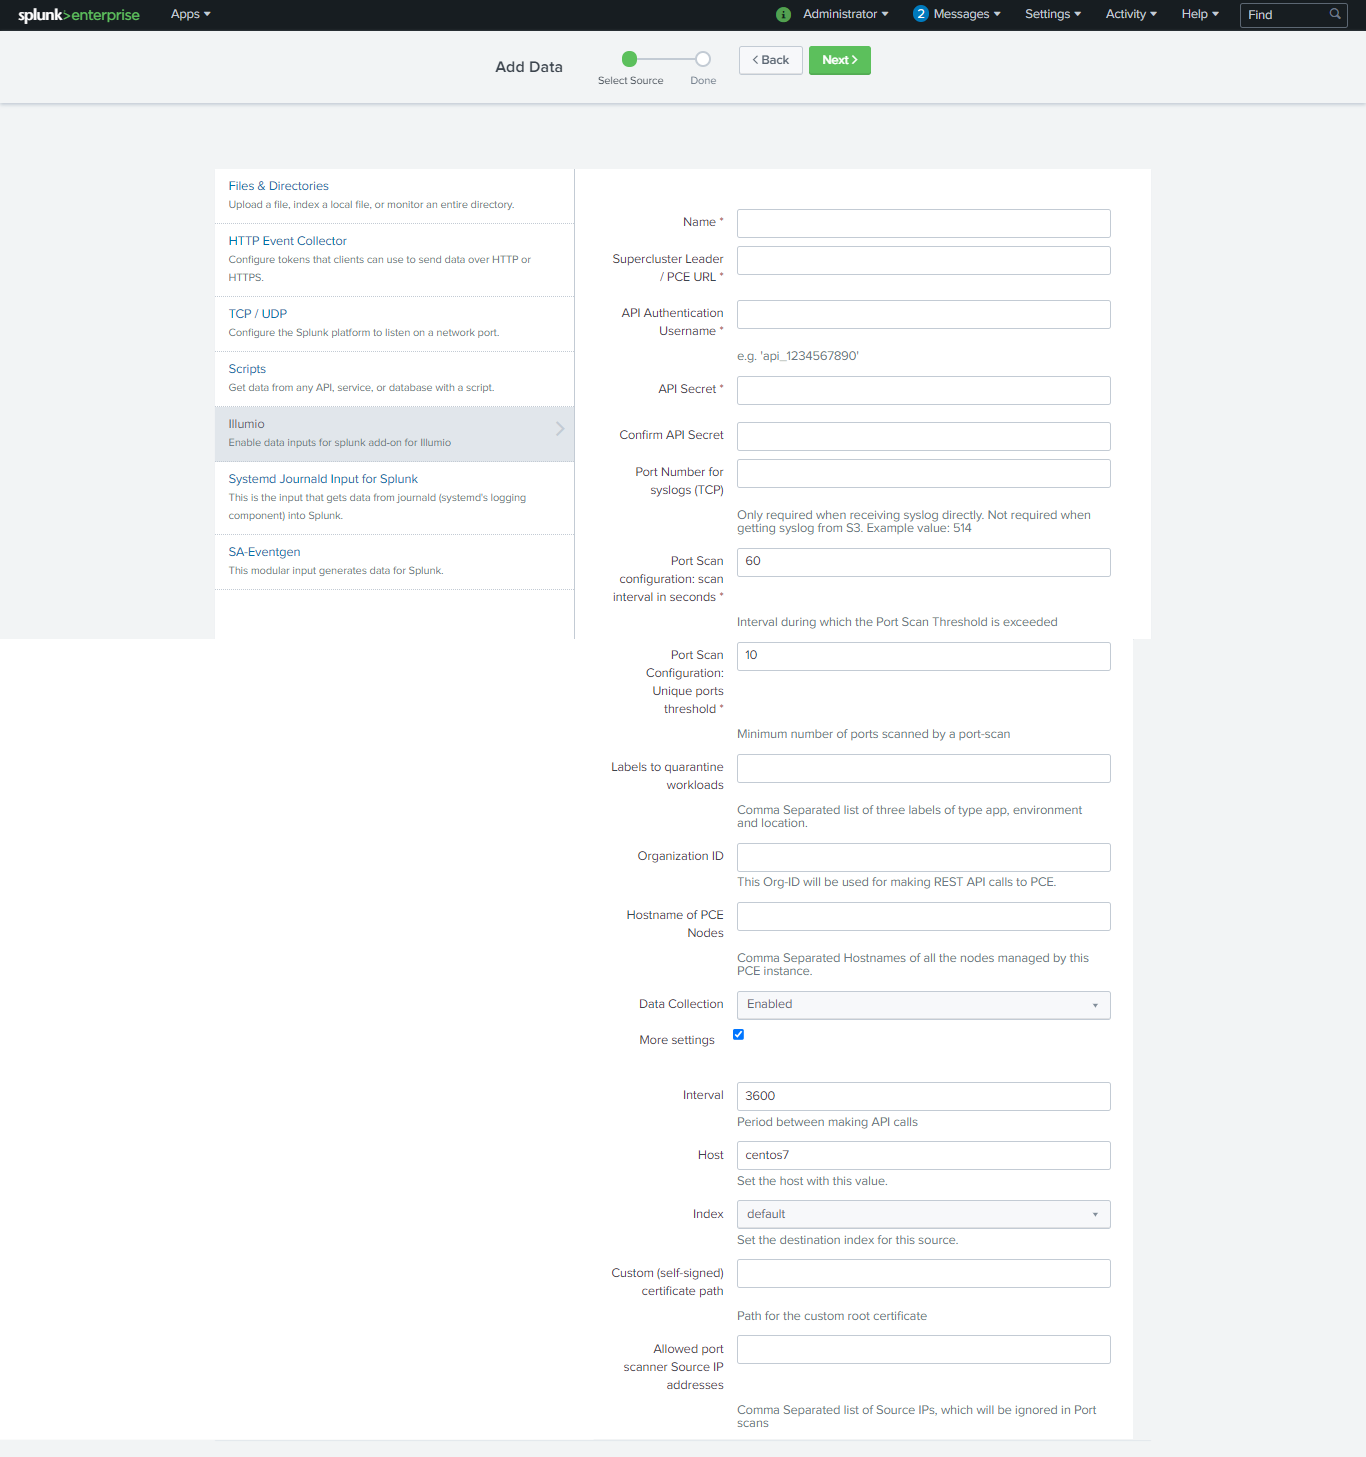
In the Modular Input page, enter the configuration information using the following table:
Input
Mandatory or Optional
Description
Name
Mandatory
The name to identify the Illumio PCE.
Supercluster Leader/PCE URL
Mandatory
Enter the PCE URL including HTTPS and the port number. (If the provided PCE is part of the supercluster, it must be the leader of the supercluster.)
For example:
https://illumiopce.company.com:443/
API Authentication Username
Mandatory
The API Authentication Username used to authenticate with the Illumio PCE. To generate the API key, log into the Illumio PCE Web Console and click Username > My API Keys > Add New.
For example: api_16175f6af766fcd7b
If you do not specify API Username and API Secret, the PCE Operations and Workload Operations dashboards will not work.
API Authentication Secret
Mandatory
The API Secret is the password for an API key that is used to authenticate with the PCE. The API key generates the API Secret.
For example:
4ed8ff8a5c40201dc52c89a59936f7b1003b950e0027204b2aaaa633ba040d22
TCP Port Number for incoming syslog from PCE
Optional
The Splunk server port on which the Splunk App should listen for syslog messages from the PCE. The PCE should be configured to forward syslog to this port on the Splunk server. If you are creating multiple Data Inputs, use a different TCP port for each PCE.
For example: 5014
Port Scan configuration: Scan interval in seconds
Mandatory
The minimum time duration of connections between two workloads to determine a port scan.
For example, if two workloads show flows between 10 unique ports within 60 seconds, then a port scan is registered.
Default value: 60 seconds.
Port Scan configuration: Unique ports threshold
Mandatory
The minimum threshold of unique ports between two workloads to determine a port scan.
For example, if two workloads show flows between 10 unique ports within 60 seconds, then a port scan is registered.
Default value: 10 ports.
Labels to quarantine Workloads
Optional
Comma-separated list of App, Environment, and Location label types. Whitespaces are not allowed in the comma-separated list. Labels must be supplied with Application, Environment, Location as the exact order. These labels should exist on the PCE with the appropriate policy to quarantine workloads. These labels will be applied while quarantining the workloads using the App or AR action.
Organization ID
Optional
For Illumio Data Center (on-premises) customers, the Organization ID is 1.
For Illumio Cloud customers, the Organization ID can vary. To determine the Organization ID, log into the Illumio PCE Web Console, click the administrator's name in the top-right corner, and then click My API keys > Add New . The Create New API dialog shows the Organization ID.
IP addresses of the PCE Nodes
Optional
Comma-separated IP addresses (private, public) of all of the nodes managed by this PCE instance. You must provide all IP addresses. Use only commas and do not add space characters.
Data Collection
Mandatory
When enabled, the TA will collect data on this instance. If you are using a Splunk Cluster, this should be enabled on the indexer node but disabled on the search head nodes.
Default: Enabled
Note
When you are invoking Quarantine Workload with Splunk Cluster, you need to configure the TA-Illumio search head node with data collection disabled and the TA-Illumio data-collection indexer node enabled.
If necessary, enter the optional settings in the following table:
Input Parameter
Mandatory or Optional
Description
Interval
Optional
Interval between REST API calls made by the Splunk App to refresh data from the PCE. The minimum value is 3600 seconds (60 minutes).
Default: 3600
Interval
Optional
Interval for the polling between AWS and the Splunk App. The default value is 1800 seconds (30 minutes)
Host
Optional
Host information added into events to be indexed by Splunk. Illumio recommends using the FQDN of the Splunk server.
Index
Optional
For use by advanced Splunk users. Change the index name under which received events are categorized. If you use a non-default (custom) index such as "Illumio", create the index manually and modify the search macros to return "index=illumio". See Splunk Index, Source, and Source Types.
Custom (Self-Signed or Local CA) Certificate Path
Optional
If you use a local certificate authority SSL certificate or a self-signed SSL certificate with the PCE, you need to upload the SSL Certificate to the Splunk server and provide the full path to the directory.
For correct SSL operation, the Splunk server must be able to fully trust the PCE's certificate. If you are using a local certificate authority or a certificate issued by a secondary certificate authority, you must update the Splunk server certificate authority trust chain to verify the certificate presented by the PCE. For example, on Linux, use the
update-ca-trusttool.Allowed port scanner IP addresses
Optional
Whitelist IP addresses of known port scanners, such as Qualys hosts. These addresses are excluded when determining port scans, which avoids false positives in the Port Scans panels.
Click Next after you have added the values for data input (modular input).
Look for a success message displayed as a header in the setup page. This indicates that the credentials passed validation. If the credentials were incorrect or there were validation errors, a failure message displays. See Troubleshooting.
About Intervals for On-Premises and Cloud Deployments
The data flow for On-Premises and Cloud is similar, but with a Cloud deployment, there are more servers to collect, receive, and send the data flow logs and then push them to the S3 bucket. Whatever the PCE logs collect is pushed to S3.
The S3 bucket can be managed by Illumio or you can create and manage it using the CloudFormation template. For more information, see Flow Logs and Auditable Event Logs for Illumio Secure Cloud PCE.
Note that the interval for the VEN to send traffic data logs is always 10 minutes.
Configure the On-Premises PCE
You must make configuration changes on the PCE so that data is forwarded to the Splunk server.
Configure the Syslog
Use the information in the "Additional PCE Installation Tasks" topic in PCE Installation and Upgrade Guide.
Configure the Runtime PCE
Note
This procedure is for PCE versions earlier than 18.2.1. If you are running version 18.2.1 or later, skip this procedure.
To generate and send traffic flow summaries to the PCE syslog and forward them to Splunk, you need to make the following changes to the runtime_env.yml PCE Runtime Environment file. You need to make changes to the runtime_env.yml file on all PCE nodes in the cluster, and you need to restart the PCE to make your changes take effect.
export_flow_summaries_to_syslog:

- accepted

- potentially_blocked

- blocked
For more information about runtime_env.yml and the export_flow_summaries_to_syslog setting, see PCE Installation and Upgrade Guide.
PCE runtime_env.yml Configuration
export_flow_summaries_to_syslog:
- accepted
- potentially_blocked
- blocked
For more information about runtime_env.yml and the setting export_flow_summaries_to_syslog, see the Illumio ASP PCE Deployment Guide.
Configure the Illumio PCE on Illumio Cloud
If you are using Illumio Cloud, perform the configuration steps in Configure the On-Premises PCE .
You need the following two components so that your PCE data can be relayed to the Illumio App for Splunk:
An Amazon S3 bucket, which permits reliably storing events from Illumio Cloud.
The Splunk Add-On for AWS, which permits reading events from an Amazon S3 bucket.
Illumio PCE on Cloud logs all traffic flows, including allowed traffic, blocked traffic, potentially blocked traffic, and auditable events to your Amazon S3 bucket. You may choose to disable specific types of events in Illumio Cloud by filing a support ticket. The Splunk Add-on for AWS reads the data from Amazon S3, enriches the data with the source type, and enables data to be processed by TA-Illumio. You then can see the data in Illumio App for Splunk.
Starting with the Illumio App for Splunk 2.3.0, the consumption of data from S3 is more robust than in earlier versions.
Configure the Amazon S3 Bucket
To implement the Illumio App for Splunk with your Illumio PCE in the Cloud, you must provide an AWS S3 bucket. You can create and configure an using an Illumio-provided CloudFormation template, which is available here: Flow Logs for Illumio Secure Cloud PCE and within this guide: Using the AWS CloudFormation Template .
The CloudFormation template contains the Illumio AWS account ID. "Externalid" is an extra password to ensure that root access to the Illumio production account is not enough to access your S3 bucket, to prevent a poorly functioning third-party service. For more information, see How to Use External ID When Granting Access to Your AWS Resources on the Amazon Blog.
When you contact Illumio, provide the following information:
The AWS S3 bucket name that you have chosen.
Your AWS account ID. This is available under My Account or https://console.aws.amazon.com/billing/home?#/account in the AWS console.
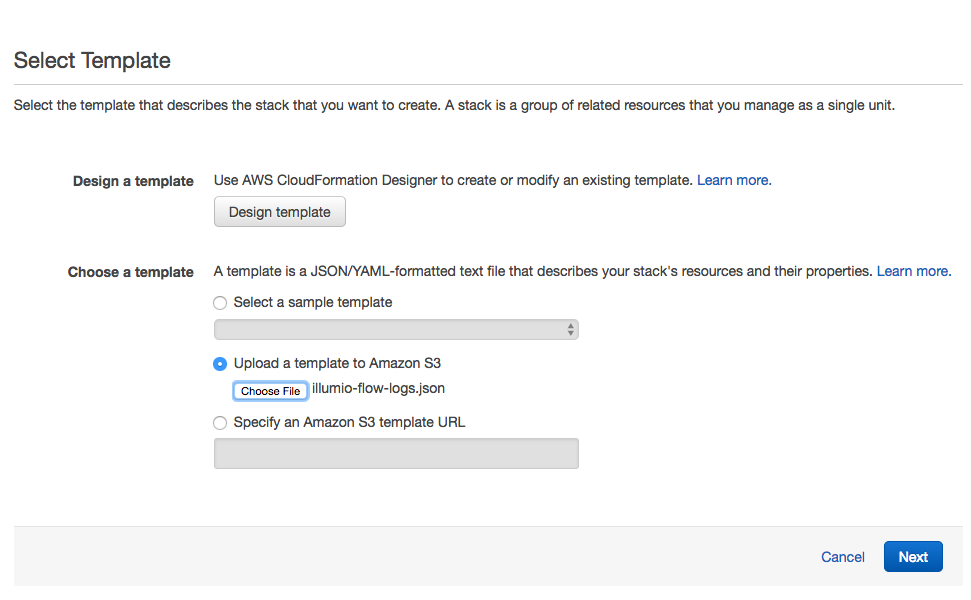
Load the template into CloudFormation as follows:
Select a template.
Specify the details. You can use whatever label you want for Stack name, because the name is for convenience only.
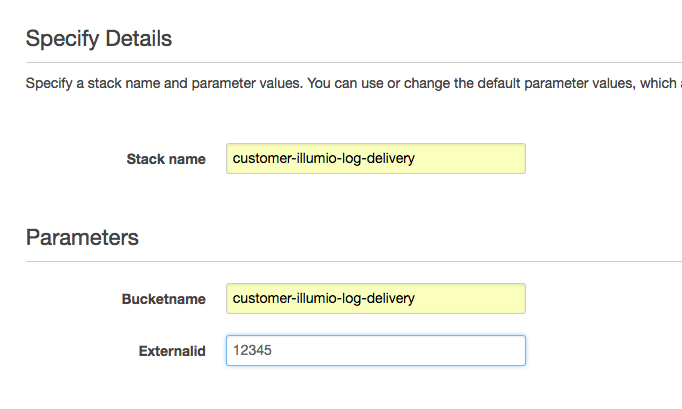
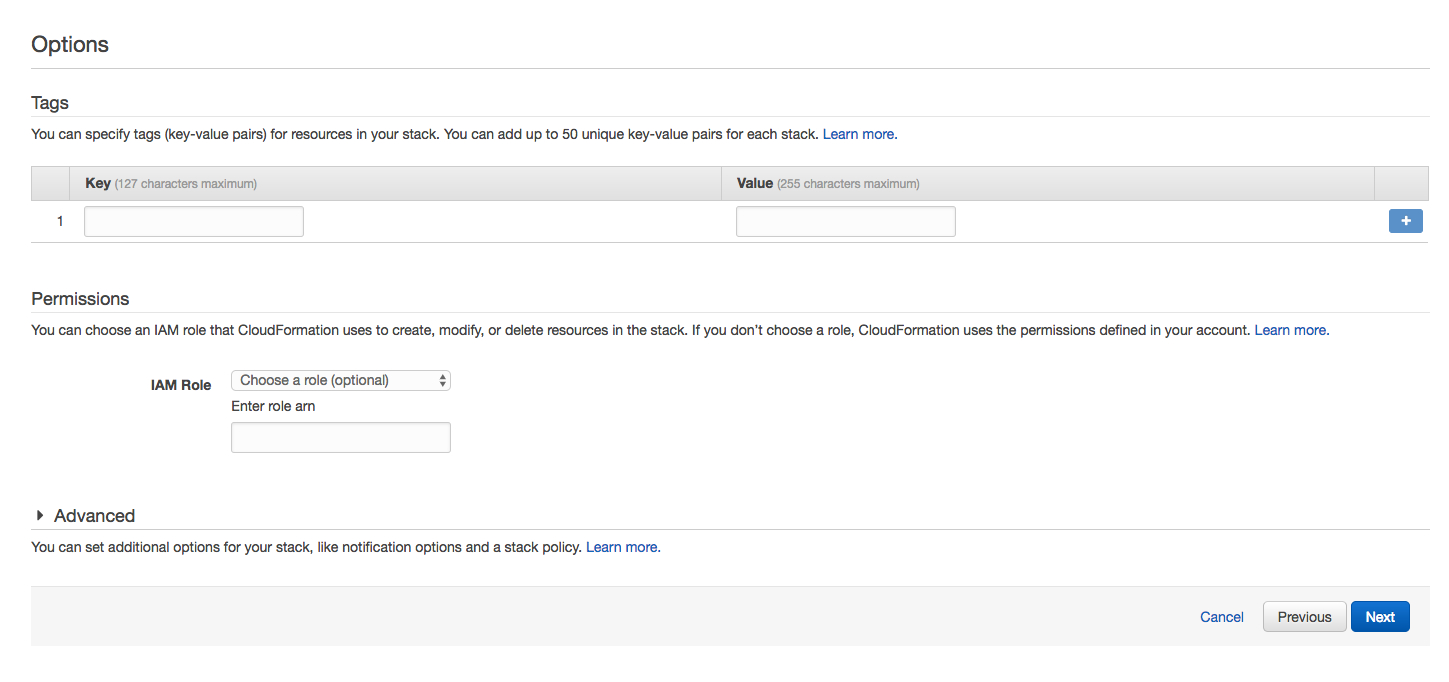
Specify the options.
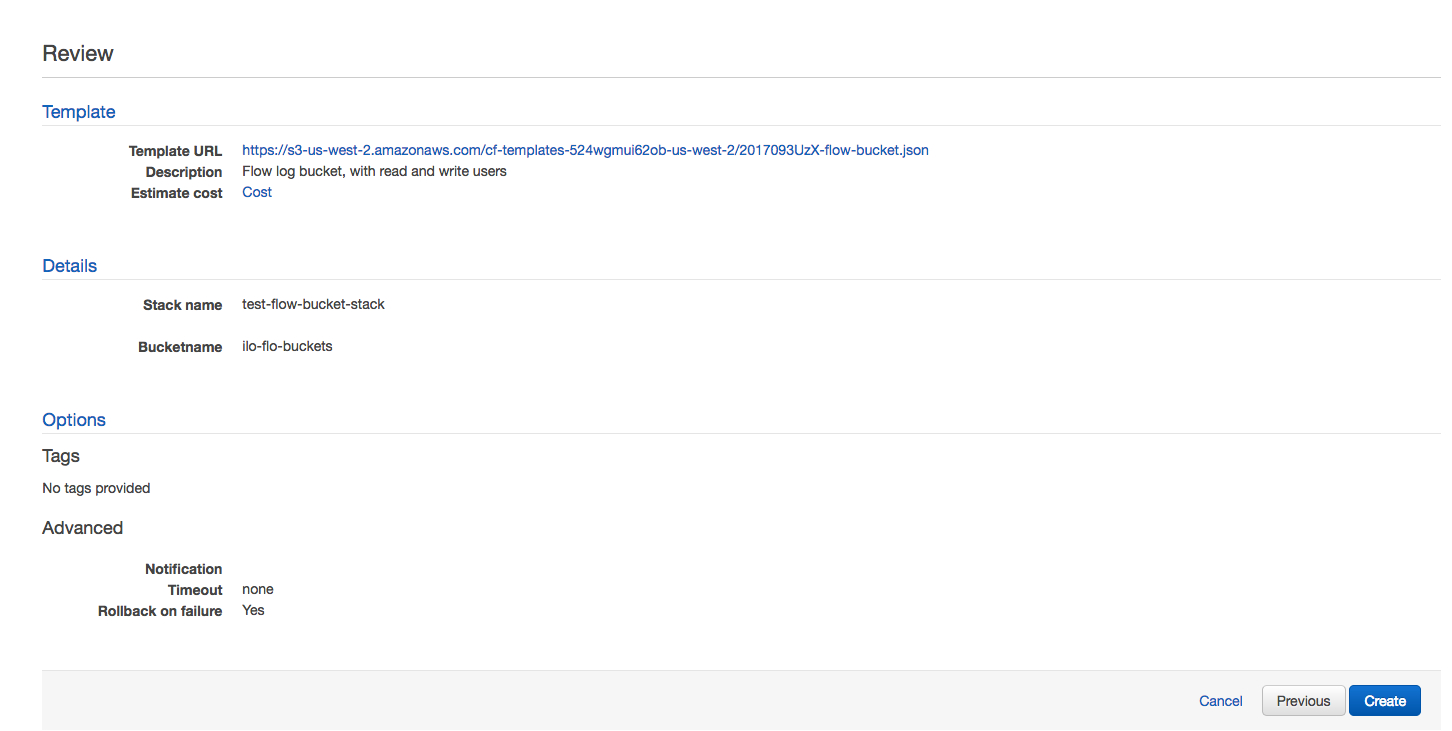
Review the configuration and click Create.
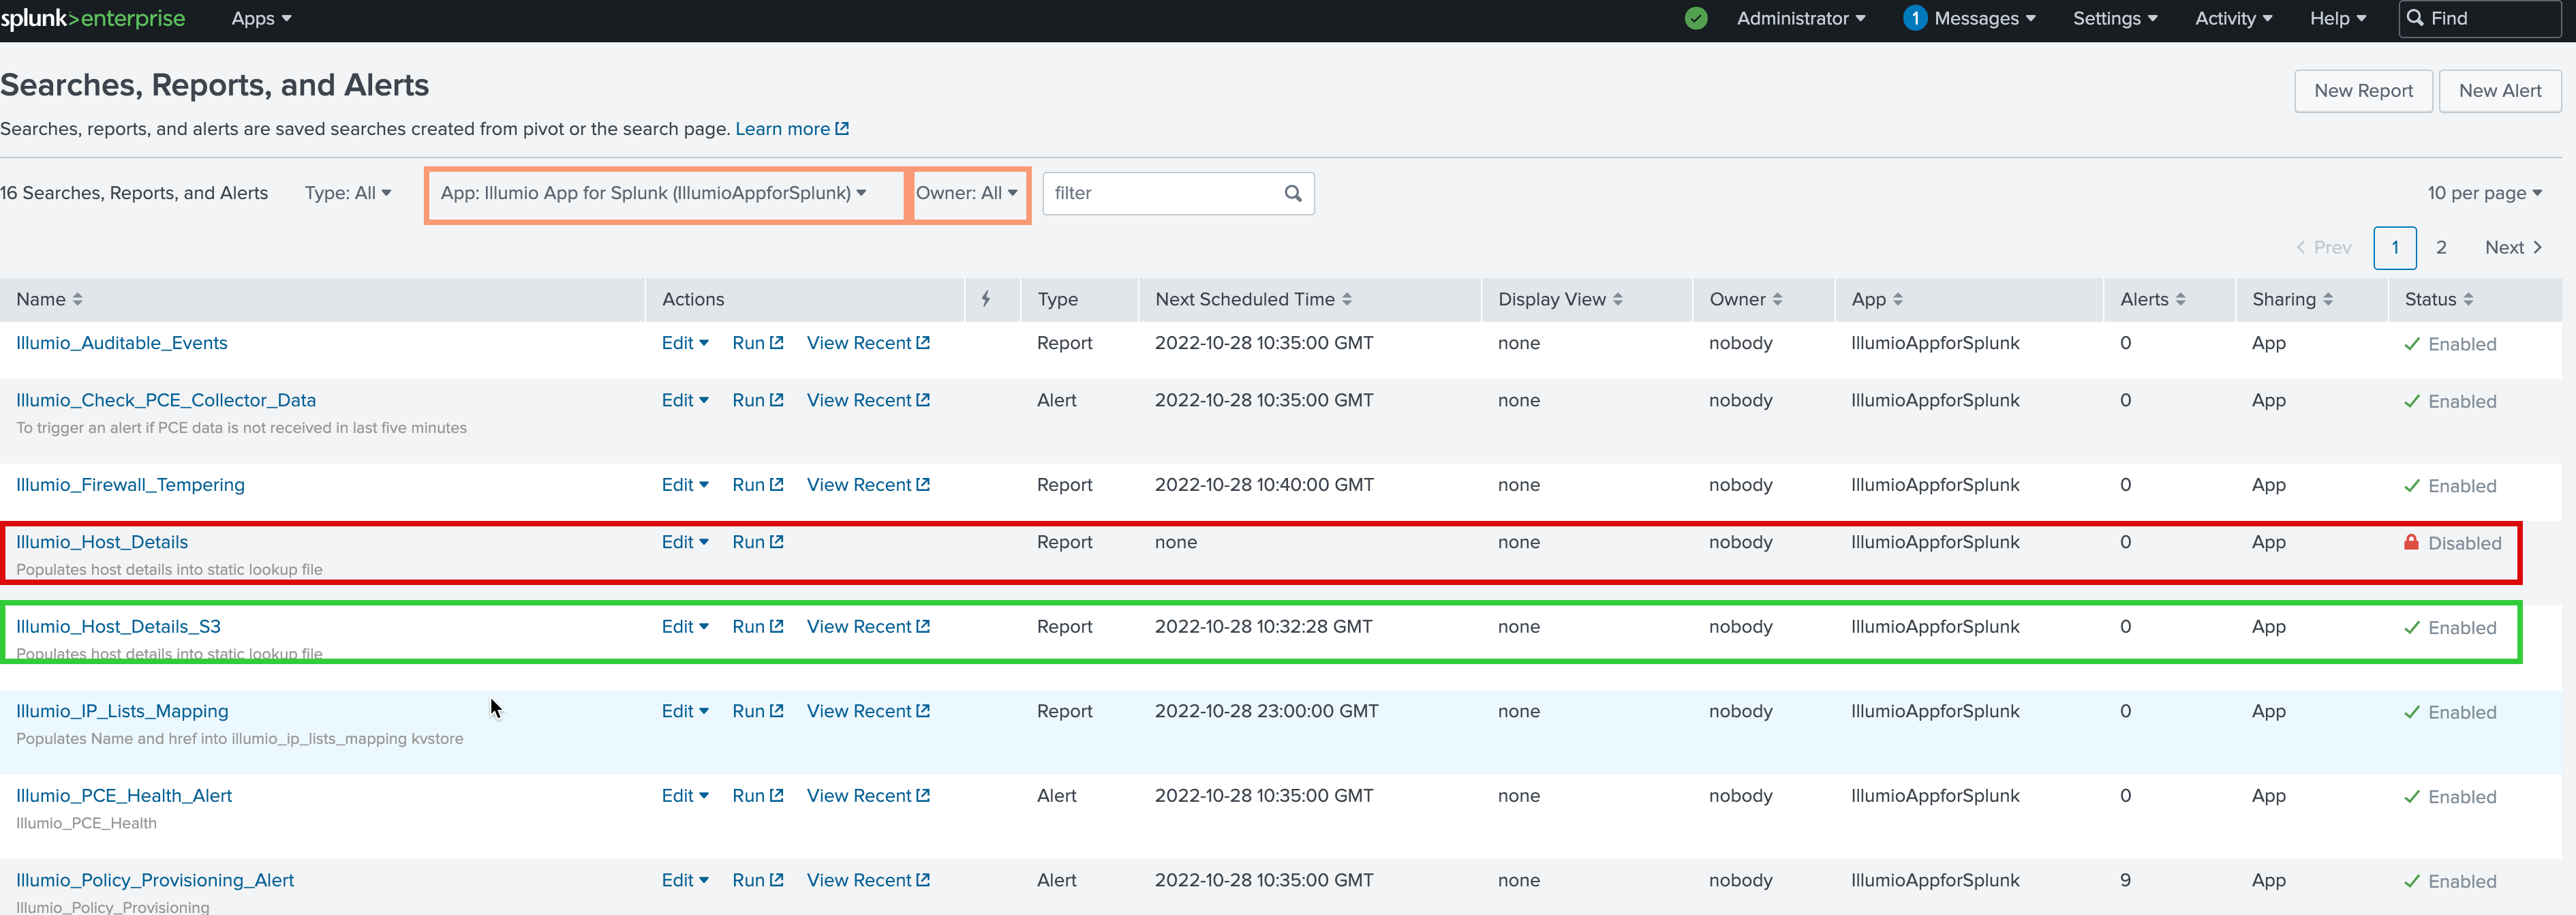
After you have configured the Amazon S3 bucket, you need to perform the following steps so that all of the inputs will display on the dashboards.
Navigate to Searches, Reports, and Alerts and filter for IllumioAppForSplunk in the App field and All in the Owner field.
In the list, disable Illumio_Host_Details and enable Illumio_Host_Details_S3.
Configure the Splunk Add-On for AWS
Install the Splunk Add-On for AWS.
Note
The Splunk App for AWS is a different app than the Splunk Add-On for AWS.
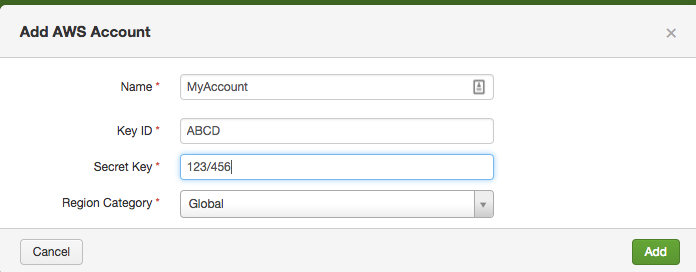
Enter your account into the Splunk Add-On for AWS app:
Enter values into the Name, Key ID, and Secret Key fields, and select Global from the Region Category drop-down:
Be sure to create an IAM S3 bucket policy that allows Splunk to access the S3 bucket. See Configure S3 permissions in the Splunk documentation.
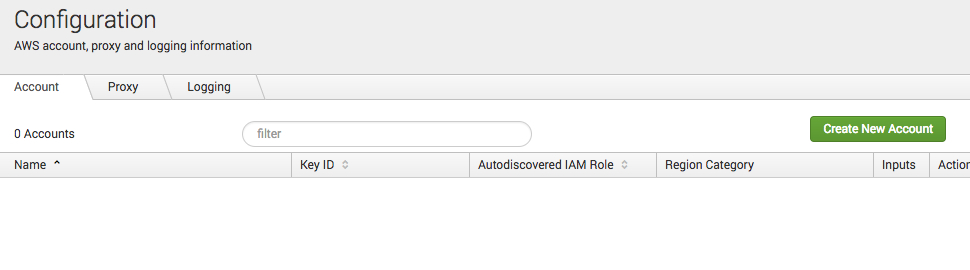
Navigate to Settings > Data inputs:
Create two data inputs for AWS S3:
Create one data input for events and set the source type to Illumio:pce.
Create one data input for traffic flow summaries and set the source type to Illumio:pce:collector.
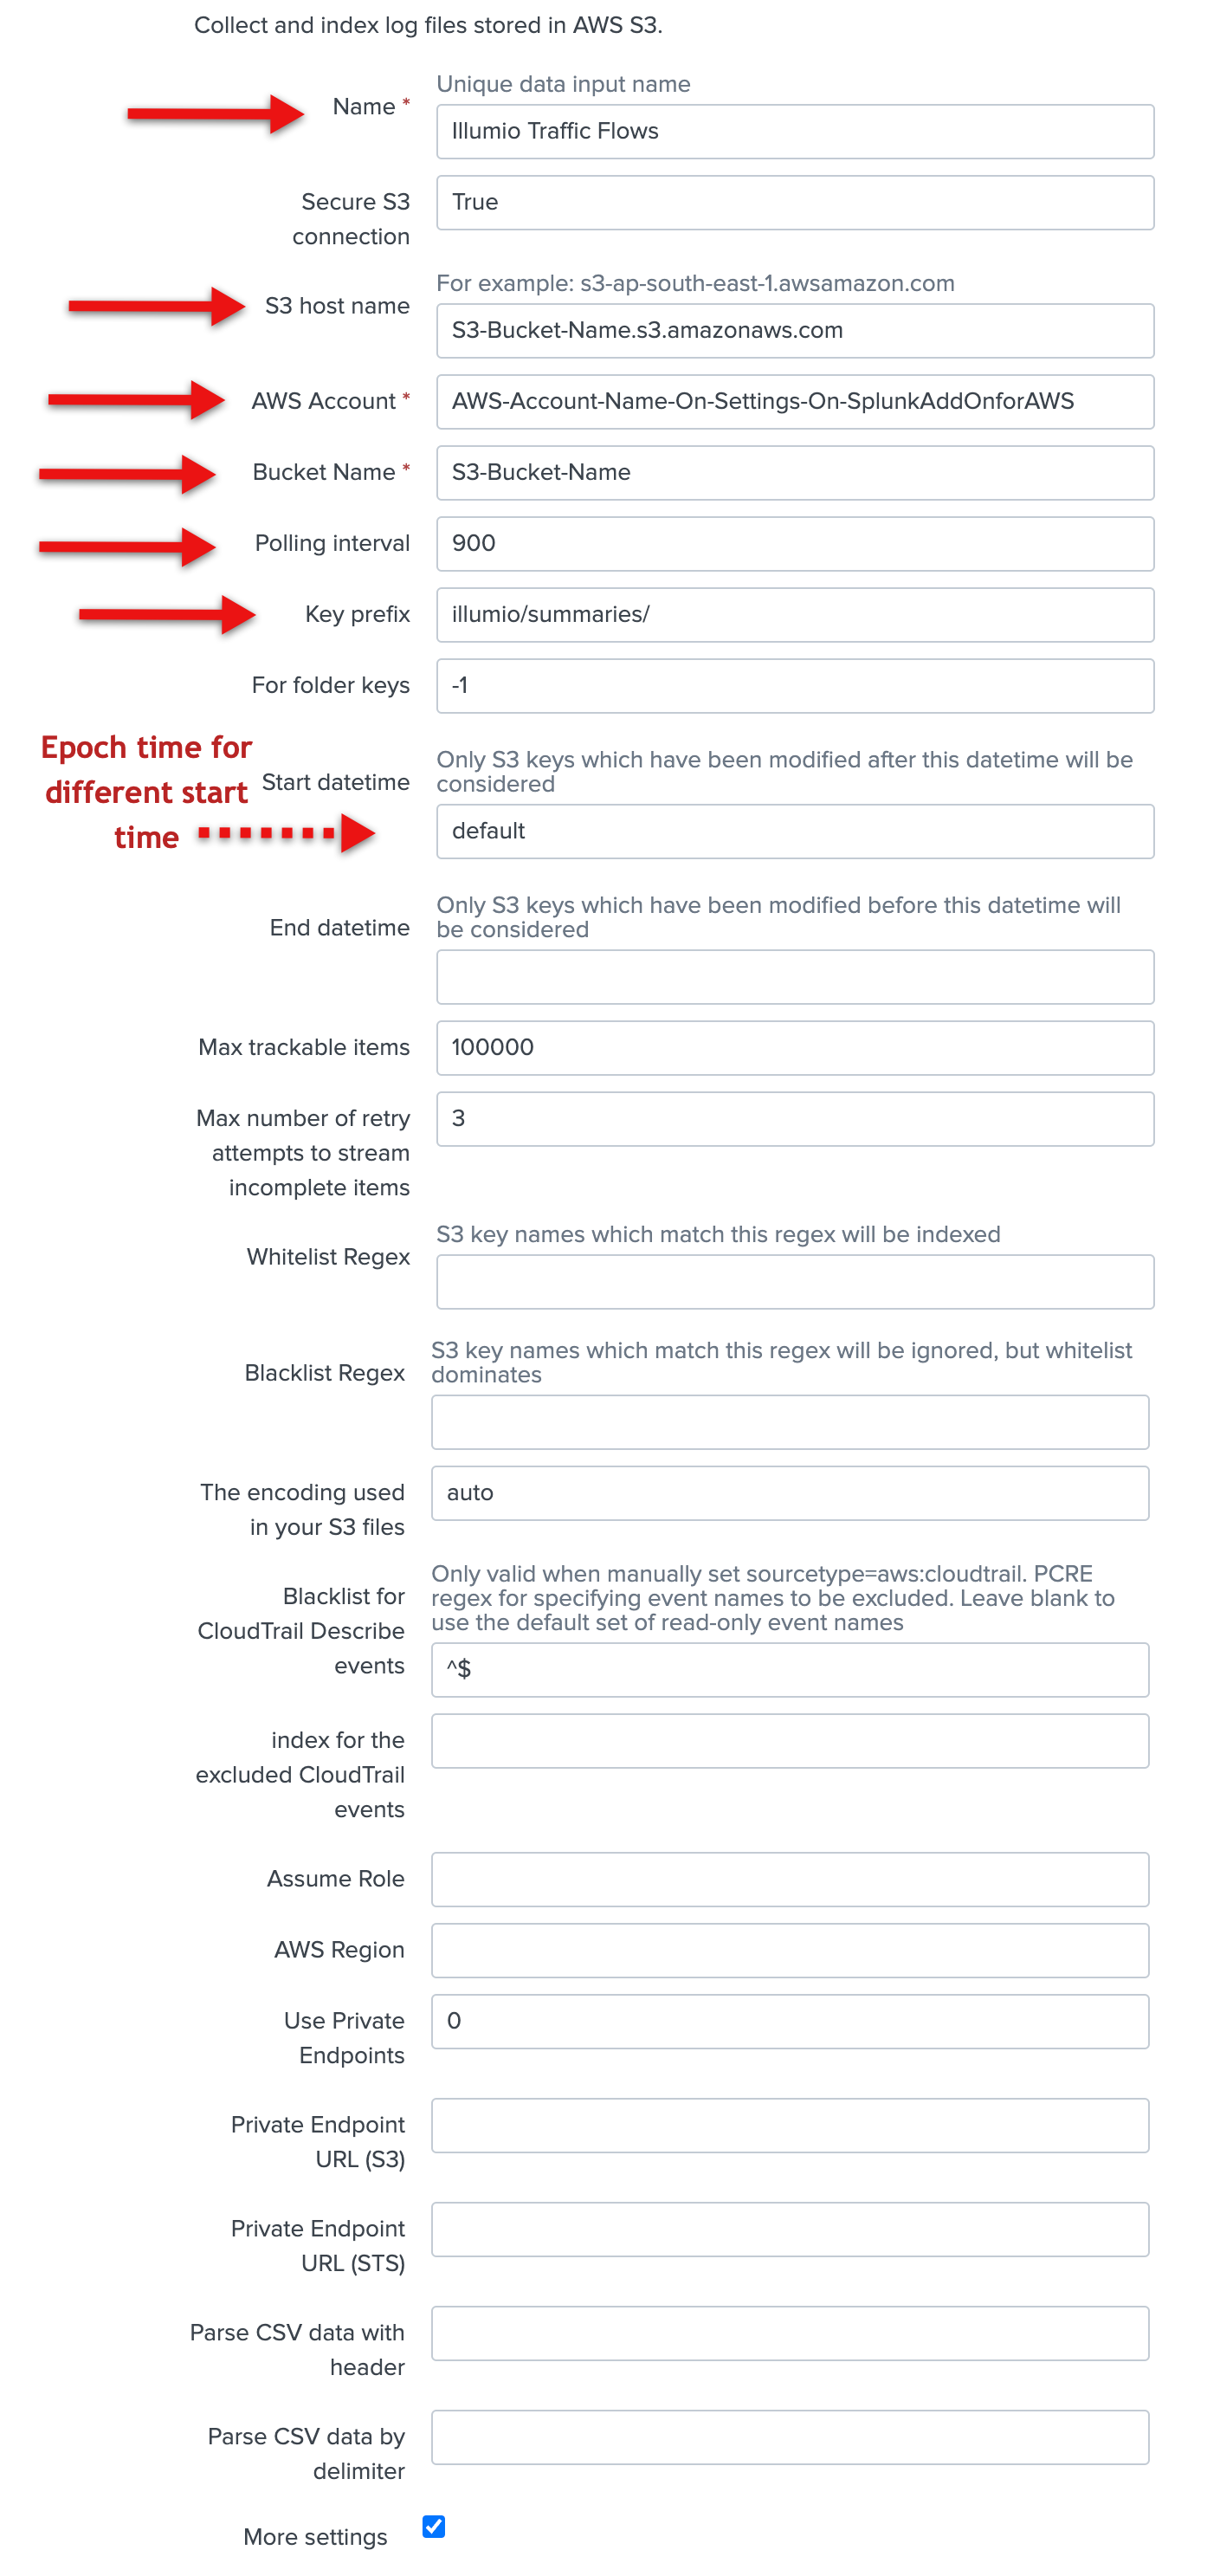
Find AWS S3 and click Add New:

Add the following configuration data for events:
Enter the name in the Name field.
Enter the account in the AWS Account field.
Enter the S3 bucket name in the Bucket Name field.
Enter the polling interval (900 seconds, optional).
Enter Illumio/auditable_events/ in the Key prefix field.
You can accept the default values for everything else on this screen.
Note that you cannot edit the initial time scan parameter of an S3 input after you create it. If you need to adjust the start time of an S3 input, delete it and recreate it.
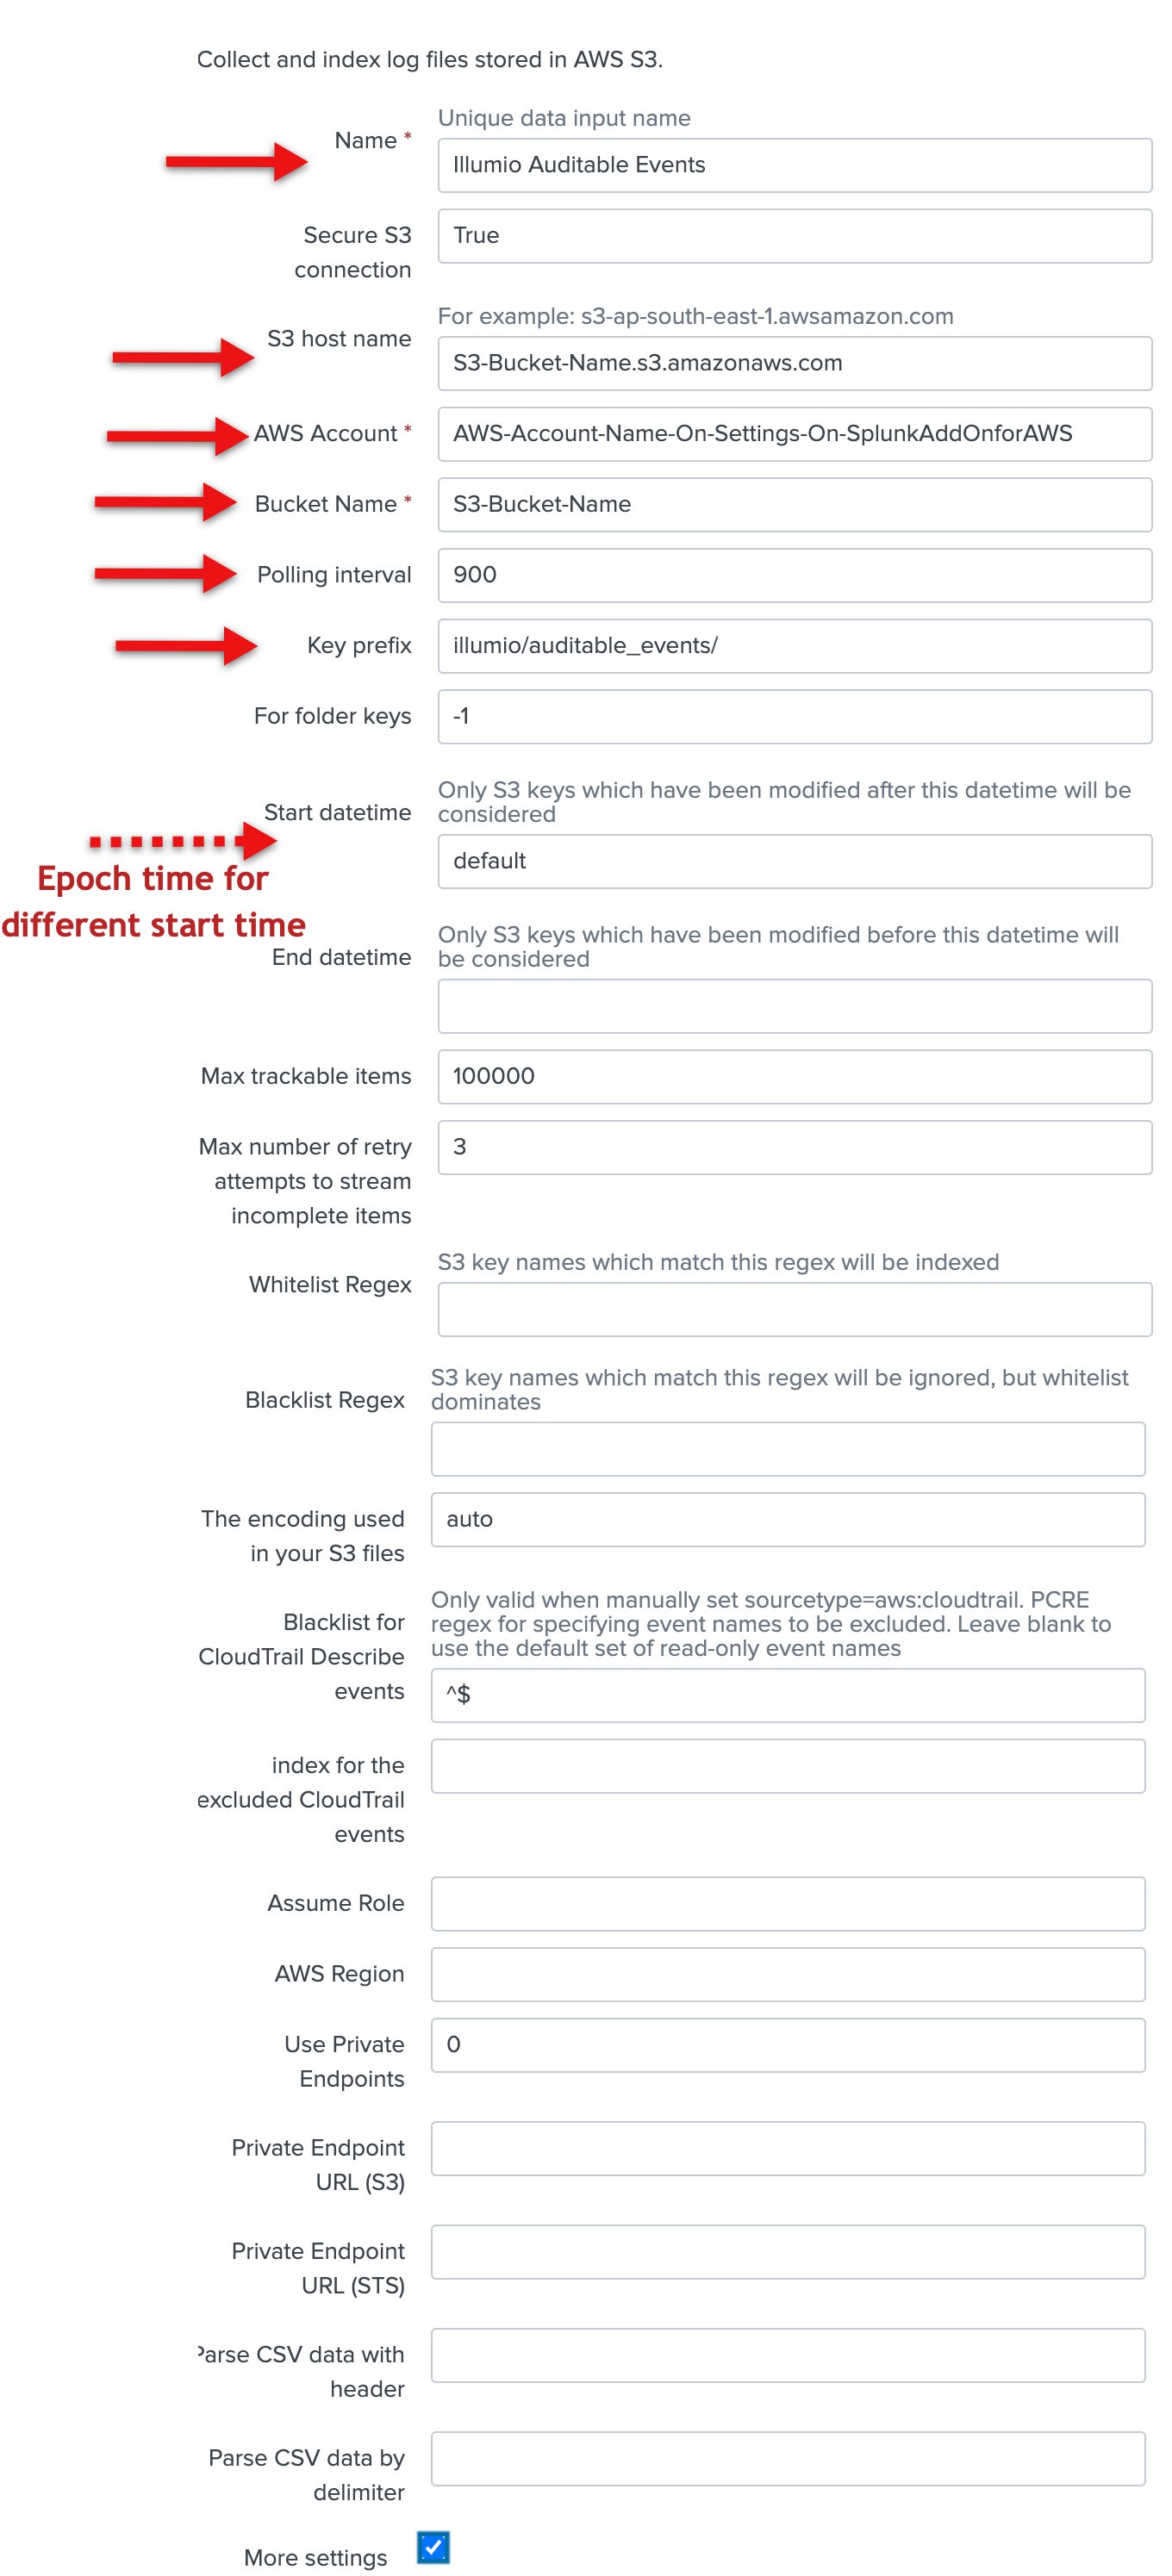
Check the More settings checkbox, and enter illumio:pce in the Source type field. You can accept the default values for the other fields.
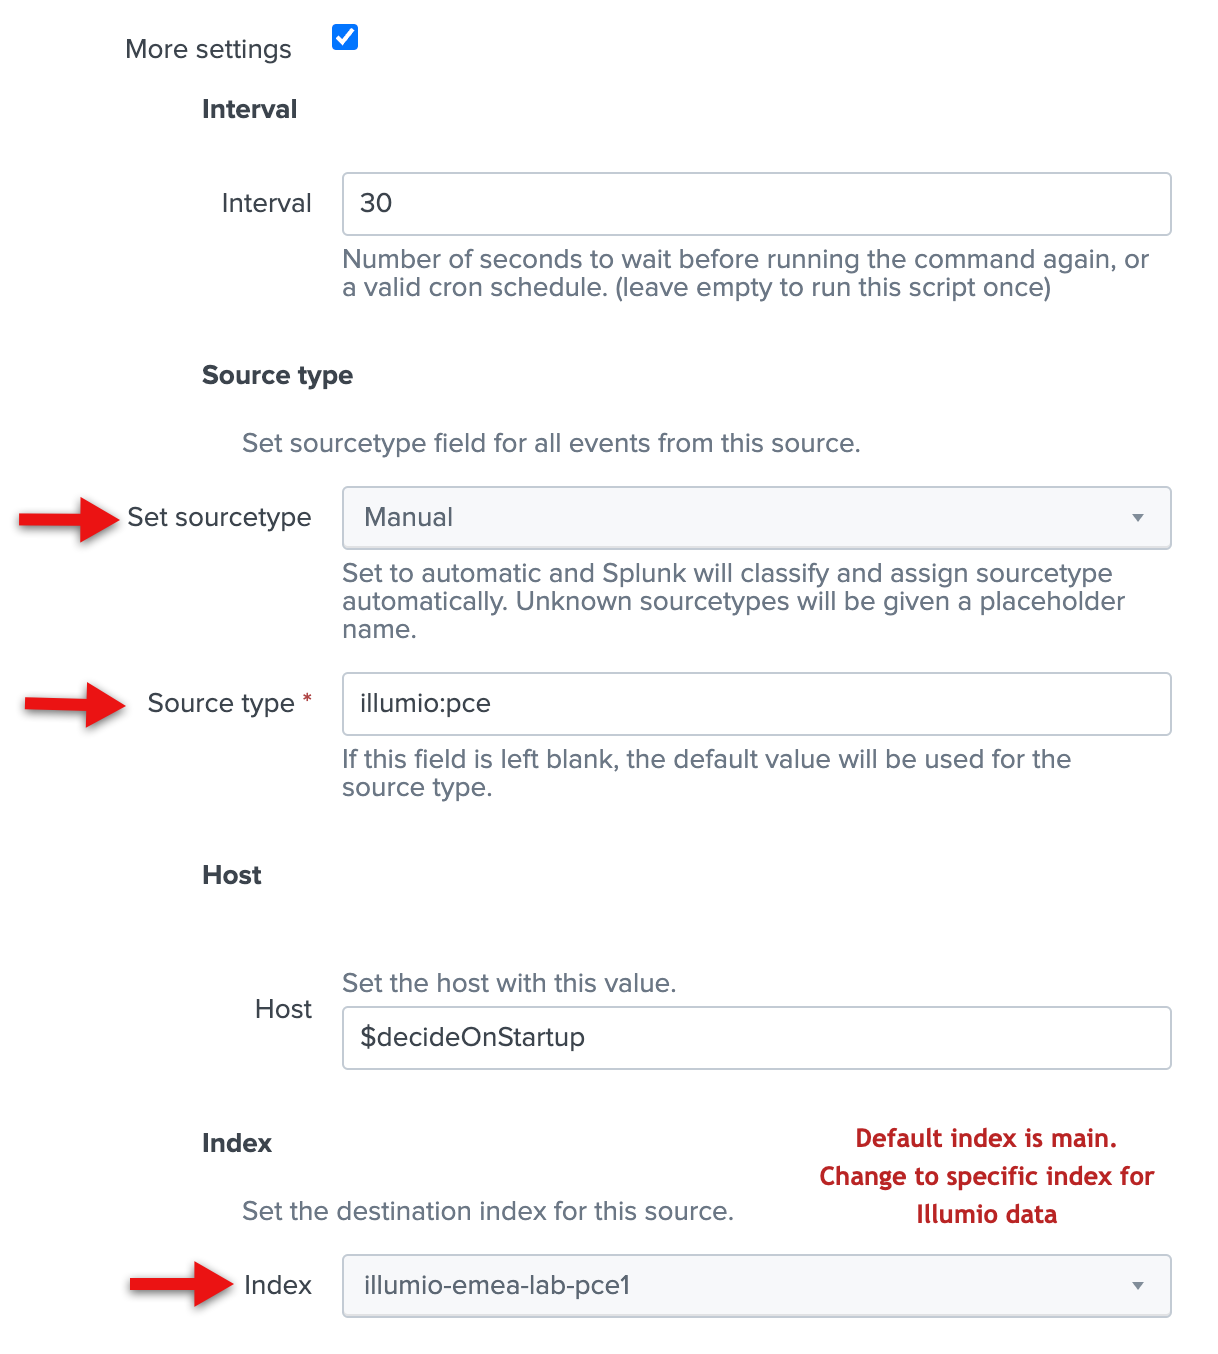
Click Save.
Add the following configuration data for traffic flow summaries:
Enter the name in the Name field.
Enter the account in the AWS Account field.
Enter the S3 bucket name in the Bucket Name field.
Enter the polling interval (900 seconds, optional).
Enter
Illumio/summaries/in the Key prefix field.Check the More settings checkbox, and enter illumio:pce:collector in the Source type field.
You can accept the default values for everything else.
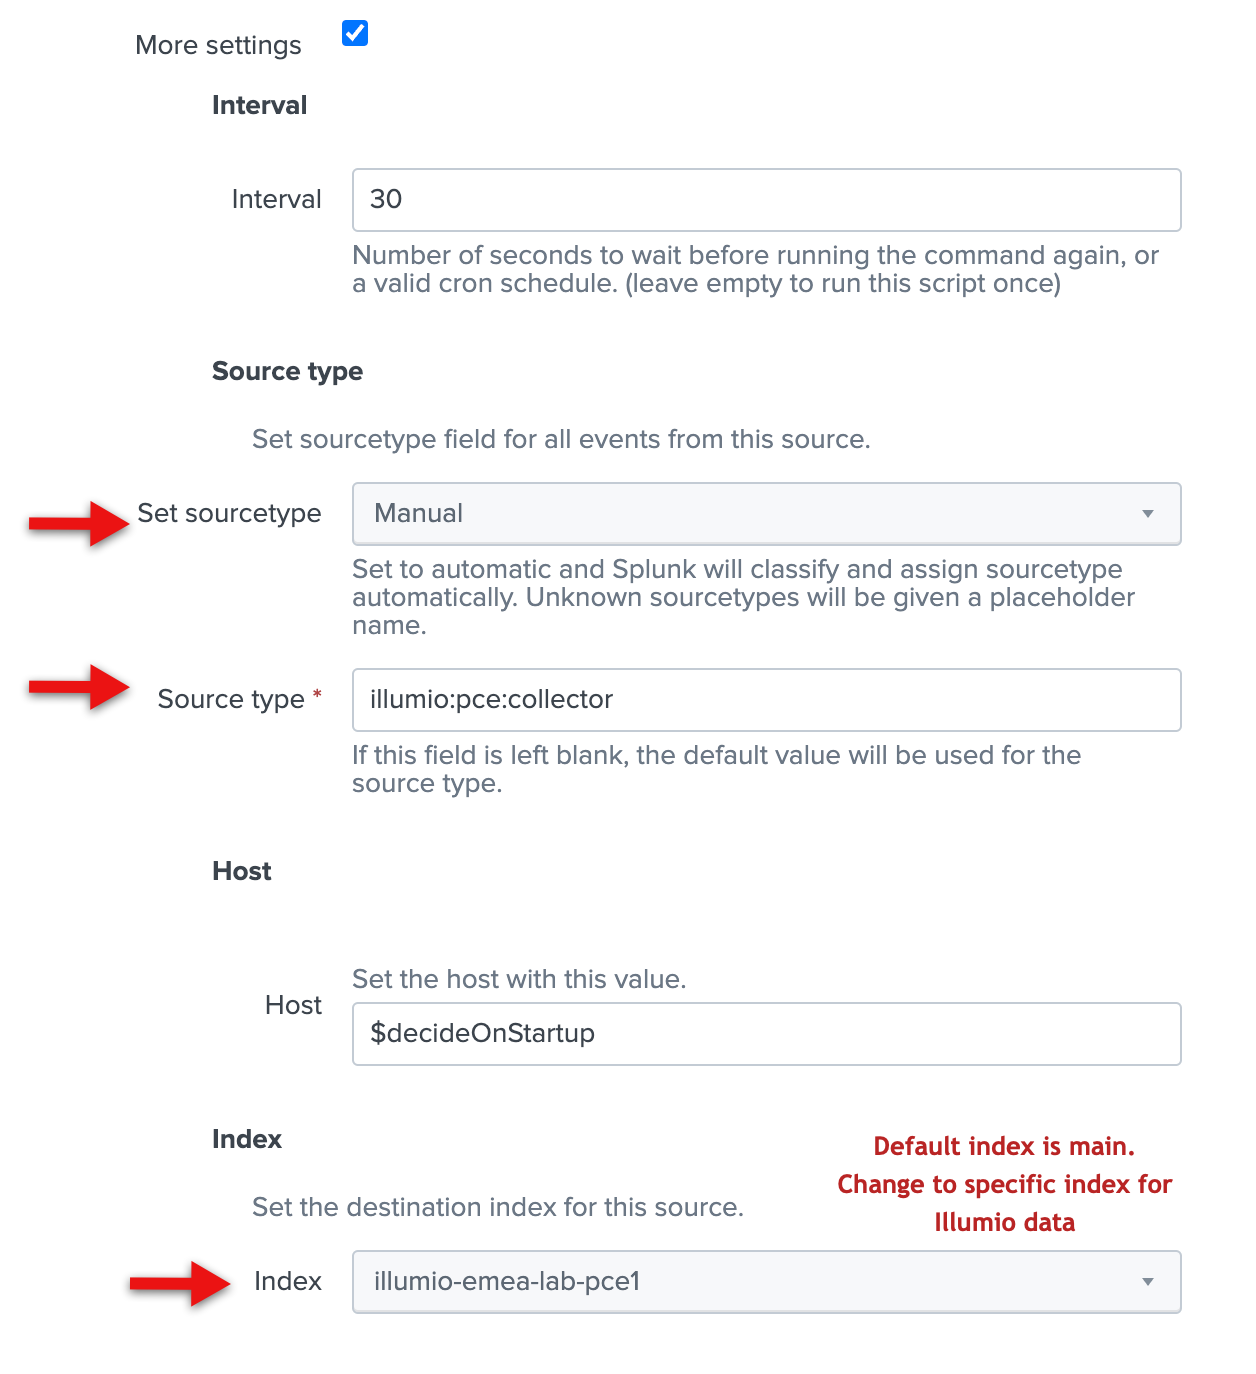
Click Save.
In the Inputs screen, you should see your two new inputs. Click the arrow next to the input name to view details about the input.
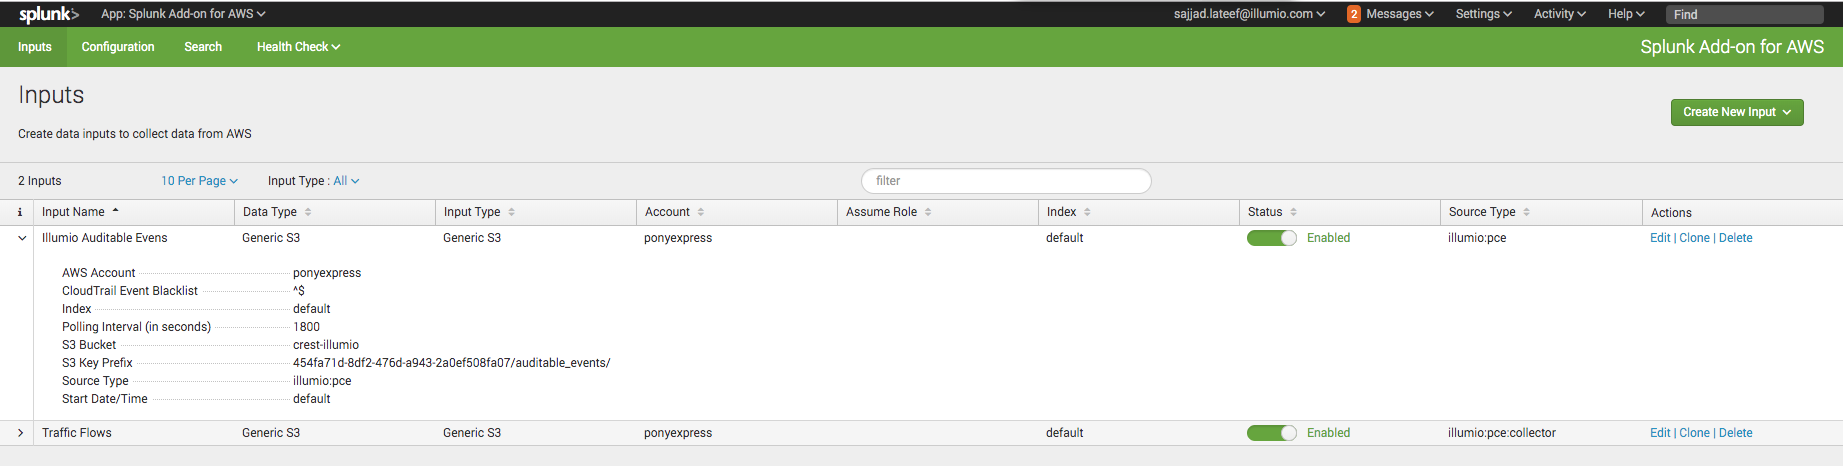
You should also have access to your VEN flow data and auditable event logs. See Example Splunk Queries for examples of how to access the data. Illumio can provide additional Splunk queries if you need them. Contact Illumio Technical Support for assistance.
Speed Up UI Rendering
If most of your searches will cover a time period of 7 days or less, you can make the panels in the app respond more quickly by modifying the summariesonly macro.
Choose Settings > Advanced Search > Search Macros.
Click the
summariesonlymacro.Change the definition of the macro to
"summariesonly=true".
Configure Alerts
If you have administrator privileges on the Illumio App for Splunk, you can create or update alert configurations using the Alert Configuration page. By using alert configurations, you can watch for events that are of interest related to a variety of Illumio PCE entities such as rules and workloads.
To display the Alert Configuration page, click Alert Configuration in the top-level navigation menu. This link only appears if your user account has the admin role.
After creating alert configurations, use the Alerts page to set up the usage of the alerts, such as sending emails whenever an alert is triggered. See the Splunk documentation for details about alert configuration and the Alerts page.
In the Illumio App for Splunk, you can configure five different types of alerts. Choose the desired alert type in the drop-down list on the Alert Configuration screen.
The options in the drop-down are:
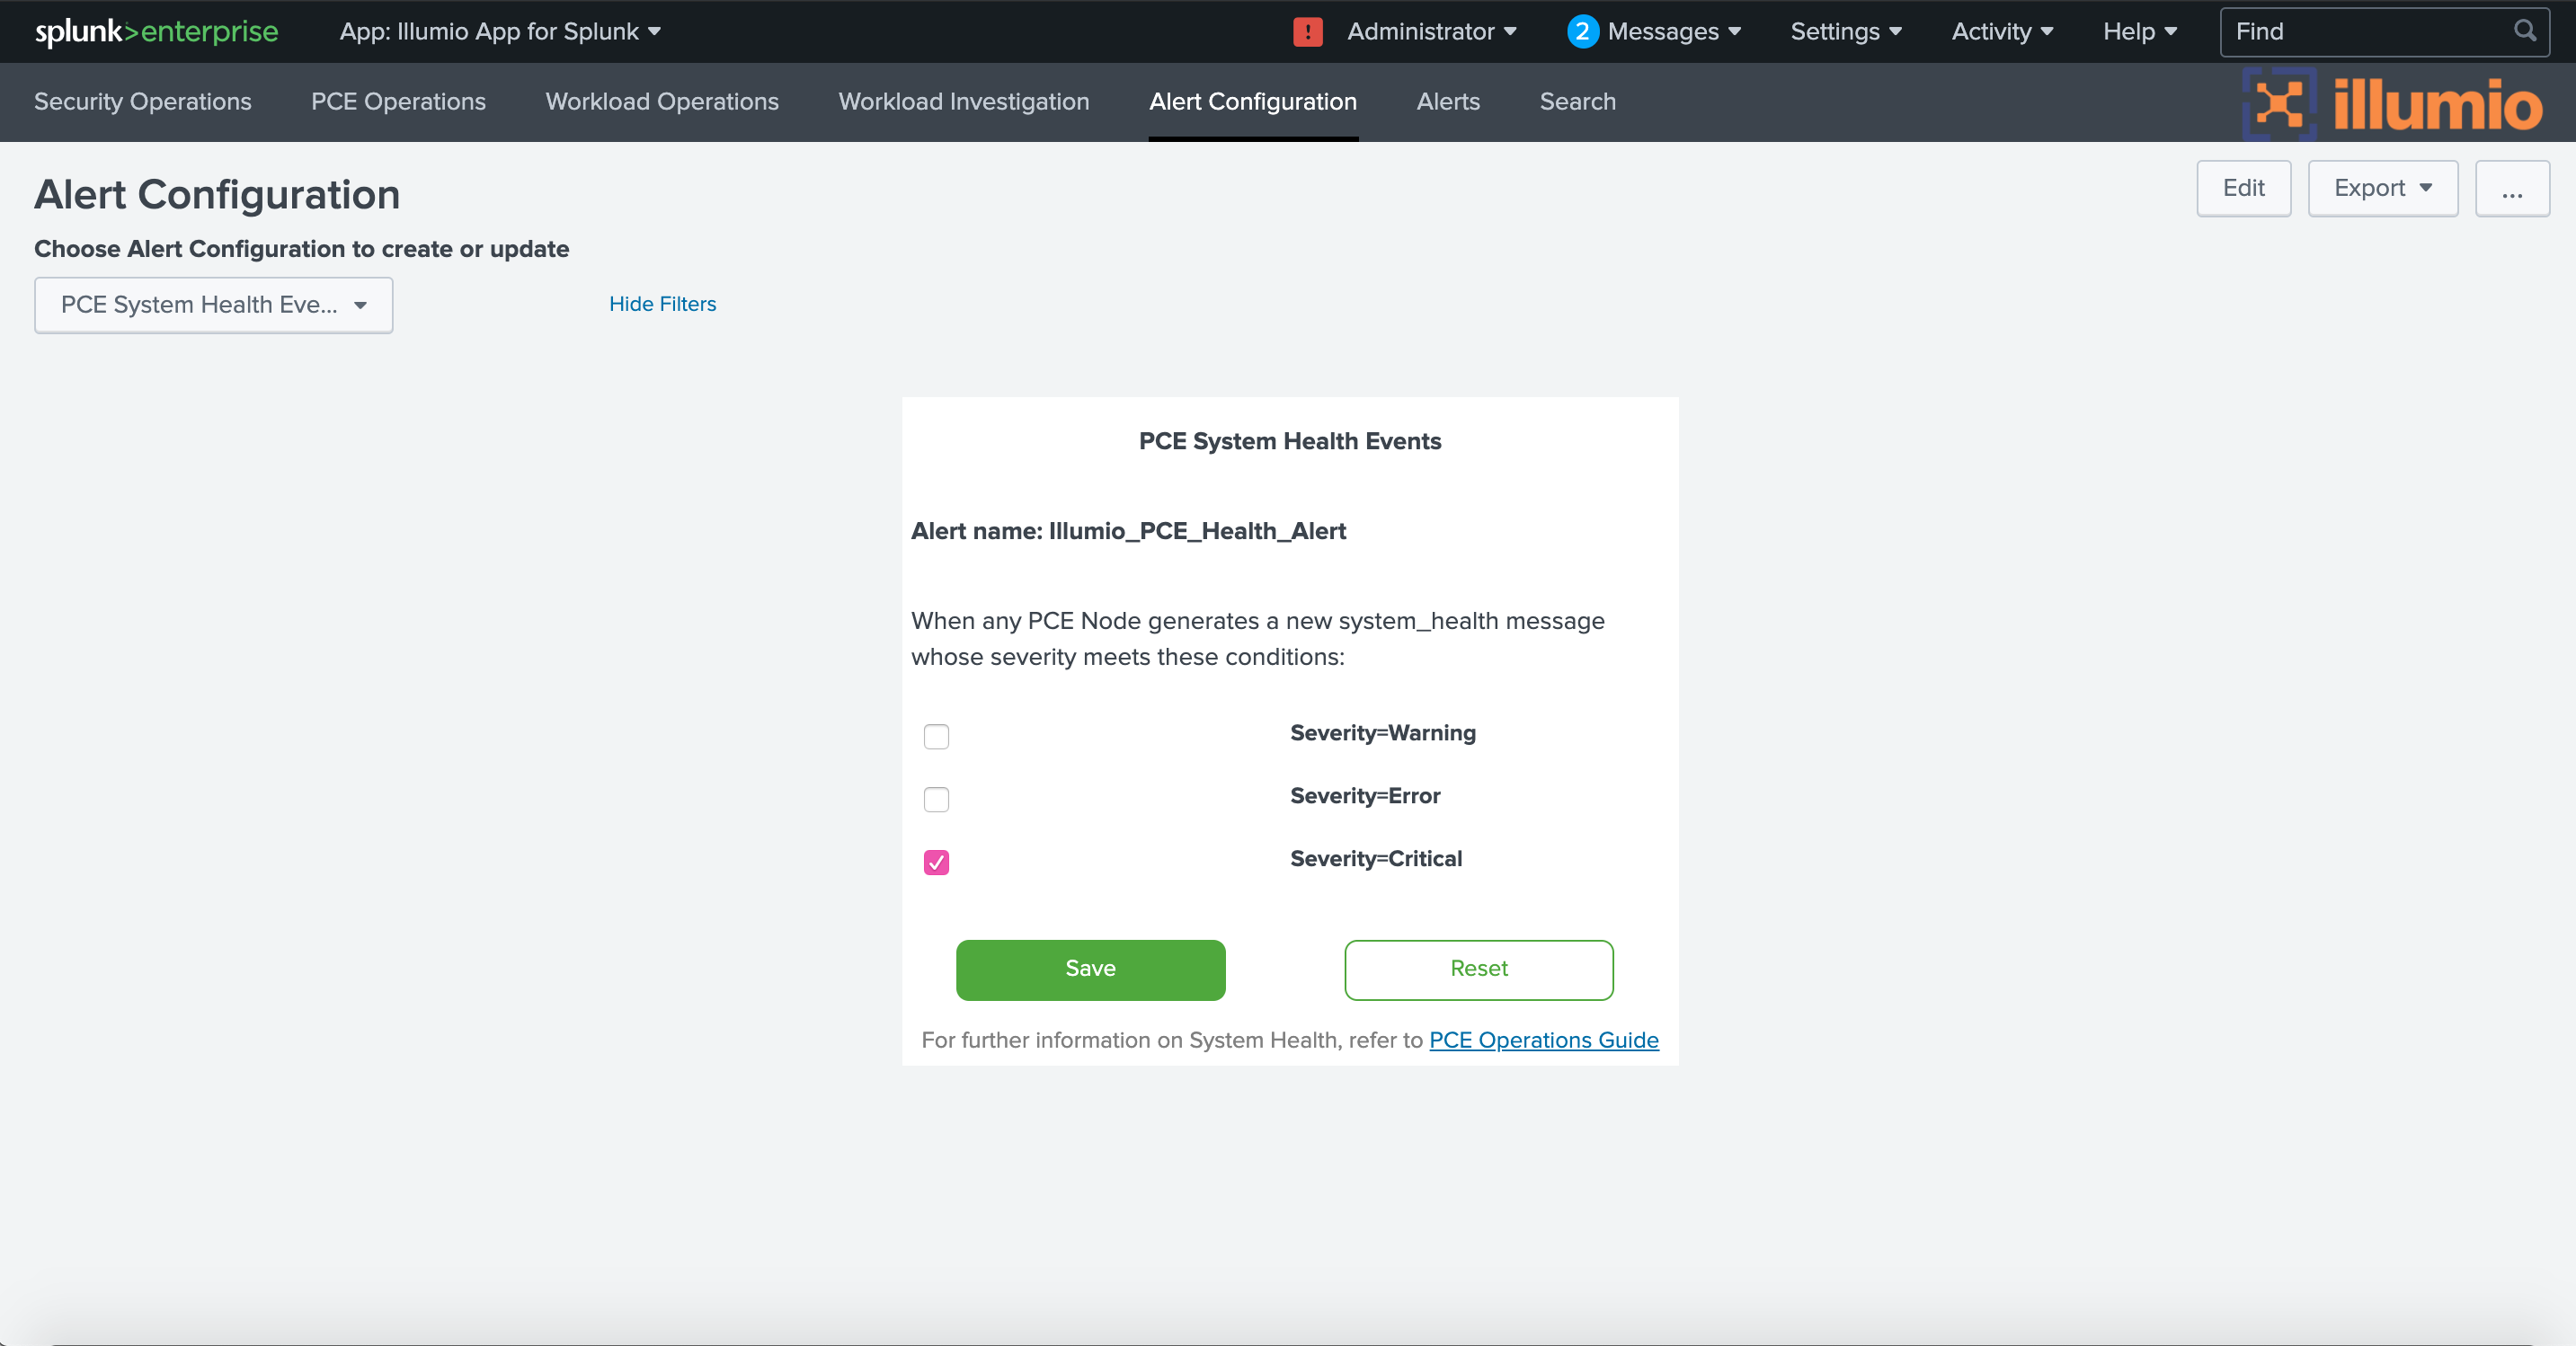
PCE System Health Events
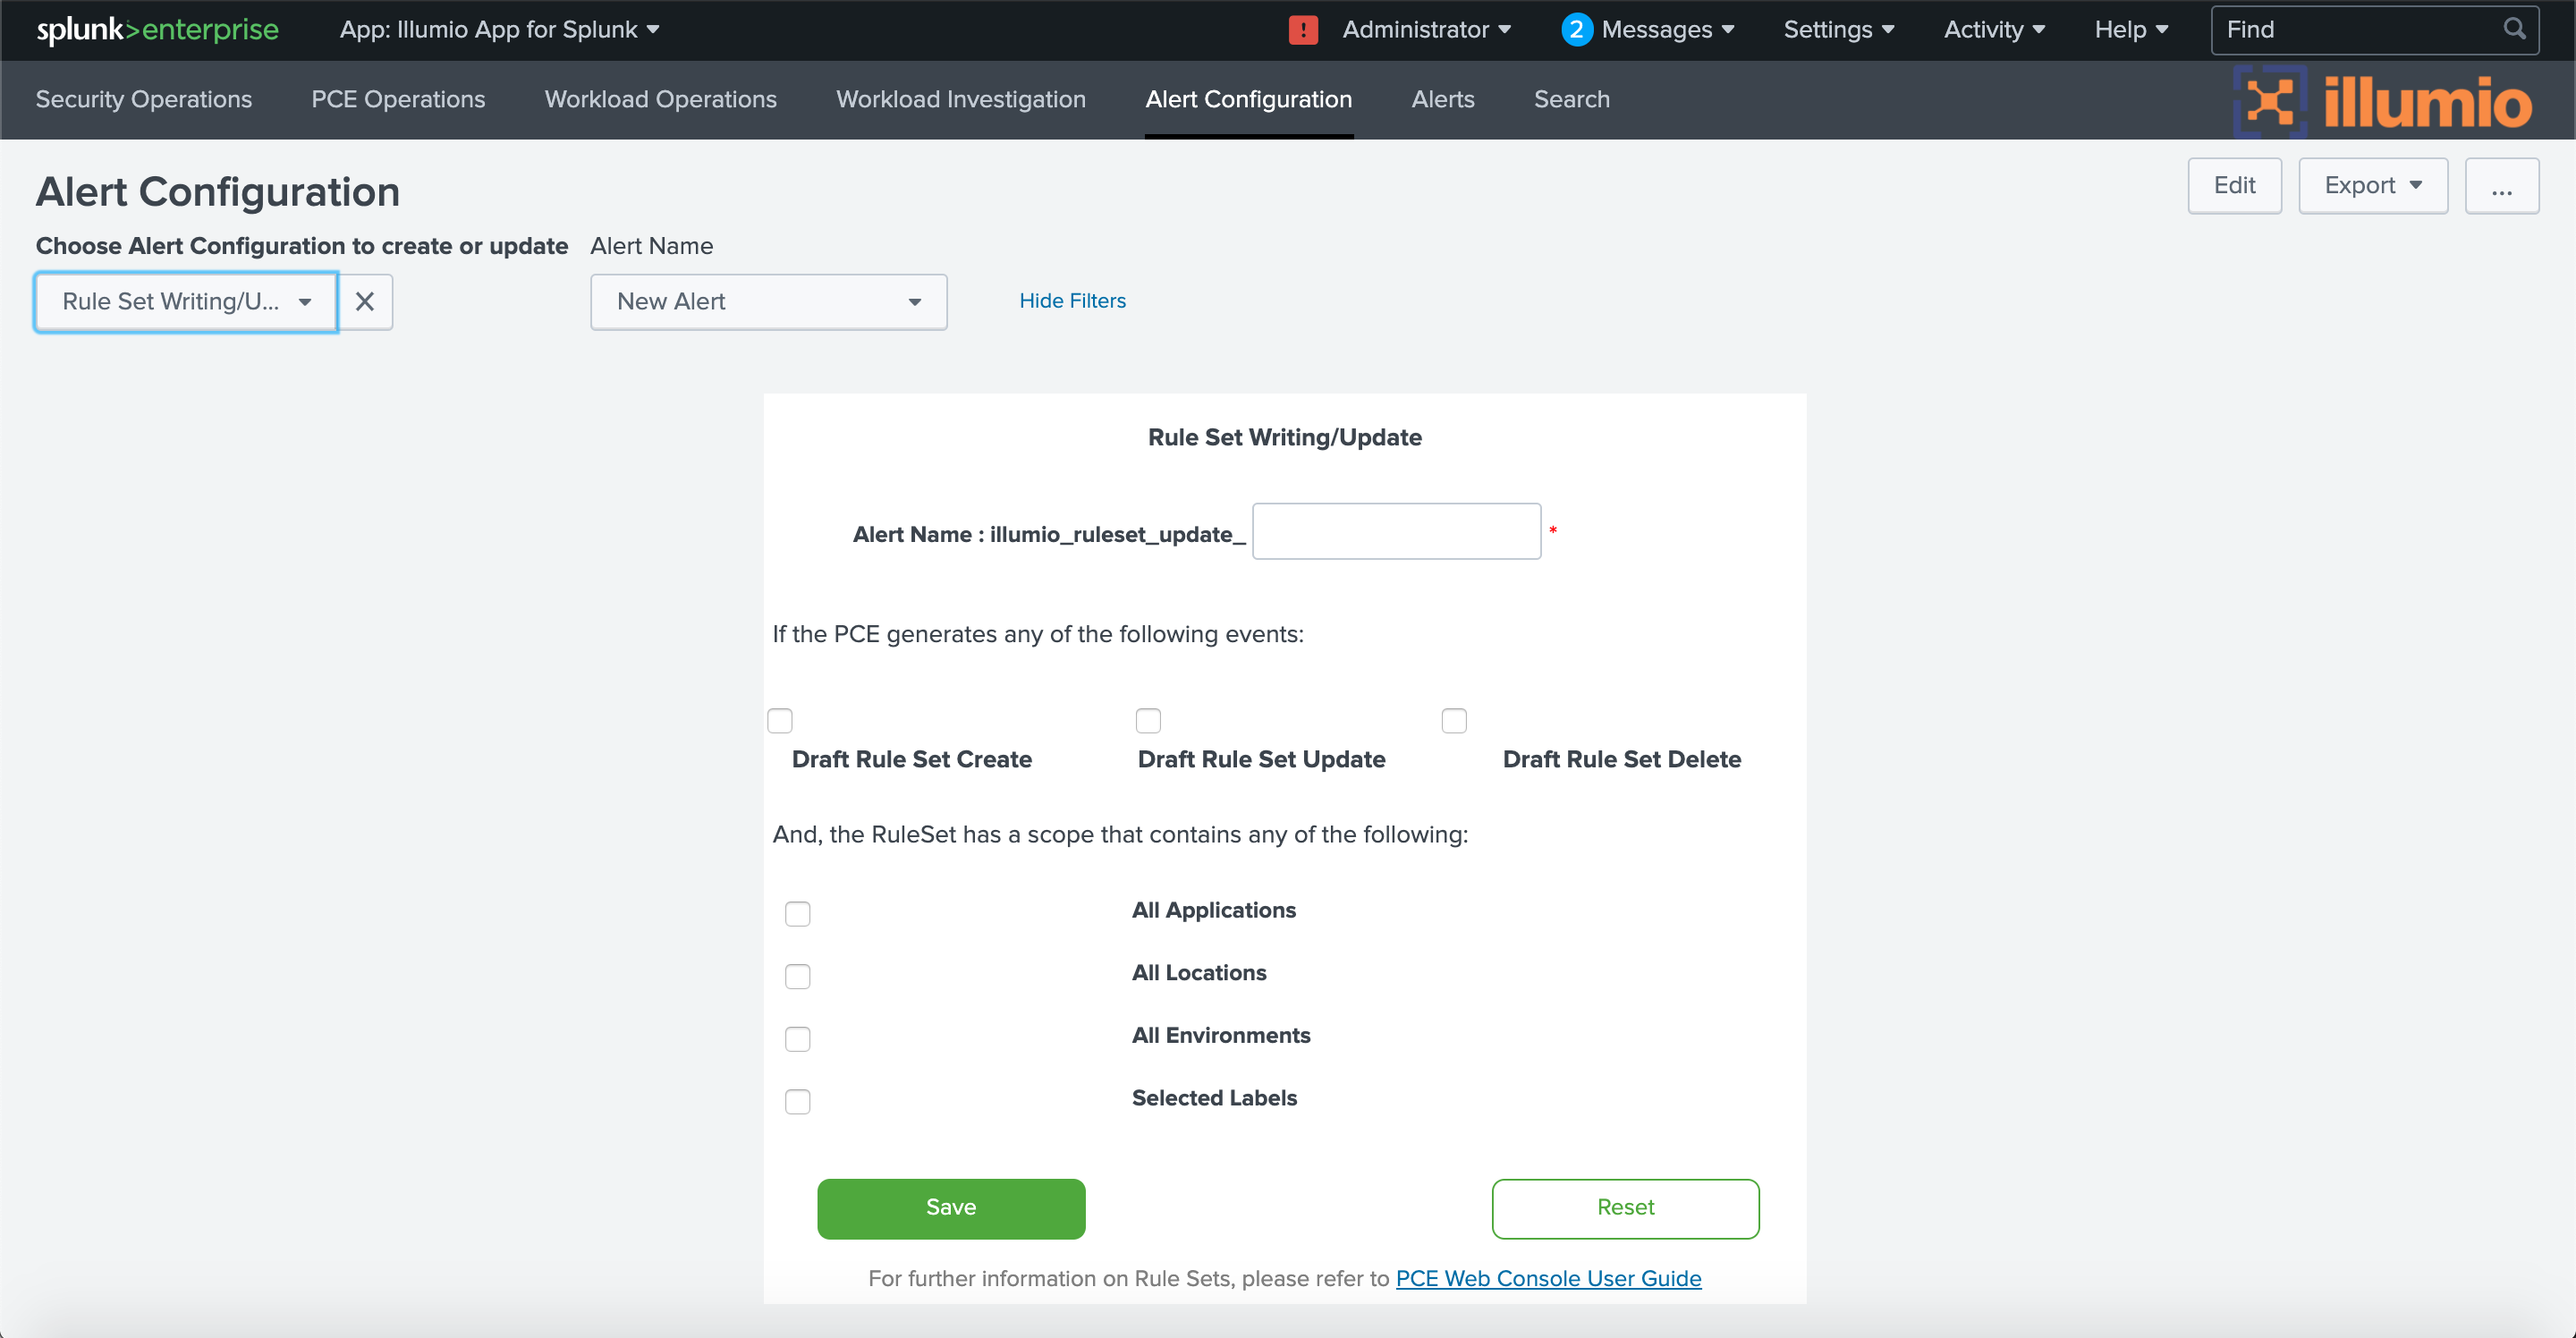
Rule Set Writing/Update
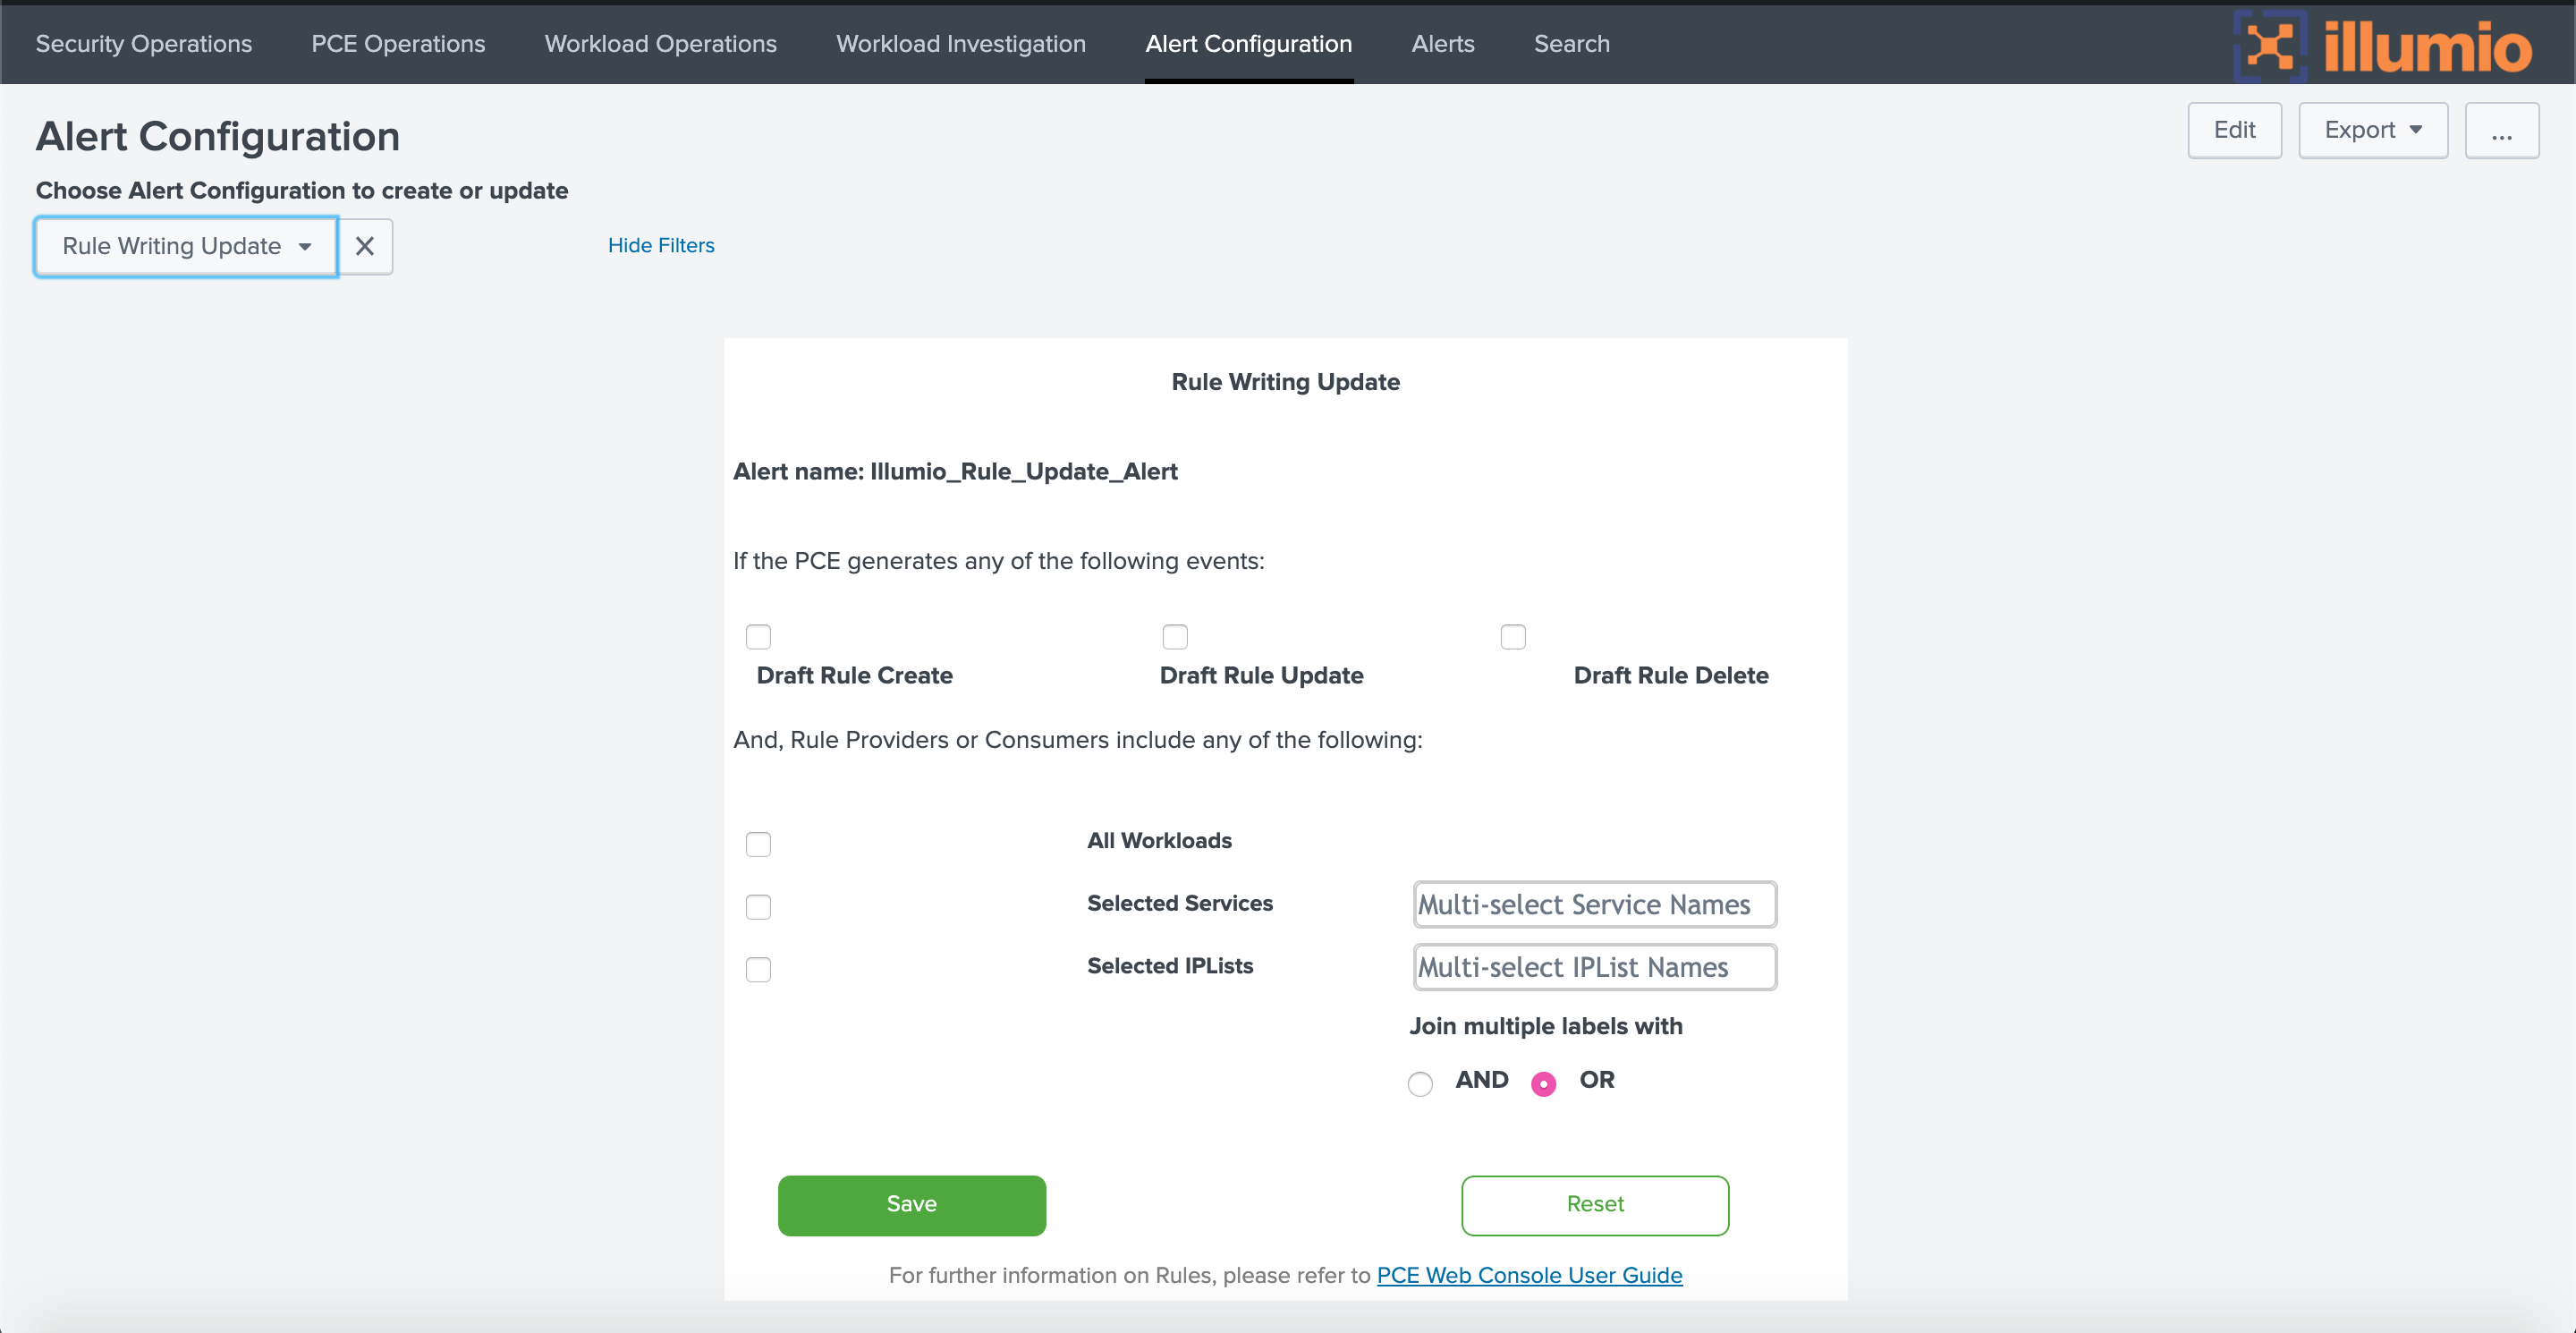
Rule Writing Update
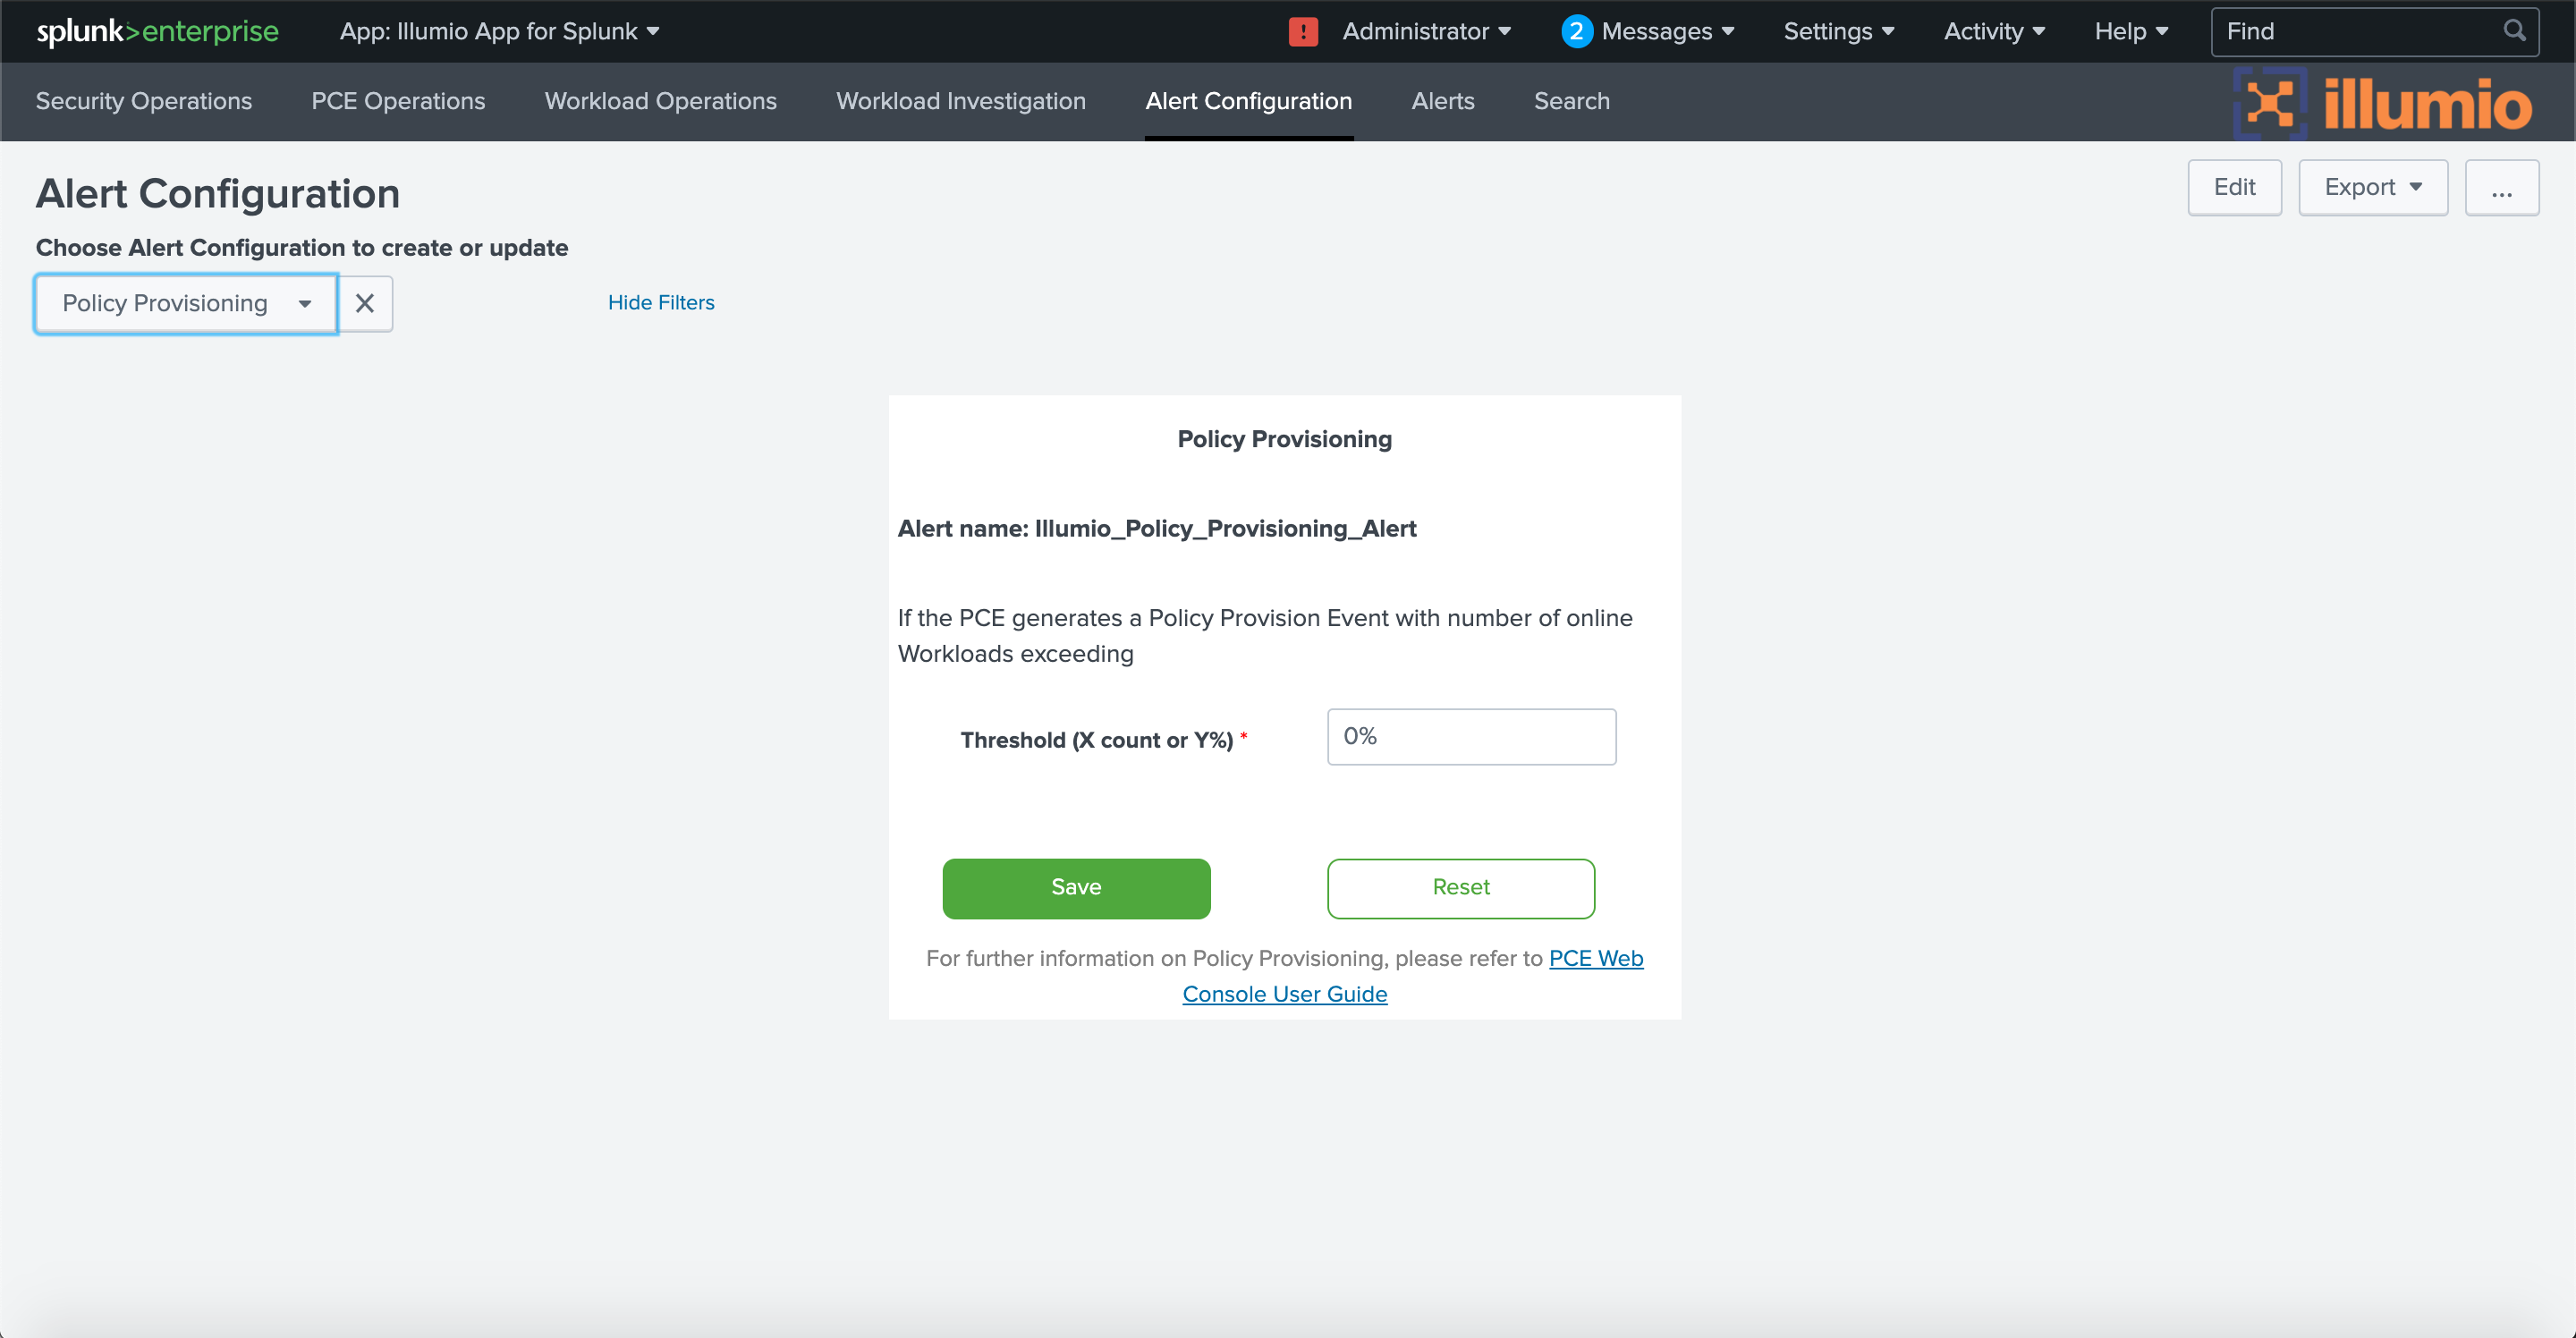
Policy Provisioning
Workload Labeling
To configure alerts about system health events, choose PCE System Health Events from the drop-down, then choose which level of event severity to include (warning, error, or critical). For details on conditions that trigger event severity warnings, see the Monitor PCE Health topic in the PCE Administration Guide. (Download the zip file.)
 |
You can configure alerts about changes to rules on the PCE. For example, a draft rule might be created that affects all workloads. Because this is a very wide-ranging effect, which might have been unintentional, you might want to be alerted so you can confirm the rule is correct.
To configure alerts about changes to draft rules, choose Rule Writing Update in the drop-down, then choose which type of rule change to include (create a new rule, update a rule, or delete a rule, or any combination) and which rule providers or consumers to include (all workloads, or a subset based on service names or IP lists). Choose the AND operator if all the selected rule providers/consumers must be matched. Choose the OR operator to match any one provider/consumer from the selected list.
 |
Similarly to rules, you can configure alerts about changes to draft rulesets on the PCE. For example, a draft ruleset might be created that has a broad scope. When provisioned, the ruleset might affect too many workloads unintentionally. It is useful to be alerted so you can confirm the ruleset’s scope is correct.
To configure alerts about new, changed, or deleted rulesets, choose Rule Set Writing/Update from the drop-down. In the Alert Name drop-down, choose New Alert if you are setting up a new alert, or choose the name of an existing alert if you want to make changes to its configuration. If you are creating a new alert, give it a name in the Alert Name field. Choose which type of ruleset change to include (create new ruleset, update a ruleset, or delete a ruleset) and which ruleset scopes to include (based on applications, locations, environments, or labels).
 |
In PCE 19.1.0 and later, you can configure alerts to be triggered when new policies are provisioned. For example, you might want to know if a new policy is being provisioned to a large number of workloads.
To configure alerts about provisioning of new policies, choose Policy Provisioning from the drop-down, and then set the minimum number of workloads that must receive the provisioning. The number can be specified as an absolute number, such as 100, or a percentage, such as 10% of the workloads. To trigger the alert no matter how many workloads are involved, set the threshold to 0.
 |
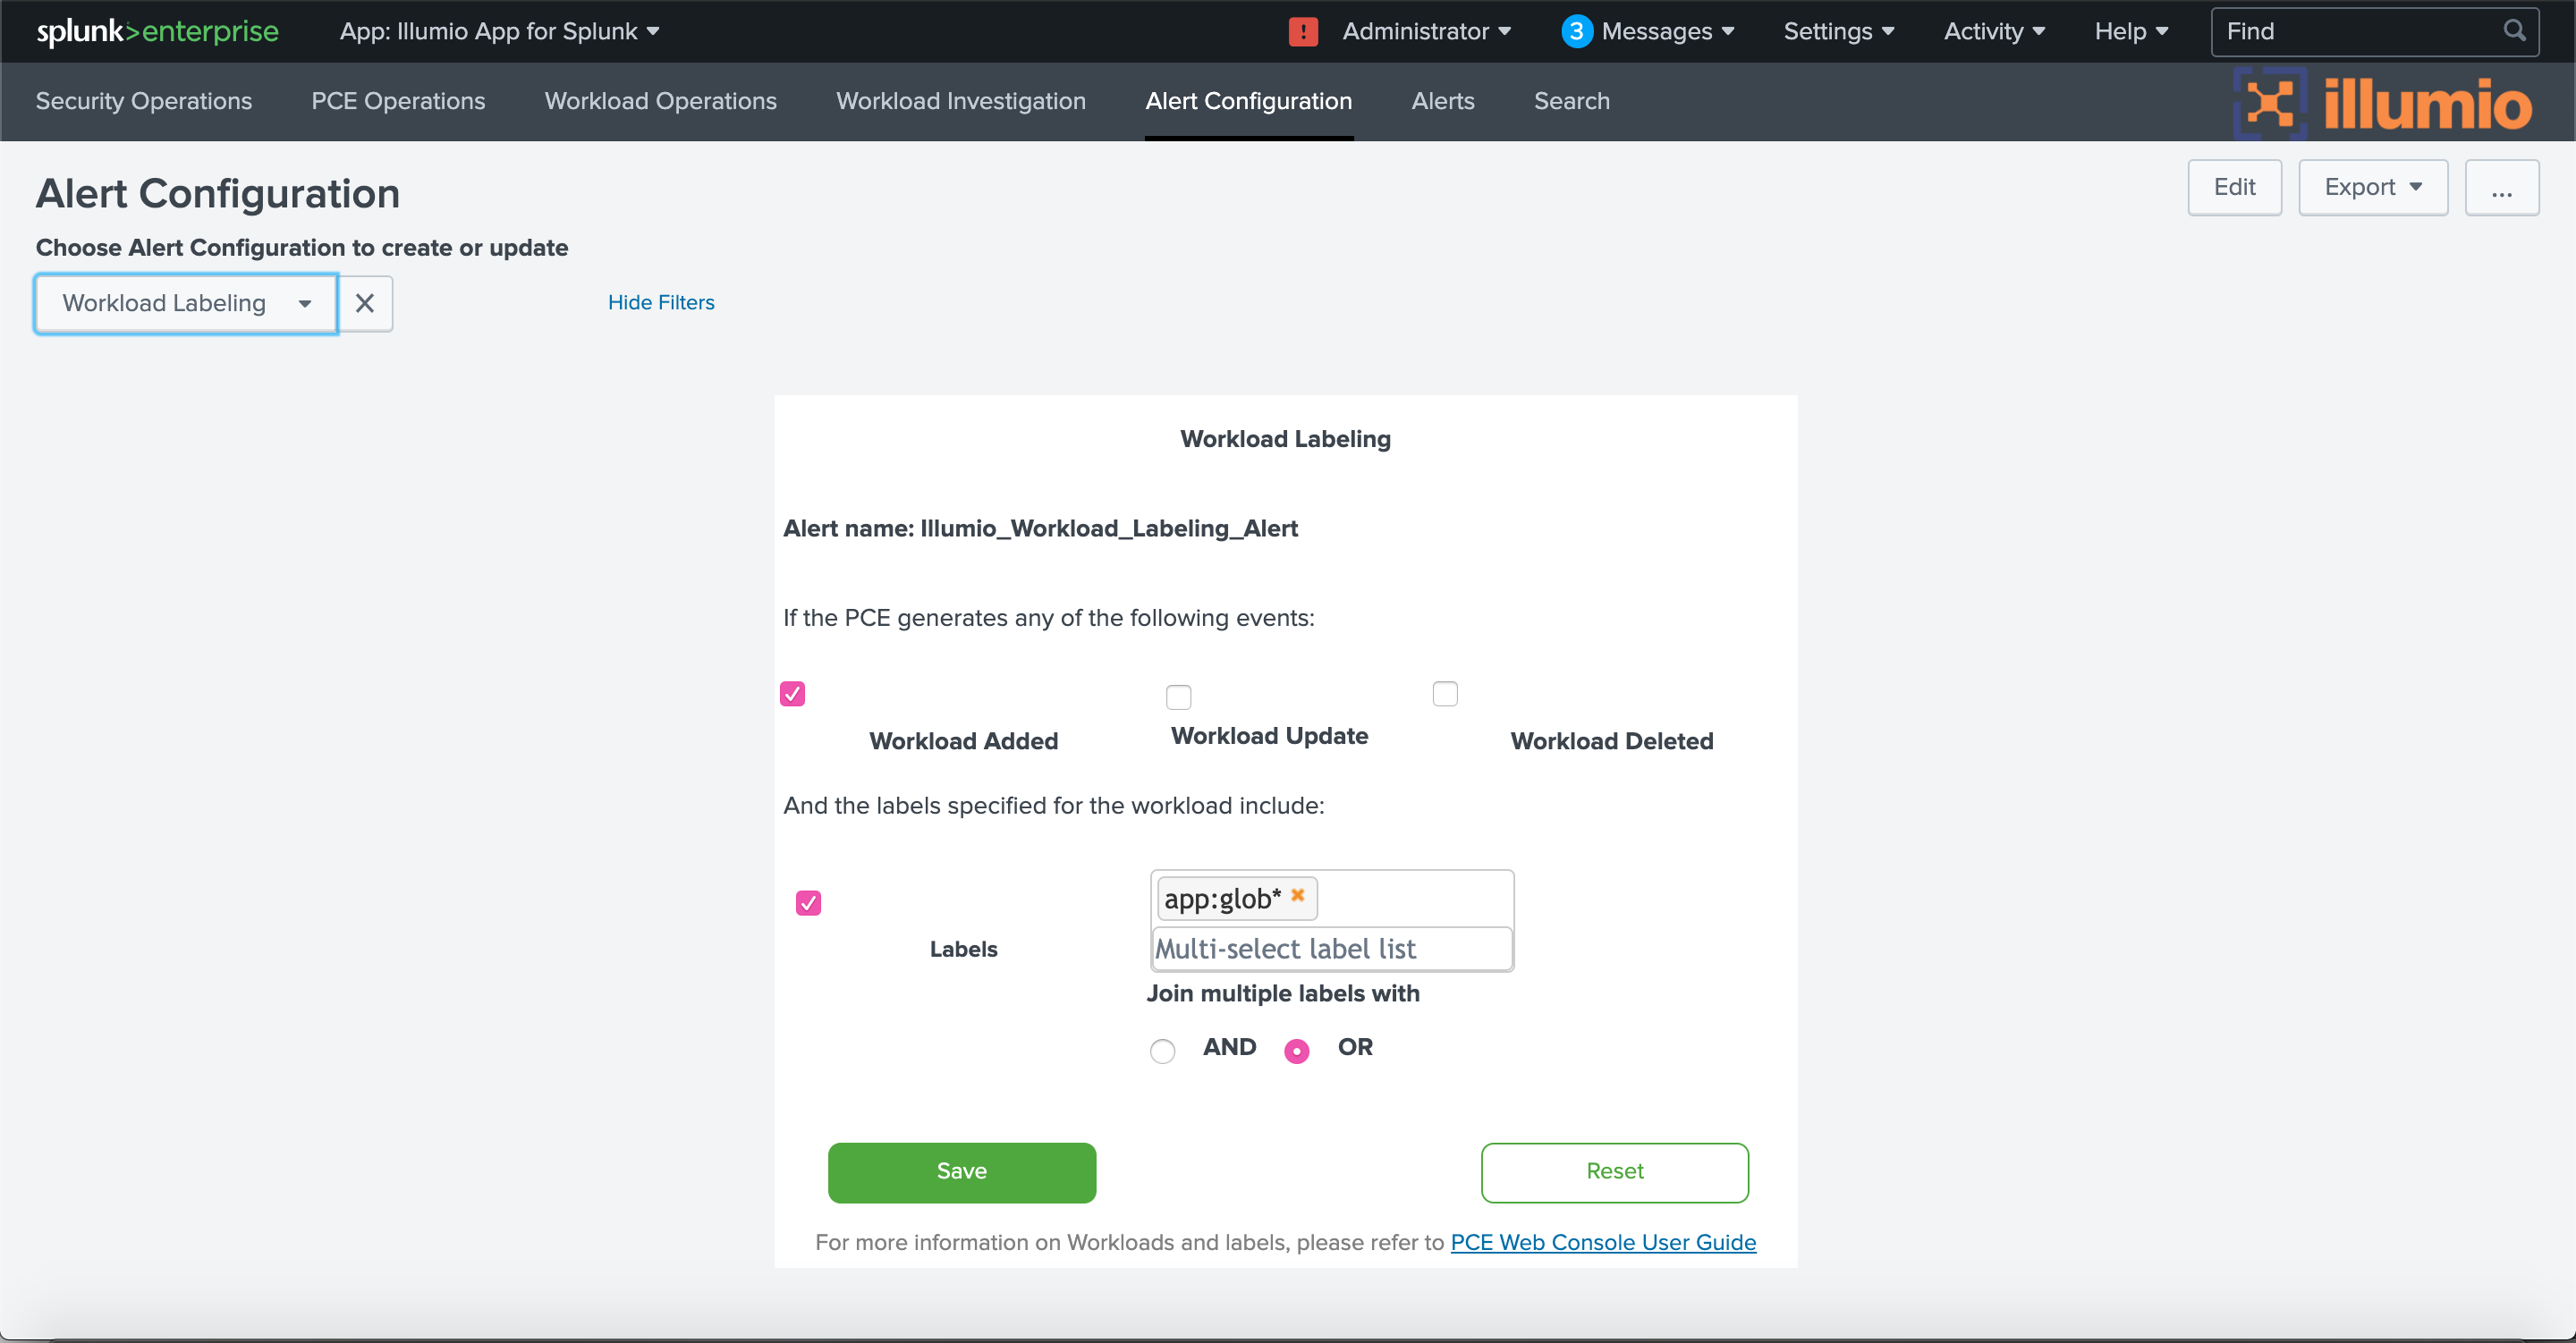
You can configure alerts about changes to workload labels. For example, it might be a reason for concern if a workload label is changed in a way that reduces the workload’s security posture, such as changing from “Production Top Secret” to “Internal Testing.”
To configure alerts about changes to workload labels, choose Workload Labeling from the drop-down, and then choose which type of change to include (add, update, or delete label) and which labels the workload must have. Choose the AND operator if a workload must have all the selected labels. Choose the OR operator to match any one label from the selected list.
 |